Silver Bass

A silver and mixed metal bass guitar earring.

After finishing the Silver Elephant in the pre-final class of the year, I had to think of a quick project that I could do in 1+2.5 hours. Luckily, when I was trying to decide on the elephant, I’d also found a pin of a somewhat abstract bass guitar that really struck my fancy. My mother plays bass guitar and wears earrings so I figured I might try to make a bass guitar earring for funsies.

To make it, I flattened a piece of silver in that first hour and did the shaping and finishing in the final class. The plan was to bend it into shape, then solder the one pointy bit, drill holes for strings and finish it with sanding and polishing. I knew that it wasn’t going to hold the correct amount of strings for a bass, so I just drilled two holes in top and bottom. At home, I found some metal wire, made those strings and attached the earring hook. It turned out pretty well and so far, she’s enjoying it.

Jingles!

A while ago, I was going around the shops in town and found some really nice beads and a bracelet with rings to hang things on. I also found some bells.. So once I got home, I added bells to the bracelet, and three bells to some earring hooks. I also added the beads to earring hooks, so within an hour I had three sets of earrings and a bracelet.

Since I don’t have holes in my ears, the earrings went on to be presents for my mother and a friend. My mother phoned me a while later telling me that the bell-earrings were impossible to wear, since they jingle so close to the ear. The bracelet is much easier to bear since it’s further away. I do enjoy wearing it every now and again.

Woolly Necklace

No, not a woolly jumper yet, although I’m getting there. I am slowly finishing up a green sweater with a side front closure and weird collar. However, in the mean time, I made a few necklaces. I have a colleague who owns a necklace made of a lot of rolled fabric strips in coordinating colours, all in hues of blue. I really liked that idea and when I found some interesting yarn on sale, I figured I’d try to recreate that necklace. This was the yarn and the first part of the necklace.

OLYMPUS DIGITAL CAMERA

I wanted to figure out a way to make the necklace without using any knots in the yarn. So I looked through my stash of jewellery equipment and found some bits that have a hole in the top and fold over to grip whatever you put in. I had about 20 of them. I made the first necklace, the red one and didn’t have enough bits to make another one. So I looked through all the shops I could think of to find bits to make more necklaces. Couldn’t find any, and I didn’t know what those things were called, so ordering them was difficult at first. Using some interesting methods I eventually found out that I was looking for “Fold Over Cord Crimp Beads”, and I got 3 packets of 150 bits in 3 colours.

OLYMPUS DIGITAL CAMERA

To make the necklaces, I put the yarn in the bits, fold over the sides and cut of the yarn that comes out the top. I do this for 8 or so strands and then I string them on a jump ring. Another jump ring is added and the other ends are strung on another jump ring, then the second jump ring with closure are added. This produced, in my opinion, a nice finish. You can also first braid part of the strings or add a metal chain or two. I personally really like the mixed media approach.

OLYMPUS DIGITAL CAMERA OLYMPUS DIGITAL CAMERA

I have made three so far. Of which I only took pictures of two. I sent the third one to a friend, I hope she likes it.

OLYMPUS DIGITAL CAMERA OLYMPUS DIGITAL CAMERA

This one has 5 red stands, one black and a doubled chain, the bits are silver coloured. This one was the first attempt and I really like it. The second one, below, used all the colours, two strands of each, one chain and old copper bits. I twisted this one a bit before I put it on. Which is an alternative method of wearing it.

OLYMPUS DIGITAL CAMERA OLYMPUS DIGITAL CAMERA

So this was my new project. I like it and I have still quite a lot of the yarn left over. This means that I can experiment and make all kinds of things, using this approach. Maybe even add large beads or knot, braid or twist strands. The options are endless!

Ring

I made a ring today! I was looking around the internet and I found the cutest little ring with a rabbit on it here. Sadly it was sold out! Otherwise I might really have bought it (since there are other cute items in the shop but the shipping is expensive so combining might have helped). I decided I could not make a better one, but I could be inspired by it. So I got out my fimo for the first time in a year or so, and made a little rabbit ring.

I made a metal wire base (basically an elongated U shape bent in an almost circle) and formed the paws on that, then I formed the head as a little squashed in bowling pin. The ears were two little ovals with rice grains pressed in and taken out to shape the indent. I just my pinky nail to smooth everything out and put more clay over the bottom of the U to form the back and end. I redid it about 4 times because I wasn’t happy with the results. With this final version I’d done enough and this was going to be it, so I popped it in the oven at 110 degrees C for 30 minutes and out came a cute little rabbit ring.


The original rabbit looks a little desperate because it can’t reach its bottom, in my opinion. Mine doesn’t have eyes so that is less the case and his ears are not as far back. I’m really liking him, although I’m not sure how much use it will get, since I tend to not wear rings. I also found open ended rings like this in cat and mouse shape. Although, I think I like rabbits better.


Also, it’s dark and my pictures are really yellow, but I know me, if I don’t post soon, I don’t post at all, so I hope you’ll excuse that issue.

Jewellery

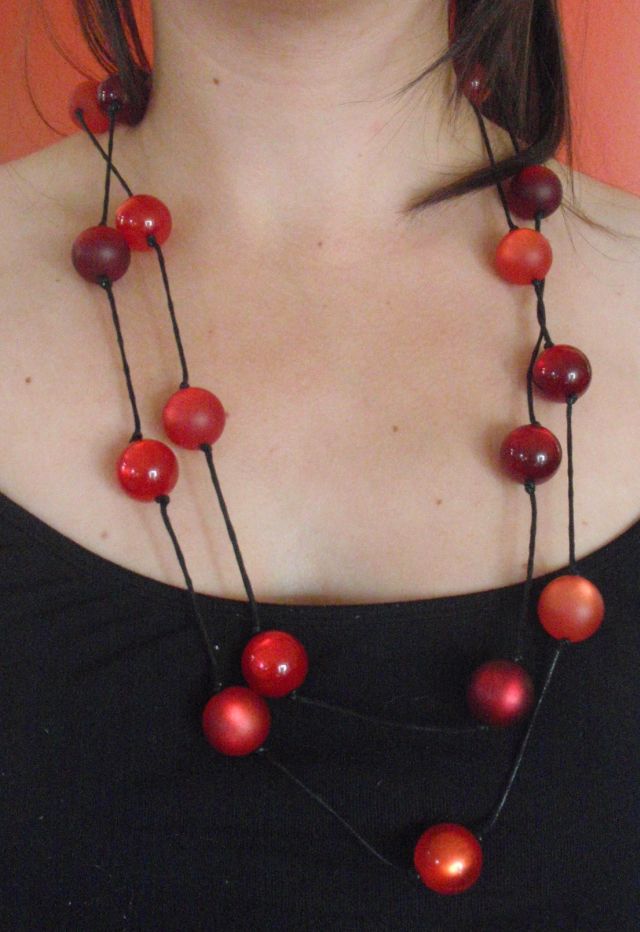
So the visit to town on Wednesday landed me some other goodies too. I’ve been looking for some big red beads since my mother showed me her necklace.

Red

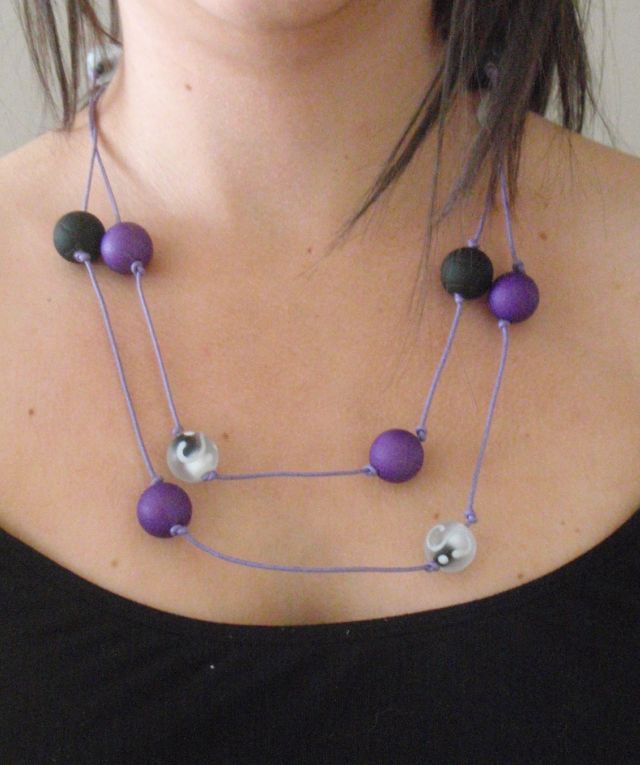
I made the red plaid skirt some time ago and found that wearing a black/grey is turtle neck with it and that necklace looked really nice. So I’ve wanted to make one for myself. I couldn’t really find any nice red (and affordable) beads, so I opted to go with purple. To add some difference I added some black beads and some white swirly ones. I really like the finished look.

Purple Beads

The other bits I made were two earrings for my mother. She wanted some over the top earrings to wear during samba performances. So they needed to be in the samba colours, yellow and blue. However, we found it was difficult to find some in the shop. So when we were in the bead shop, we got two square donuts and two blue beads for in the donuts, to make her some earrings. I had some feathers at home and some other bits and bobs like the hooks and something to secure the feathers with. And within 5 minutes my mom had some over the top samba earrings.

Earring

From Clay to Silver – Part 2

So the next day I came home late after work and we started finishing the piece I was making. This involved a lot of sanding, with minute files, and increasingly finer sandpaper. The idea is that every flaw and crease you get out before firing you don’t have to sand once it is finished. So while I was working on the flower everything went alright. I got it sanded to where I wanted it and that was all fine. But then I got to work on the little stem like bit the rose was going to be attached to. It went fine for quite some time, but eventually I accidentally broke the loop of. However my aunt insisted that we could glue it back on and it would not be too much of a problem. So after sanding both bits and deciding it was good enough we wetted the ends of the break and added a little silver clay from a syringe, and stuck the bits together again. I used a brush to spread the clay as far as possible as to reduce the amount of sanding that was needed. We popped it in the over at 100 degrees so it was well dried before I sanded everything off that needed to go. And then we stuck the flower to the stem bit. Again same method with dampening the bits where I wanted them to stick together and then adding some syringe stuff. It fitted perfectly. Popped it the oven again and then syringed the back to make it one piece for added strength. Sanded and sanded and sanded until I was fed up and we decided it was fine.

Then the exiting bit. Filling the sink with water in preparation. Then we placed a mesh over the cooker hob and turned it on after we put the hanger on it. Turned the lights of and saw it glowing red. Counted down 2 minutes and then put it in the cold water to cool. When we took it out it was white, but my aunt grabbed a little steel brush and made me brush.. and from underneath the white came very shiny silver!

I was so incredibly surprised and happy, I couldn’t sleep for another hour after I finished sanding it and using an agate to make it shine even more. I’m so happy with it.

I hope you like it as much as I do! I’d like to hear of your adventures with silver clay, some day!

Finished Silver Hanger
Finished Silver Hanger!

From Clay to Silver – Part 1

My aunt is visiting us this week, she’s come by boat from England and is staying with us until tomorrow night. Last week she asked me if I would like it if she brought her silver clay with her. Silver clay is a strange substance made of 92 (I think) percent silver, some water and some binder. So it looks and feels like clay but is ridiculously expensive. Anyway so she came along and brought some here so we could play with it.

So first we had to decide what we were going to make, I got my little bag of jewellery stuff and started looking at the things I liked. Eventually after looking at my stuff and liking the following three (the two right ones are the same but front and back). I selected the most right one to try and see if I could make something similar and then we started playing with fimo.

Hand Flower Front Side Back Side

I have a big box of fimo and I’ve done quite a lot of things with fimo before, so I started playing with making roses. Eventually I settled on a rose design with a sort of loop around it, like a rose in the middle of the hanger to the right. Once we unpacked the silver clay, I found out that it is really sticky but also dries out extremely quickly. In the end I tried wrapping cling film around my fingers and that sort of worked. The first attempts at the rose were not so good, my usual technique of squishing bits flat into petal shapes failed miserably because of the stickiness. So in the end we decided to do a long petal in the middle and once I had that I added three petals to the sides. So now I had a rose. (Saying it like this makes it sound very easy but sometimes it was tough)

So then we attempted the snakelike thing around it, but the clay dried out so we couldn’t make the loop at the top, so we tried again, and again eventually it worked and we were very relieved, they even fit together nicely in the end. Well that was the first night. We needed another night to sand it, stick it together, ‘glue’ it and sand some more.

But that is a story for another day (say tomorrow if I remember writing it). I think I’m liking this new craft!