Practical Tray Conversion

Sometimes you’ve got to make some more storage possible.

I’ve been storing spools of thread in a little cardboard box for the last while now. It wasn’t very practical since I couldn’t easily see which colours I had and it just didn’t look very good. So I set out to create a thread rack. I wasn’t really sure how to do it but I figured the Action might be helpful in supplying a base. I found a nice wooden tray and decided that that would do. After that, I went to the hardware store and got three one-meter thin rods to use as the actual spool holders.

At home, the tray was measured and the rod locations were marked before getting out the drill. I made the mistake of drilling from the back which did leave some rather large splinters out on the front, but after pulling those off, I decided it was good enough. The rods were sawn into 7 cm bits and then glued into the tray. Sanded the back, stuck some more rods in the bottom to keep it up and angled and called it a day!

The new rule is that if the rack is full, it needs to be sorted and some less used thread needs to be put back into the organizers upstairs. All in all, I was very happy with this project that was finished quickly, easily and will be helpful in the long run!

Three-Piece Suit (part 0.5 – Failed Jacket)

So, for some reason I really wanted to have a three-piece suit. I’m not sure why, but I decided that this was a thing that needed to happen. So I started leafing through the pattern magazines and eventually settled on Burda 5/2009 jacket 102 A.

I’d found the last 4 meters of a bolt of grey stuff with a white running stitch at the front and dot-pattern at the back. I hoped that I would be able to make a three-piece suit out of it. So a jacket, a vest and pants. I cut out the jacket in a table cloth and fit it. I needed to take three cm out of the length above the waist, so I had some fun with paper, scissors and a pencil. I also wanted to have one button at the front, so I took the front in a little. I sewed it all up in the new fabric and it fit well. Then I added the lining and everything went wonky.

The lining was too short, so I tried all kinds of fixes apart from cutting out a longer lining. So I chucked it in the corner and started on the vest. After finishing the vest, it turned out that the vest peeped out from underneath the jacket, sneak peek in the picture. Queue plan B! Ripping out the center front pieces and re-drawing the pattern. Update on that in the future.

Attempt at a Blanket

Quite a long time ago, I wanted to knit a blanked with different coloured yarn squares. I bought eight different colours and white and started knitting the white border. Then I started squares bordered by white. It was horrendous to knit..

It took forever to get as far as I got and I just gave up.

I stopped and started numerous times, but it didn’t really work, I wasn’t into it enough. So eventually, I knit a white border and started trying to get rid of all the yarn ends, there were two ends per colour and two ends for all white separators. It again, took forever to weave in all the ends.

Scarflet Scarflet

This is the result! I do think that it looks nice, but there is just too much work involved to continue to create a full blanket. For now, I might add some buttons and create a little scarflet or something out of it. Or maybe just decorative trim on my chair? Any other bright ideas?

Backpack (intermediate 3)

After almost finishing the outside of the backpack, I decided to work a little more on the inside of the backpack. I had made the lining first, but found out that it didn’t really fit that well inside so I had to redo some bits.

The lining started out like this: all pockets and a flat bit of fabric. Some markings are present from my first attempt at creating the shape. I did the exact same thing, but made it a little smaller. I forgot to take turn of the cloth into account.

Flat lining

After re-measuring and re-sewing the lining I had a square bag. I reinforced the bottom such that it would hopefully stand up straight. You can see how it looks from the inside on the right.

Lining Inside lining

While having the lining almost ready was great, I couldn’t actually put it in yet. I still needed to add the closing loop to the outside of the backpack, and maybe some more pockets. I would like to have that nicely finished and then drop the lining in, so it’s invisible from the inside. So onto the pocket making!


Backpack (intermediate 2)

I’ve been diligently working on the backpack for a while now. Before starting the embroidery (results here) I managed to close the straps, by attaching the front to the back with an overcast stitch, where I attempted to keep the stitches straight and not angled. After finishing the embroidery I overcast the flap pieces together. Before starting the embroidery I had already made a welt type hole in the front for the closure that I am going to make (I just found out I made it in the wrong direction, not very clever of me, but this way will probably work too). So now I have straps and a flap. If you look closely you can see the stitches.

Backpack back Backpack strap

The straps are connected to the bottom with ribbon. Therefore, they can be tied and retied if the backpack needs to be adjusted. I don’t know yet if this will actually work, but hopefully I’ll see during the April 11-13 road test. Below you see the backpack with the straps attached.

Backpack straps

The straps were based of a backpack that I really like the straps of. So I just copied them and cut them out in the skai leather. Then I cut them in something resembling fake suede. The fake suede was stitched (by machine) right sides together to a piece of flannel and a bit of batting was put inside such that the straps would be comfortable. It was then turned inside out and overcast to the skai bits. I think it turned out quite well.

Now on the the last couple of steps.

Backpack (intermediate 1)

I’ve been working on my backpack since I previously mentioned it (here). I sadly did not finish it by the time I wanted to use it for a Larp special, which was the 15th of March. However, during that special something happened that made me rethink the pack a little, more on that later. The day of and on the way to the special I had been working furiously on the bag. I managed to get the straps on, although the fronts were not sewn to the backs yet. I added the flap in its two parts (front and back). I sort of sewed the lining in. It clearly was not finished yet.

During the special, I found out that they wanted me to become a priest (I did not want that, but they made me anyway). So I figured I’ll embroider a raven (the symbol of the god I was to be a priest of) on the flap. Luckily I had not yet closed the front and back of the flap, so I could easily embroider something on the back. I did a quick Google search, found a magnificent picture and decided that this was so much for personal use that I could use it. On the left you see the original, click it for the link to the source. On the right is my embroidery.

raven_eyes_by_sauceoftheboot-d4lgnq7OLYMPUS DIGITAL CAMERA

Sometime before starting this piece I read a blog post about filling in embroidery using long and short stitches (here), to be able to create directional embroidery. It’s not as clear but I know I’ve used it and I think it works a lot better than stitching willy nilly, which I used to do before.

So on with the rest of the bag. I’m getting there!! The new deadline is the 11th of April. I hope I’ll manage.

Backpack beginnings

As you might now, I wander around a larp field sometimes in a skirt with a lot of pockets (here). Since I also stuff those pockets, at the end of an event my hips are usually not very happy with me. The skirt is heavy and difficult to manoeuver in. So I figured I’d make myself a larp backpack, ages ago. I started well, creating a pinterest board with inspiration for a backpack. Some of the pins are shown below. (Click the picture for the link.)

Backpack

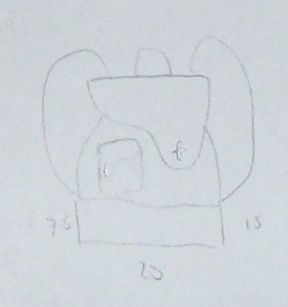
That’s were my plans ended. However, Friday, after I had a meeting with my orthodontist (I hate my teeth), my plans were put back in motion. This is because I went to the thrift store where I found some nice blueish/blackish fake leather and strong light linnenish fabric. I spent the night drawing my new backpack, which will be a combination between the top left pin, the top right pin and the bottom right pin. See the design below (with the ‘pattern’ sketched out to scale). It’s a bit vague, but the light here is crap and the drawing is little. It might not end up like the sketch though, we’ll see.

Backpack Plans

Now the reason  I wanted the backpack was to be able to not overfill the pockets on my skirt. However, I figured that if I would just dump everything into the backpack, I’d never find anything again. Since I do this in real life, I have experienced searching through backpacks, but it’s not very practical, to say the least. So the light fabric was to be the lining of the pack, with a multitude of pockets again. Strips of were added to make pockets with a fold, so that they could be opened up to hold vials and such without distorting the lining shape. Other pockets were flat. I will add some more to the side that’s only got the one line of vial holders.

Lining

Well that’s where I’ve ended now. I’m planning to have it finished by Saturday but the real deadline for it is somewhere in May, so I’d better make that. I am now seriously hoping that the fake leather stuff will cooperate, I’m afraid that that will be the most difficult part.

Next Step

Remember, eons ago, when I spoke about my sheep? I have finally acquired the elements for the next step in the sheep to something process. For in order to start spinning wool, one has to (apparently) card the wool. This is done with spikey boards with handles, and they are spikey. So while trying out my two new toys, I managed to hurt myself again. When I tried to pull the wool of the carders, I managed to get the spikes into my right middle finger, not once, not twice, every time. After a while I had to quit because on the last try I managed to actually draw blood. Figured that was not the goal of the exercise. I now start carding only when I’m wearing plasters on said finger.

These are the carders and the loot from the first night.

Carders

I hope though, that I can continue on the road to having a something made from my own sheep. I have tracked down a spinning wheel that I can probably use, so maybe, maybe, I’ll end up with a something in the (relatively) near future.

Below are my fingers, especially the damaged one. If you don’t want to see, don’t scroll further down, it’s not that gruesome though, just a couple of red pin like pricks. By the way, I know that the pointy finger is strange, it met a door 18 years or so ago, and still hasn’t recovered. The blood on that one isn’t from the carders, though.

Fingers

Brown Dress

After I’d finished the red bag, I wanted a new project. Well, it turned out that ‘new’ is a relative term. The project that I am continuing on is actually my oldest work-in-progress that I’ve saved I think. It’s a brown dress I started 5 years ago. The plan was to completely hand sew a dress that would be larp appropriate. I managed to cut it out and sew in 1.5 of the godets. I basted the other 2.5 so I needed to finish those seams also.

The reason I decided to continue with this project was the fact that I’d found a solution. The problem was that I couldn’t figure out a way to make it fitted without adding a zipper or buttons. The dress is basically straight up and down with 4 triangular bits inserted, so there is no shape. Then I saw a picture were they used two inserts in the side seams which had eyelets in them, and a corset type closure by stringing something through the eyelets.

I found that I had basted a line where I wanted to cut of the bottom to make it straight-ish. I cut of the bottom and use some of the extra’s to make the inserts for the side seams. I also handworked eyelets and now I actually have shape! I have it finished from the boobs down. The problem is the top. I don’t know what to do with it.

Front Back

I had it closed with a shoe lace, so that’ll be a better coordinating piece once I buy it.

Any ideas what to do with the top?

New Project

I am officially going to graduate on the 31st of July. That doesn’t mean that I get my diploma then, but I will be allowed to put MSc. behind my name. I find this fairly exiting. I handed in my thesis on the 3rd of July, got my grade on the 4th of July and have had holiday since then. I haven’t done much in the way of job hunting. In combination with some other struggles it’s to difficult to even try.

So, when I went to the market on the Friday before last, I found myself a new hobby. The fabric guy had a table of 3 euro/m fabrics. Including some that screamed quilting to me. I invested in a yard each of 4 different fabrics. Three fabrics were the same print in a different colourway (scooters, motorbikes and gears), and the last was another print (farm animals). I looked through the library the following day for some intriguing patterns and eventually decided on one based on a pillow case.

The plan is the following:

quiltFabrics

The colours in the picture correspond roughly to the colours of the fabrics I chose. I have since finished making the brown/grey/dark blocks and I now have to cut the red strips and attach them. It’s going to be big, this thing. The brown bits are 10×10 cm cut, so ~8.6 by 8.6 cm sewn. The strips are 4 cm cut and 2.6 cm sewn. I hope it’s going to look nice. However, I don’t know yet. Below are the blocks that I’ve done.

Blocks Attempt at end product

This is my first attempt at quilting/patchwork. I enjoy doing it, although I do think it would be really nice to have a rotary cutter. I’ve now been hand cutting with scissors and marking each individual bit. That certainly took a while.

I might embroider some of the central animals in the brown panels with yellow and blue thread to break it up a bit. I’ll have to see how that looks though. I’ve also been following the Craftsy class on pant fitting, in hopes of finally producing good pants. I’ve started the muslin. I hope I get some good pants now… Enjoy the summer (or winter, or other season)!