The fourth bag pattern from Waffle Patterns is Biggetje – Piggy Bank. As soon as I finished the duck, he was on the cutting table. This bag is again made from the same gray fabric as the whale. It also uses the same zipper and similar hardware. There’s a big bag in the middle and a smaller bag on the side.
As usual with Waffle Bags, I increased the size of the big bag by fair amount. To be able to put as many things in him as possible, I couldn’t fill it with stuffing as much. He looks a bit underfed because of that. If I bring him along, he’s a lot fuller and looks more like a pig. To combat the empty look, I did put foam pieces in his feet and his snout, so that those wouldn’t collapse.
For his tail, I didn’t have anything super curly, so I decided to use some of the stuff I’ve been using for hood strings. I also added a clip so that I can attach things to his bottom. The straps are interchangeable with all the other bags but he has since received a gray strap to match his hue better. I do think he’s very cute and he’s lovely to take on walks.
As usual around this time of year, there was a large event looming and I wanted a new outfit. My recent Simplicity sewing magazines had asymmetrical dress patterns and they spoke to me. They were Simplicity Naaimode 72, model 24-26, which is the equivalent of Simplicity 9886 (and the plus size version: Simplicity Naaimode 74, model 28-30, aka Simplicity 9887). They also spoke to my stash of 10 lengths of 1 meter of Scuba Crepe Jersey Fabrics that came in a Surprise Box in 2022. Since I hoped I could combine three of those fabrics to make a nice dress.
I started by copying the pattern and cutting it out in a dark grey, lighter grey and light blue fabric. I made two alterations to the original version. 1) I didn’t put in a zipper, since this is all stretch fabric. 2) I cut the light grey back pieces in one since I didn’t have to accommodate the zipper. As you can see, this one was just too big, especially in the back. I pinched out around four centimeters on the side and that was a lot better, but the pockets were also way too low, the colours seemed a bit muted for a fun occasion and I was just unhappy with it.
Then came the most complex alteration I’ve ever done in my life. Trying to make this thing smaller along strategic points instead of just the side seams. In the end: I took out 2 cm along center front and center back, tapered the side seams in from 1-ish cm to nothing in the waist, removed the pointy bit around the center back because there was still no zipper, took in the darts and princess seams by a cm, raised the pockets by about 5 cm and made them bigger, shortened the sleeves and scooped out the neckline. I made adjustments to every paper pattern piece there was, and some are a little bit fudged, but it fits so much better!
These pockets are at a much more comfortable height and the back fits so much smoother than the original version. I just turned the neckline under once and stitched it down, and same with the hem. The hem was with coordinating thread colours and I’m quite proud of it. It looks very neat. I also added some belt loops to the sides that almost disappear into the fabric, which is nice.
While working on the pockets, they gaped a little bit more than I would have liked, so the inside of the fully blue pocket was visible on that side. This bugged me so much that I ripped part of it out, added a patch of the light blue, and sewed it all back together again. So much better! The pockets also really wanted to just float around anywhere, so I anchored them with little straps to the approximate center front of the dress. Now they never end up on the back of my hips and I can put stuff in there, it’s supported and basically invisible.
I like this dress, it’s appropriately swooshy and has pockets and this colour combination is so much better for me than the original. I felt I learnt a lot with the alteration and now I’ve at least used some of that mystery box fabric!
So I do not remember how I got to the website of Schnittmuster Berlin and found the Nuru pants, but I somehow did. I checked the images and thought they looked cool with the interesting yoke and wide legs. So, I decided to purchase the pattern and got to work.
I found some slightly stretchy grey fabric in the hoard and decided that was going to be nice to wear. Then I printed the pattern, put it all together and cut out the size I thought I needed. The pieces were cut from the fabric and I followed the instructions for the sewing. The pocket and yoke construction were fascinating but worked well and while I ignored some parts of the waistband construction, I love how it turned out.
However, once done, the whole thing is just a little bit too large. I can’t tell if it’s just the stretch content that’s messing it up, or whether I just made a size too large or something else entirely. I hoped to fix it by adding some buttonhole elastic along the back edge but this isn’t sufficient. That might also be because I’m so used to wearing pants with the waistline at my waist, that this model with a relatively low waistline at the front is messing me up. I do love the fabric but because of the weird side seams, I don’t think it’ll be trivial to take it in. I may have to resort to suspenders to wear this one…
I saw the # 18 Top down Pullover by Lana Grossa as free pattern on Ravelry and immediately fell in love. Too bad the free version was only in German and this pattern was quite difficult to understand. I became so obsessed with making it that I went online to find an English version of it and ended up paying for a whole stack of printed paper of all the patterns in the magazine it was published in. We’ll see if I make any more of the included items.
For the yarn, I dyed some MCN DK, a dk weight yarn with Merino, Nylon and Cashmere in a grey/brownish tint. I also used two more skeins of that yarn but undyed and two skeins of Tibetan DK, with Merino, Yak and Silk for the thin stripes and hems. I purchased the yarn bases way back, based on their listed gauge, before I even got hold of the English pattern. That’s how much I wanted it.
When I had my pattern and my yarn, I got to work. I believe I followed the instructions pretty faithfully up to the transition from dark to thin stripes. I messed up a little there but I think I managed to hide it pretty well. The pattern uses spiral stripes to get those thin stripes, which is such a cool technique. It did take me a bit to figure out how it worked though, so there are some increase errors in one of the raglan areas.
I followed the pattern until separating the sleeves and even a bit further, put it on and thought it looked like a tent. So I frogged a whole bunch (also super interesting with spiral stripes) and separated for sleeves a lot sooner. I also didn’t add as many stitches in the underarm and I decided to continue the one raglan pattern p, k7, p down the body and the sleeves. I thought that was a fun little detail. Then it was on to a whole lot of stockinette knitting, three at a time. The separate balls of yarn were in the sweater which was held closed with safety pins. This worked really well.
For the bottom, I chose to do a 3×1 rib so I didn’t have to do a fold-over hem. I didn’t have enough yarn to make it in the same colour as the top, so I used the yak yarn for that. Seemed like a wiser choice than white cuffs, especially for such a klutz like I am. I did hours and hours of research on bind-offs, chose one, did it wrong and decided I liked it better than what it was supposed to be, so I left it. The final touch was hiding all the ends and stitching a little cross in the neckline to mark the back. I don’t own much brown clothing, but I do really like this thing. I hope it is as soft to wear as it is to touch!
As mentioned in the Whale Bag post, I also purchased the Penguin – Pinguïn pattern from Waffle Patterns. Since it’s of course imperative to make that penguin bag as soon as possible, I set out to gather my materials. I wanted the bag to look like a real-life penguin, so I bought a white felt-backed curtain fabric for the belly. For the body, I used the same kind of fabric as for the whale, just in black. While the penguin closest in markings might be an Adélie penguin, I didn’t have appropriate orange fabric for the feet, so I chose the whale grey curtain again.
I looked over the instructions and the pattern pieces and decided that I did want to make one major change to the pattern. To increase the size of the inner pocket, I wanted to use all available space to store stuff in. So I measured the body pieces and made an estimation of how big I thought the inside could be. To make the biggest possible pocket, I added circular end sections so that the inside pocket would be shaped like a cylinder. The other addition is to add a zipper to the bottom seam, so I could stuff it after finishing all the sewing.
As usual, the instructions for a Waffle Patterns pattern are very thorough and clearly laid out. In the end, I did almost all the steps but in a very different order. I added some extra d-rings, one to the belly pocket as an embellishment, similar to the snap in one of the original examples. All the way at the end, I undid a little bit of the tail seam to add the other extra d-ring as an attachment point. I had just recalled this pin and this pin and thought I could combine the animal fanny pack and thigh bag thing together.
It all came down to the straps to get those ideas working. So I set out to build the those straps. I wanted two separate ones with side release buckles for easy on-off. A long one that could transform from waist to cross body/over the shoulder strap and a shorter one for thigh or hand strap. I didn’t have enough of the webbing to make the shorter one, so I used the same strap that I used to attach the d-rings for that one.
The long straps comes in two parts, a short part that just has the swivel clip and one side of the side release buckle. The long section has a swivel clip, a slide buckle and the other side release buckle. The length is such that when it’s fully doubled, it fits my waist, but it’s also extendable enough that it fits as cross body. The thigh strap measured to be somewhat too long for my leg, so I could also wear it with wide pants and stuff. I added a snap to the end so that the excess length could be doubled up and snapped away when it was used as a hand strap. I think this will work really well. I can use any of the three top d-rings for whatever configuration of strap I want.
Camouflage thigh strapWaist strap onlyCross body option
I really like this penguin too. I’ve found that I’ve taken the whale bag out a few times the last couple of weeks. It’s really fun and super nice to pet. I hope that will be the same for the penguin. I cut him in such a way that the nap would run down his body, and forward on his beak, so he would be super pettable too.
When I got a notification that one of my favourite pattern companies (Waffle Patterns) had just released two new bag patterns, I couldn’t resist. Off to the sale section of the website I went and before I knew it, I’d hit ‘add to cart’ on novelty bag patterns shaped like a Whale – Walvis and a Penguin – Pinguïn. While no longer on sale, I do think these are particularly adorable.
I’d been looking to make a whale bag for a while, ever since coming across the whale shark bags on Pinterest. I spent a decently long time clicking around the internet at that point to find something I liked, but decided I could probably draft it myself if I really wanted to. But then the pattern was released and that plan was out the window and a new one was quickly formed.
The pattern has 10 pattern pieces, of which three are shapes for stabilizer. There are two rectangles for the different pockets and the main body is really only 5 (doubled) pieces. This meant that I could cut it out from the leftovers of the fabric I used for the curtain cape. Since it’s a curtain fabric, it has some stability of itself and it’s very pettable which I figured would be great for a bag.
Since some whales have baleens, I thought it would be really cool to give him some baleens with the fabric I also used for the reversible dragon egg. This meant that I cut two layers for the body base section. Bottom layer was the curtain for stability and then the soft, fuzzy, white fabric for the overlay. That was sewn down along a few ‘stripes’ and cut to size. This front section also doubles as a pocket and I used the egg fabric for the lining and the pocket piece.
The pattern is great! The markings line up and the instructions are detailed and easy to follow. I made my own life a little harder by doing that overlay for the body base, which meant a lot of layers in one go. I also think it would’ve been better if I had found 12mm tape for the d-loops that hold the strap. It was a bit fiddly now with the wider tape.
Inside the pocketZipper at pocket’s baseThe stuffing inside
I only changed a few things from the pattern; the side pocket is on the wrong side (my bad), the mouth doesn’t have visible topstitching but it is tacked down nearly invisibly, I added some fun extra d-rings on the side as in one of the examples and I put a zipper in the bottom of the large pocket. Since I am unsure if I’ve put enough stuffing in, I wanted to still have it be accessible. This afterthought zipper actually works great, so I can stuff mr. Whale more or less depending on what turns out to be my preference.
If I make one again, I would make a few small tweaks. I’d make the big pocket bigger, put the side pocket on the left side of the whale and put the zipper in the big pocket bottom a lot sooner. I’d also change the shape of the tail, it’s a little pointy now and I think it would look better if it was more filled in. All in all, I do love this little project. It’s absolutely bonkers but I’m sure I’ll find some place to bring my whale!
End of January(ish), so yet again time for a new outfit for a ceremony. This time I was very indecisive. I made several plans and didn’t execute them. I originally thought that I would make this dress in a teal-ish fabric. But I never got excited enough and decided that it would probably be too cold. I then looked through all my pattern stash to see if something sparked joy and it did not. So on to the Pinterest journey where I finally ended up on this: Vogue 1645. It’s a wrap jumpsuit and it did give me some brain tingles.
I couldn’t remember where and how, but I thought I’d seen a free pattern like it at one point in time. So more scouring of Pinterest where I found several other expensive patterns and once I’d basically given up, suddenly the Meadow Jumpsuit pattern from Mood appeared. It’s a free multi-size pattern with very limited instructions. I’ve tried some of the Mood patterns before, and I don’t understand their sizing or their fit. However, having a base always helps me to explore options.
The plan was to follow the pattern as is, apart from adding pockets and widening the flap. This is not entirely what ended up happening. First of all, it calls for a stretch fabric and I’d originally found a brown-purply stretch stuff with a shiny and a dull side. Thought it would look fun but it was also thin, and I didn’t trust it in the winter air. Then I found the Redux version of the pattern that specifies you can add a side zip and use a non-stretch fabric. So I grabbed some grey thicker stuff with a woven and a fuzzy side.
I’d already placed all the pattern pieces on the purple, so I just copied the layout from the purple and started cutting. I ended up widening the flap and its facing by a fair bit. To test fit, I basted the pants part together, which fit well enough even if they were a lot long on my short body. For the bodice, I had already sewn the collar and facings in place before truly trying it on. That meant I had to do some alterations after the fact, since I was not ripping all of that out.
This included taking a wedge out of the shoulder seam, cutting at least 2.5 cm off the bottom, reducing the side seams by at least 3 cm and thereby also pulling the armscyes in further. There are pleats on the top of the sleeves for ease, there is a center front zipper in the pants since I didn’t want to deal with side zippers. I did not understand the instructions for the sleeve flounces, so I just .. did something. And I accidentally sewed one of the ties in the wrong side seam, but honestly, I like this better. It now creates a belt effect in the back, so this was a successful design element.
It held up well during the event and the only parts of me that were a little cold were my wrists. I also feel quite fancy when wearing it. It’s a little bland by itself but with a fun scarf, I can almost pretend to be an actual adult.
Who needs sleeves when you can have pockets in a cape?
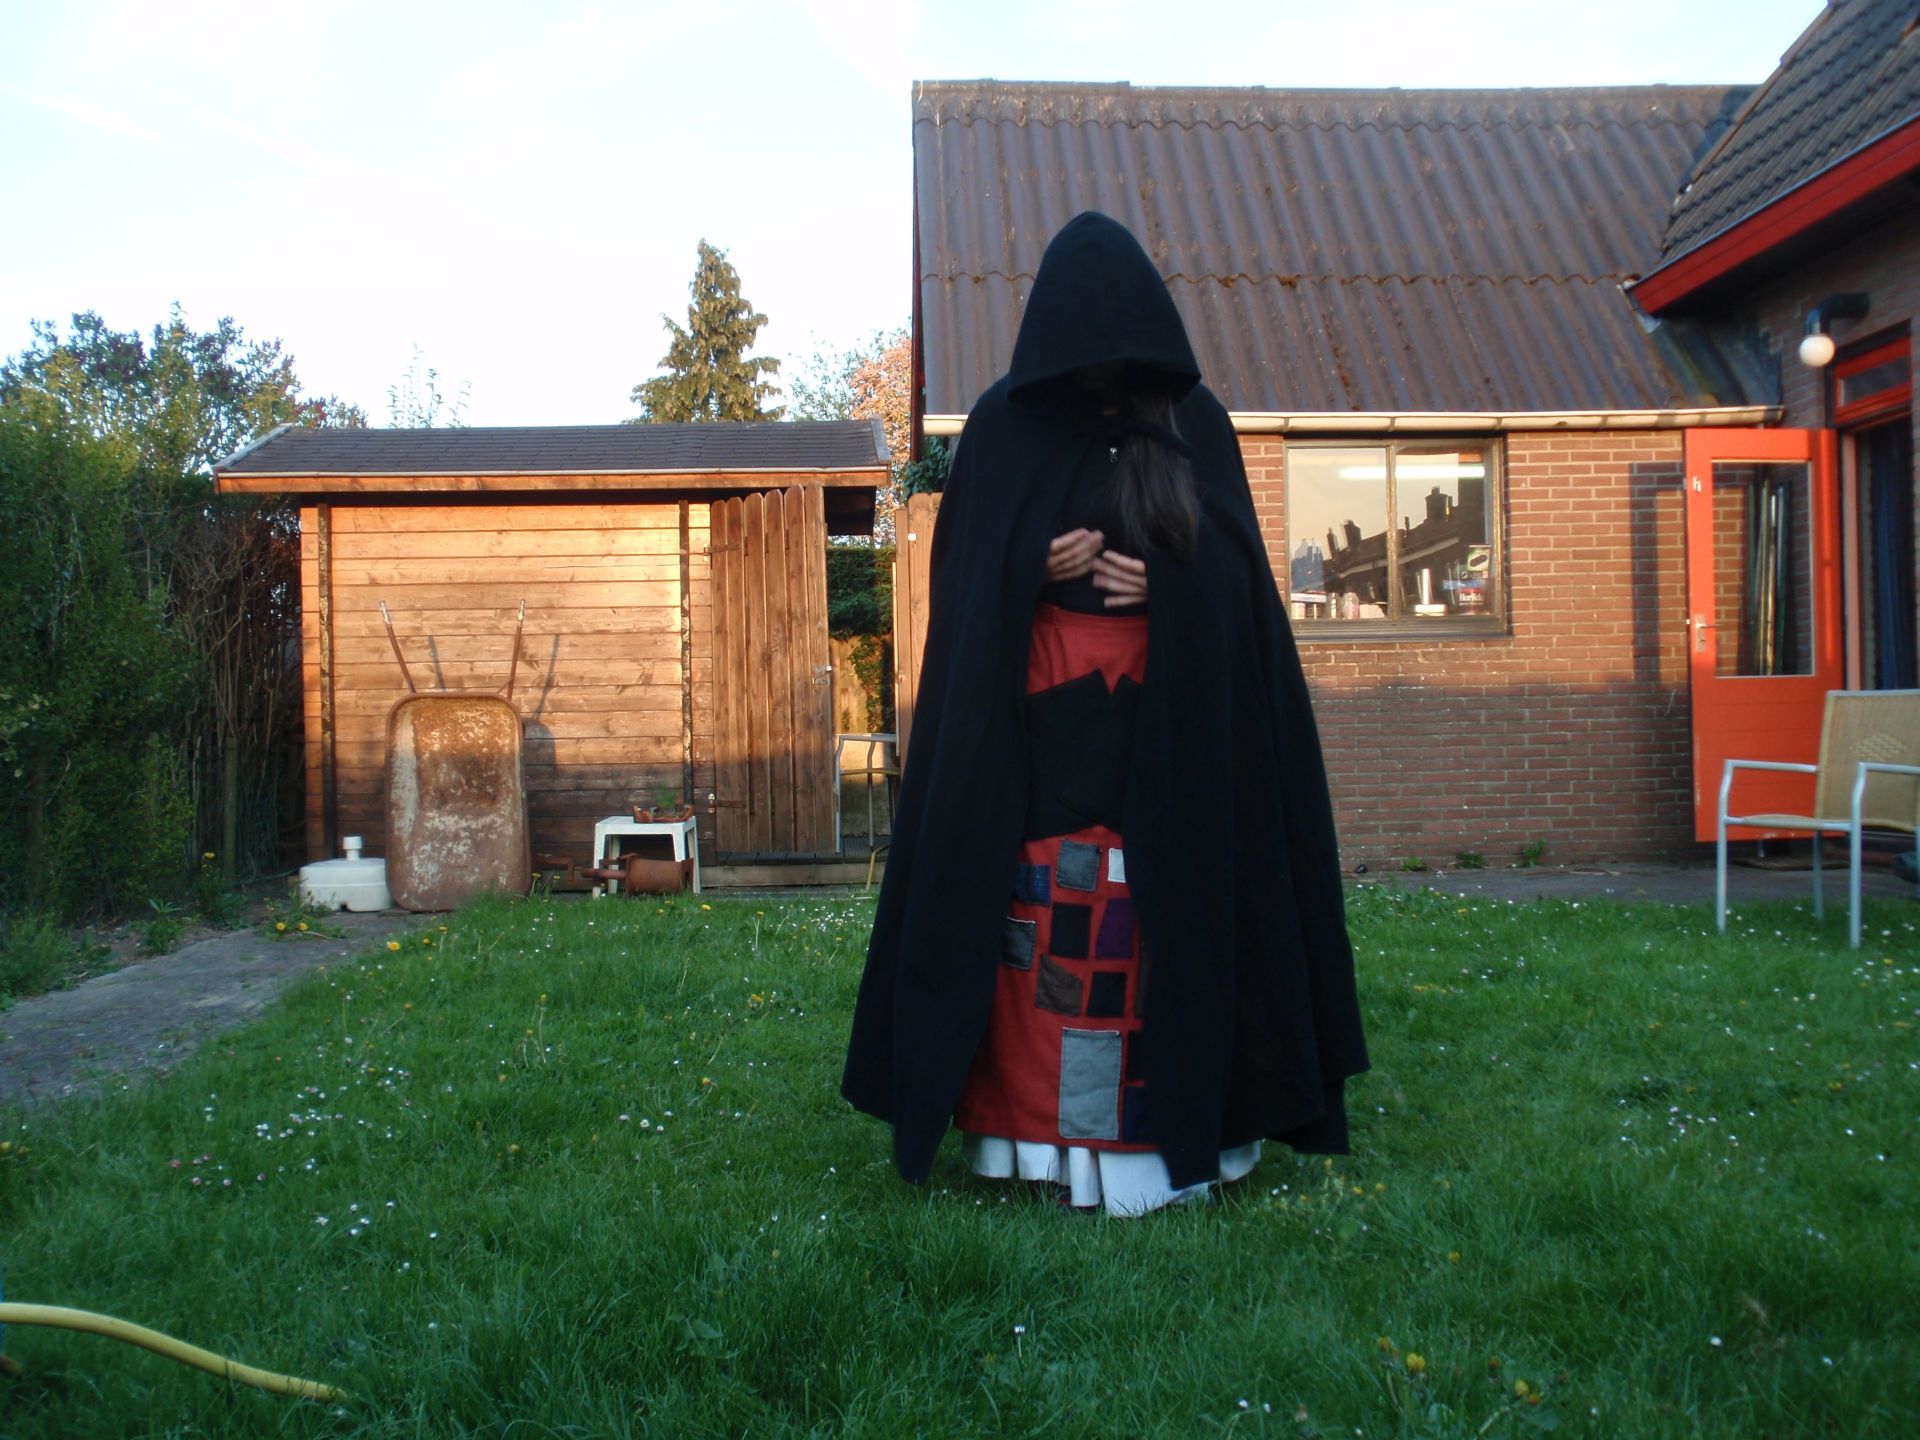
Some months ago, I was sent a picture of a comic by abbycomics/Paige Walshe about a girl being asked about her cloak. With the reveal being that cloaks are cool especially lined with pockets. You can find the whole thing here. This sparked the beginning of an idea in my head. It was percolating for a while, but after repeatedly grabbing for my boiled wool cape to feed a cat half a block over, I figured I wanted another cape/cloak thing. This time one that closes and has pockets.
I was looking through all my pattern magazines and taking photos of the line drawings when I stumbled upon a cool cape pattern. Burdastyle 10/2011 Model 101 A/B. It’s a hooded cape with arm slits and a zipper down the front. It had cool style lines and there were a few reviews and blog posts that made it look decent. So I traced that pattern and started looking through my stash. Nothing really caught my eye though.
So, after hibernating in my house for the full week of Christmas, I decided to go on an excursion on the Saturday. I accidentally woke up early and travelled half the country to go buy fabric. I wandered the market and found a stall that sold curtain fabric for only 2 euro per meter. It’s a napped fabric with an almost fleece like black backing. I got 2.5 meters of the grey and 1 meter of black, since I was planning on making the front zipper placket a different colour.
Once I got home and washed the fabric, I was amazed by how quickly it dried and I could get to work swiftly. There was perfectly matching thread in my stash, so that was great. I cut a size 36 with 1.5 cm seam allowances and got going on the cape. Since the fabric is really thick, but doesn’t fray at all, I didn’t overlock anything. I did want to flatten the seam allowances a little, especially in the shoulder corner pieces. So I trimmed the inside seam, stitched the allowances down, and cut the outside seam close to the stitching. I like the decorative nature of this too.
I did make a few alterations, as usual. The pattern calls for lining the hood, which I didn’t think it needed although I did cut a facing for the opening. I skipped the zipper placket all together but included plackets over the arm openings. I’ve added an ‘unzipped’ hook and eye as closure and a hanging loop. The most important change was to add pockets to the inside. Since the cape isn’t lined, I took special care to make everything as symmetrical as possible, and follow the lines of the cape, since the stitching would show on the outside.
There are four pockets in total, two hand warmer pockets that open vertically; the ones closest to the zipper. The other two are content pockets that are on the side front pieces. These open at the top but I can still get to them when the cape is on. The pockets were all made out of fleece, since I thought the cape fabric was a bit too thick.
I quite like how it turned out and it’s so soft! I can just pet this cape forever.
Silver snap detailed mash-up overalls with grey stripes
I got some interesting grey striped stretchy fabric from one of the fabric markets this summer. It seemed really fun to make overalls/dungarees with it. I’ve been dreaming of having some overalls that have the same top details as the Cat Dungaree Dress. Since that dress was supposed to be dungaree pants before I made terrible fabric choices…
I tweaked the pants pattern I used for the previous corduroy dungarees and pants to make this thing. The main changes were to add some length to the bottom again, and to eliminate the dart in the front. So I redrew the pocket pieces to take those in by a few centimeters. I added pockets to the back, and made the back darts work, in contrast to the Dark pants. I grabbed the cat dress pattern and just directly copied the top onto the fabric.
I made some stupid mistakes that meant that a waistband wouldn’t work, so I just slapped the front and back bib straight on. I don’t trust zippers 100%, so I added an additional closure with a snap to the side seams. It also looks fun, so I’m happy with this choice. With the cat dress, I’ve found that the top strap is helpful to hang things on, like a bag with my yarn if I’m knitting. So it’s both another design detail and useful. I still have some of the fabric remaining and the plan is to make a blouse, similar to some I purchased eons ago from H&M.
Ps. if your screen does weird things with the stripes, The whole thing looks like the side detail image, there are no psychedelic blobs.
Some more dye experiments – olive does weird things..
I recently got to spend a lovely afternoon with a colleague, playing with dye and bleach and trying some new things.
We mostly used Alpaca 4 ply yarn, and dye in three shades of blue (brilliant, royal and sky), periwinkle and gunmetal grey.
Turns out that if you put too much blue in, the variation gets lost. To get some variation back, we put some bleach over it, but it didn’t do all that much. Maybe my bleach was too old or it just doesn’t work. We decided to tried again with only brilliant blue, the periwinkle and some gunmetal speckles. A much more defined result.
As a contrast to the blues with periwinkle, we also did a silver grey one. It’s always amazing to see how you end up with clear water after dumping in a bunch of dye.
For some variety, we dumped some dye labeled ‘olive’ in the pan, and added two skeins of kid silk, and one alpaca 4ply. The yarn turned entirely green first before becoming orange-ish? It was as if it entirely split; super interesting to watch and I should’ve time-lapsed it, somehow.
One of the blue ones and the olive yarn stayed in my house while the rest went home with my colleague. It was a good afternoon and I do really love experimenting!
Active filters:
Category
Tag
Post Type
·
No results found. Try a different search.
No results match these filters. Try clearing some, or searching for something else.
No results match these filters. Try clearing some, or searching for something else.