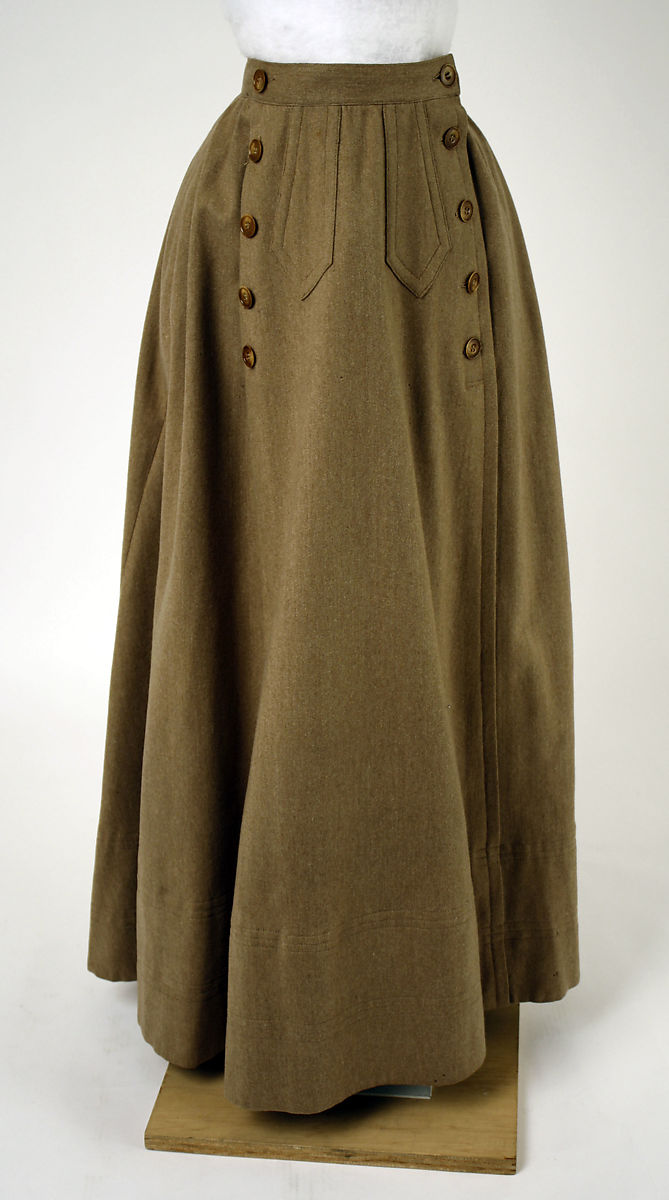
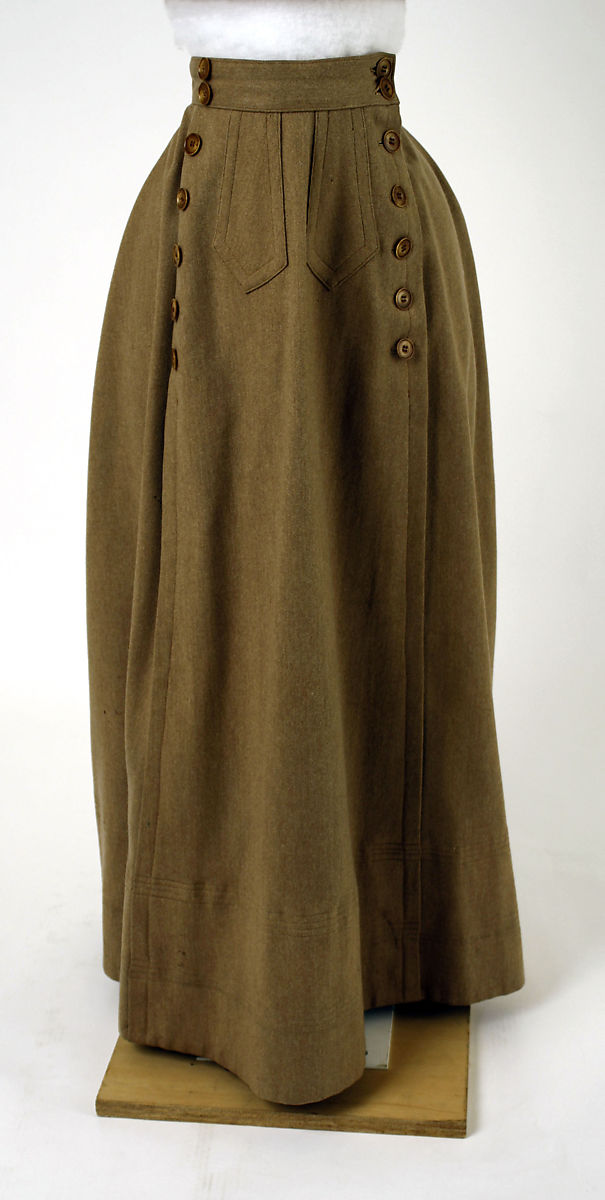
1906 Beach Suit

Making a four piece suit from 1906 that only took 3.5 years to complete.

Back in October of 2022, I talked about finishing the blouse of a 1906 Beach Suit pattern I’d bought on Etsy in July of 2021. The pattern has four elements; a blouse, a belt, a skirt and a jacket. I have now managed to complete one of each element!

The original plan was to make the fun leafy blouse and make the rest of the suit in a dark fabric. However, after cutting out all the pieces from the black fabric, it turned out to be a wrong fabric choice. It was too stiff and there were sun marks all over is, so it looked faded in places. In the end, those pieces ended up in the bin because there was no point in continuing. I’d never be happy with the end result. So I pivoted, and found a red fabric in my stash.

It’s a strange, probably quite synthetic material that’s soft on the outside but almost crunchy (?) on the inside. I can’t really explain it. It’s not very thick, but there was enough of it to cut the other pieces of the suit. Based on a picture from April 2023, I had already cut the skirt, jacket and probably most of the belt some time after finishing the blouse.

The skirt was the piece I believe I finished next. I added pockets, because without pockets a skirt is not useful. They are quite large and can hold some stuff. I also wanted to make it somewhat adjustable. The aim was to make it wearable with or without a corset, so I added some extra thread loops to the back for closure. Since it was supposed to be worn with a belt, I figured that could be hidden effectively enough. I think this skirt was finished sometime in April 2023.

The belt however, took another half a year. I wanted it to be stable enough so there is something that I believe might be horsehair in it for stiffening. It’s also got a few bones and it’s almost entirely handsewn, because I kept messing up. As with the skirt, I wanted this to also be adjustable, so I added lacing. And then I decided to make my life a lot harder and added hooks and eyes to allow it to open without having to undo all the laces. My brain took so long to figure out how to get this to work, and it think it mostly does now. A message to a friend indicates that I finished it in September 2023.

That jacket has been hanging, mostly finished over one or the other mannequin in my living room since at least April 2023, if not longer. I had tried sewing the facing in but it puckered like no tomorrow, so I gave up. Earlier this week, I finally got the courage to try again. In two fell swoops with some help from an iron and simple perseverance, I finally finished all the seams and it’s now done!

So that means that all four parts of the beach suit have been completed! It only took 3.5 years… And with the change in fabric, the blouse and the suit don’t really go together anymore. It’s very Christmassy in colours, not in amount of winter warmth. That’s a problem for another day though. The skirt does need a petticoat for wear, because it’s too thin otherwise and doesn’t fall correctly. I think the belt solution works, even if it’s possibly not the prettiest thing you’ve ever seen. I like the big sleeves of the jacket and how it hits. Now it’s just waiting for decent weather and taking it out to the beach!

In any case, happy holidays if you celebrate!

Split Skirt

Historically inspired pants that can turn into a skirt with an added panel.

I was thinking about secret pants, also known as split skirts, for a while. It probably started some time during covid lockdowns when I got into the historical sewing. It took a bit longer to commit, but in June of 2022, I purchased the Laughing Moon Mercantile #150 Split Skirt pattern. Printed it, cut it out, took all the relevant steps and then.. left it. The pattern was in the corner of my living room, waiting for me to decide which fabric I wanted to use.

It took two years and a bit to actually get myself in gear to make this thing. I chose a bottom weight brown fabric that I do not remember purchasing. Maybe a de-stash gift too? I made some minor changes to the pattern. The pockets seemed very shallow, so I added more length and the legs were very long so they were shortened. I added back pockets and belt loops. The fall front pieces were cut partially out of lining because they would not fit on the fabric anymore and they are hidden anyway.

All the panels were serged and then sewn together on the Pfaff. I had to remove about three centimeters from the top of the split skirt to make them fit near my waist. The front panel was supposed to be lined with lining fabric, but that didn’t seem smart, so I chose to use the main fabric too. The buttons came from my stash, one of the few options that looked old-ish and that I had enough of. All the buttonholes were made with the Greist buttonholer on the 1901 machine. It took a while, but the results are so satisfying. One of the back pockets was absolutely perfect flat, but my butt isn’t flat so it does gape a little when worn – very disappointing.

The first pass of the buttons through the buttonholes was a struggle, but it’s much easier after a few goes. I like the fall front method of closure on these pants. It gives a little extra security. Since the legs are quite wide, I do have to pay attention to not get stuck on the pedals of my bike, but it’s not been a problem yet. All in all, this thing is fun to wear, with or without the front flap buttoned on. I do now also have an incentive to make a top that fits with this. There isn’t as much brown in my cupboard as I thought.

Empire Skirt

Wearing a 1900s skirt in 2022

A while ago, I found an image on Pinterest of the ‘Keursrok’ or corseted skirt from an old Dutch book called ‘Ik kan kostuumnaaien’ by Henriette J. van Wessem. I searched all over for that book and most of the time didn’t find or find quite expensive versions. I yet again ran a google search for it some day and lo and behold, there now was a digital version available! It is the 1908 version of the book and is available on Delpher. I had already found a physical copy on an auction site, put in an offer and forgot all about it, so I now also own a physical copy of the book.

Based on the mostly legible image of the keursrok in the book (page 142), I drew out the pattern as is on grid paper. The pattern indicated a waist of approximately 66 cm, which I figured was close enough to mine if I added enough seam allowance. I made a mock up of only the top part and made quite a few changes. Contrary to Edwardian bodies, my waist and underbust measurements are the same, so I had to remove a lot of the flare at the top of the skirt. I’m also short, so I had to take off some height. The side back part was really wrinkly, so I played around a lot with that and ended up with something that fit better.

The skirt pattern was cut from some 2 euro/meter wool fabric (I don’t know, Utrecht fabric market is weird) for the outside and I wanted to interline it with some cotton and chose some dark brown as that was what I had in the stash. After basting the different layers together, I picked it up and promptly started removing all my basting again. The thing was way too heavy for comfort. I settled on adding the mock up as a lining for the top part only and attached some rigilene to it in lieu of boning. I did use some of the brown in the deep hem.

I pinned it up on my mannequin to hang and droop as the full skirt is basically half a circle and might sink a bit on the bias. The length of the skirt was taken up and I had to remove so much. People from 120 years ago may have been a little shorter, but clearly not as short as I am. While the modern zipper wasn’t invented yet in the early 1900s, it was much easier to install one of those than the faff around with hooks and eyes in the crook of my back. So I settled for an invisible zipper, which is really quite invisible this time around.

I also added pear-shaped pockets to the seams between the two side panels because I don’t think skirts are wearable without pockets. Normally I also add belt loops, but since this one doesn’t have a belt or waistband, I added a little loop to the right pocket for my keys. While I started the project in October, I only finished it yesterday. There was so much procrastination happening the last couple of months. However, to celebrate the thing being finished, I wore it to work today and it held up great! The pockets work, the boning isn’t so aggressive that I can’t wear it for a full day, and I feel lovely and swooshy in it! I call it a success!

Cycling Skirt

Making a turn of the century bicycle skirt for the non-car owning people among us.

During the pattern buying spree of 2020 (that rhymes!), I also got Black Snail Patterns #0714 Bicycle Skirt about 1900. At some point when the corona lockdown wasn’t as bad as it was now, I’d purchased 5-6 meters of a sand coloured (no, it’s beige but I hate that word) fabric. I think it might be a sort of twill, but I’m not certain at all. I’d also found some sand and white checked fabric that I thought would work well for a blouse to go with the thicker twill stuff. While the paper pattern has been cut out for a while now, getting started on it proved to be a little more difficult.

Eventually, however, I managed to get going and once I did, the thing was done in three days. I chose to make the third size but once I’d cut it out and was measuring everything, I got scared and wanted to have some more space in the waist. So I moved all the markings on the side – front seams over by a centimeter. The seam allowance was 2 centimeters so that wasn’t too big of an issue. I think that this was probably a good call as I can now wear the skirt without foundation garments too. I also took 8 cm out of the hem and disregarded their instructions for the spacing of the hem-stitching. Most of it was sewn on the treadle, with certain bits being hand-sewn on.

The appliques where sewn on using a thicker thread, the same that was used for the hand-worked buttonholes. I’m very proud of these. It was the first time making a keyhole opening for the buttons and using a technique that actually seemed to work. I also used it to secure the buttons in an aesthetically pleasing manner. The buttons on the left are functional for putting the skirt on and the ones on the right are just decorative. There is one pocket in the skirt and this sits on the right side. Once I’d finished it and put my phone in the pocket, the entire skirt pulled out of alignment and I decided that I needed to add a pocket-holding strap. That’s since solved those issues entirely.

I’m fairly certain that this thing is based of a Cycling Ensemble in the Metropolitan Museum of Art, from around 1900. Otherwise it’s an incredible coincidence… The details seem to fit even if the actual seamlines might differ a little. The Met version also has a friend which is so similar that I actually had to look very carefully to spot any differences. The only real obvious changes I can find is that the second one has more buttons? I have made my very first bicycle test drive with this skirt and it seemed to work very nicely. I hope to get some wear out of it and finish a nice blouse to match.

Purple Skirt

The Edwardian outfit is extended by a purple fan skirt.

The next part of my Edwardian outfit was a purple fan skirt. I used another pattern by Black Snail Patterns, #0414 Fan-Skirt about 1890. I felt this was probably similar enough to make do for 1900-1910ish times. It’s basically one front piece and two ENORMOUS back pieces, a waistband, placket and pockets. The instructions say to flatline the outside fabric, so I cut out the giant pieces from a purple/black striped fabric and from a white poly-cotton stuff. Followed the rest of the instructions and sewed it together, wrangling this enormous heap of fabric. After essentially getting winded from sewing a single seam, I decided that it might be time to weigh the whole thing; 1.5 kilos, oof. That was too much. I kept 30 cm of the cotton stuff around the hem, stuck it down with steam-a-seam and cut out all the rest, essentially having to remake my skirt again.

It’s got a giant inverted pleat in the back, and closes with a placket and hooks/eyes. I chose to do the subtly pointed waistband (because I love pointed waistbands). This pattern actually includes pockets! As no good skirt is without pockets, I really appreciate that. These ones are a little deep though, I’m not sure I can reach the bottom of the pockets while standing straight. At least that means that I might not need a backpack… The hem is so large that it took me three episodes of Crime Scene Investigation to hand sew it down. I think I may also need to make the bustle pad that is included with the pattern, that would make the back stick out a little more.

The waistband is based on a corseted waist, which means that it’s not too nice to wear without. However, wearing the corset is nice because it distributes the weight. The one remark I have about the pattern is that I didn’t understand the dart in the front. It looked to me that I was supposed to cut it on the lines. That doesn’t seem to be the case, however, since the waistband didn’t fit when I did that. I tried it on the flatlining fabric first, and then decided not to cut the dart on the outside fabric. I still have the pieces of the flatlining that were cut out, so I think I’ll try to make a petticoat from them – I have been thinking that for a few weeks and still haven’t started on that…

Skyline Skirt

At some point in the past (my downloads folder claims August 15th, 2018), I decided that I needed a skirt with the skyline of my town on it. So I scoured the web looking for a picture with the skyline and managed to find one on a Christian website that seems to have been taken down since. The picture went though some fine MS Paint-ing and had all the coloured background removed. I then printed the results on A3 paper to see how large it would need to go to be able to cover a skirt. That was .. September 2018 and I promptly forgot about the whole thing.

About two weeks ago, I remembered this project and decided to go ahead and try to get it started. Step 1, find a good skirt pattern. Step 2, cut out the pieces of the skirt from the smallest bit of fabric possible. Step 3, serge the sides of the skirt pieces and put them together. Step 4, measure the amount of coverage the skyline needs to be. Step 5, print the skyline again because the older version was too short. Step 6, embroider the skyline on the skirt. Step 7, finish sewing the skirt together.

Step 1 was a bit of a struggle to start with, since making choices is HARD! At the end I made the choice for Simplicity Naaimode 27’s model 3-4 (aka Simplicity 1324). A knee-length skirt with a contrast mock wrap at the front. Going through the hoard, I found a piece of fabric that I also used for a larp thing ages ago. There was only little fabric left, so the skirt pieces were on one grain, while the front bands and waistband were on another grain entirely. The sides were serged and put together after which I measured and printed the right size skyline. I sat down for a night and managed to stitch the skyline in with some thick white thread.

I did make a change the skirt and added a pocket in the right seam, since skirts without pocket(s) are not useful bits of clothing if you ask me. In the same vein, I also added belt loops to hold my keys.

On Friday there will be a little reunion for employees and I figured that would be a good time to test whether this skirt works. It should be somewhat appropriate, I hope.

Graduation Skirt

At the end of January, there was a graduation ceremony again. So I wanted to make something nice. This time I decided to go for a skirt. I had found some blue sparkly stiff stuff that I figured would work nicely. I wanted to try the vintage Simplicity 1076 pattern again. I’d traced it before and used an adapted those to get the pattern to fit my body. The fabric was quite weird and the sparkly threads got caught by the needle and partially ripped out sometimes, but I don’t think anyone could see. I also added some more adornments to the skirt. I started with adding loops to the back to create a corset closure.

I bought two types of ribbon to thread through the loops, and in the end decided to use the black ribbon because I thought it looked better. After finishing the whole thing, I thought that the front was a little boring. So I searched through my stash and found some buttons that I harvested from a jacket and added those to the front.

The skirt is fully lined and the lining doesn’t have the pleats. The skirt also has pockets, because otherwise skirts are not useful. They are nice and large and manage to hold my phone and the schedule for the day and all kinds of other stuff without showing much.

\

On the day, I wore it with the cut out shirt and a blue scarf that I bought ages and ages ago. Quite a few people said they liked it. It was a lot of fun to twirl around in it. Since then, I have started a button-down shirt but haven’t managed to finish it, perhaps I’ll get around to that soon-ish.


Sport Skort Evolution

In December I will be playing my first roller derby game. It is very exiting and very scary. We will all be wearing a yellow sport top with our name and number on it. However, for bottoms, we can figure it out ourselves. I wanted to have something different from just short leggings (or long leggings), so I set out to create a skirt with attached short leggings, now named the sport skort.

The first iteration used the leggings pattern from the striped leggings, taken in along the side seam and back seam significantly. With an added full circle skirt from some strange waffle-scuba type stuff. I had the waffle stuff on the outside. While testing it out, I determined that I liked the idea of the skirt, but since the fuzzy side was down, it kept sticking to the attached shorts. It was also very full which made it behave less than ideal. This is also why it ended up in the closet and is wrinkled in the pictures.

The second iteration took the same pattern, but I overlapped the side seams to each leg is now one piece. The skirt is a half circle from the same fabric as before, now added with the waffle side in and the fuzzy side out. The waistband is still from the leggings stuff, now with an added pocket for my mouth guard. This is most likely the shortest skirt I’ve ever worn outside of my house.

The only reason I dare to wear this it is because it has the attached leggings. This version fares much better and I’m actually thinking of making a second one, since this one is very comfortable. I declare this a success!

For the second version I cut the skirt with the same diameter, but being a half circle vs. a full circle, the waist takes up more of the diameter and the skirt becomes shorter. On the left the first version and on the right the second version.

Shiney, Wrinkly Shipwreck

Sometimes you just choose the wrong fabric, or the wrong pattern or both and you produce something that you’d rather send to recycling immediately. That is what I did this Monday… I had found a (seemingly) nice pattern on Papavero with a very interesting cut. They call it the Autobusowa spódnica (here) but my Polish is limited (read, non-existent, so google translate is my friend). I liked the idea of the wrap around skirt without side seams and with the godet in the back.

I printed and assembled the pattern on Sunday and tried to figure out what kind of fabric to choose. I basically also wanted to see if I could even fit in it, so I chose a fabric that I didn’t have any other ideas for, the remainder of the Twirly Graduation dress fabric. I cut everything out and stitched it together…

Front

And I hated it! The back stuck out even after cutting the godet a lot smaller, the fabric is too shiny for a slim skirt and the fabric wrinkled so much that this happened in about.. 0.5 seconds:

Whaa Wrinkles!Maybe I’m just not fit for slim skirts like this, but I didn’t like it at all. It’s been put in the ‘go to goodwill’ pile so someone else may still enjoy it. Anyway below you can see the side (stick out) view and the back in all their g(l)ory.

Side Back

That same night I also started a scarf and promptly managed to forget all the rules about turning things inside out and created a tube in the wrong direction. However, I did manage to solve that problem, so a success story will show up here soon.

Alice’s Tea Party Skirt

A while ago I found some purple and white border print fabric on the market. I couldn’t help myself and bought it and of course showed it of to my coworkers immediately. The plan was to finish the skirt in a week or so. This was a good plan, although I managed to screw it up royally, naturally.

The plan was a simple gathered shirt with pockets with a waistband. I had one cut of fabric which consisted of two bits sewn together, I’m thinking it was the end/beginning of a new roll or something. I first removed the stitching and cut the bits into the height I wanted. I then seamed the bottoms with sticky iron on stuff, serged all the edges and attached them. I found some old slanted pockets and put those in. I then tried to make the waistband, that was a complete disaster. Enter the ‘unfinished projects box’. It was balled up and dumped in there.

I took it out a while later and gathered the whole business. This made it look even more hideous. Back it went into the unfinished projects box.

Then I took it out at the beginning of the month. First things first, discard the waistband idea and cut square pockets from the fabric. This worked, I only later found out that I completely failed in making the pockets sufficiently deep for putting my hands in if I wanted to have the waistband all along the edge. I took out the gathering and redid it using the lining. Eventually sewed a casing to pull the elastic through. Almost all the gathering is in the back now, with pockets on the front. Because the elastic kept twisting, it’s been sewn on at regular intervals.

During the last session of this skirt the aim was to finish it before going to bed. This did mean that due to exhaustion and frustration, several parts had to be redone twice or three times. Conclusion, this is not a smart idea. Moreover, I haven’t completely solved the ‘if I put something heavy in my pockets my skirt fall down’-problem, but I’m thinking of ideas, and it was 2:30 and I HAD to sleep. Anyway here it is, front and back.

OLYMPUS DIGITAL CAMERA OLYMPUS DIGITAL CAMERA

So why is it called Alice’s Tea Party? Because there are teapots and rabbits and butterflies and mushrooms and cupcakes and all kinds of cute Alice in Wonderland themed bits on it, if you ask me. Below the pockets and a close up of the back, with all the gathering.

OLYMPUS DIGITAL CAMERA OLYMPUS DIGITAL CAMERA

I am very happy that it is finished. I like it a lot, because of the print on the bottom. I think it’s really cute. That one problem still needs to be solved, but I’m thinking of some sort of waist stay concoction that could solve the issues. Lastly, it’s all nice and finished on the inside with lining and everything.

OLYMPUS DIGITAL CAMERA OLYMPUS DIGITAL CAMERA

Next up is a larp present, basically a copy of something I use myself. You’ll see…