Spur of the Moment

Sometimes Pinterest just sparks your imagination and you’ll make it come to life in less than 24 hours.

Browsing through Pinterest has given me lots of ideas over the years. Recently there was an image of a dress that really tickled my fancy and that I’ve been thinking about on and off. So last Monday evening around 20:00, I remembered that I had an event on Wednesday. I decided that I wanted a new outfit, but if it didn’t work out, I’d have enough in the cupboard to make something work anyway. To the hoard I went to select a piece of fabric. I chose a length of blue synthetic something with a smooth back and an peachy outside.

For the pattern, I decided initially not to look for an actual pattern to but to try and drape something on my dress form. I cut two bits of fabric and attempted to pin the shoulders in place. It didn’t really work as I intended so I moved on to another part. That was the side straps, which involved cutting 4 and sewing them together. By then it was bedtime, so I postponed the further fiddling to the next morning.

At that time I’d decided that I did want some sort of sleevelet unlike the sleeveless inspiration image. I thought it would perhaps work to fold over the sleeves and create some sort of integrated facing. To make my sleeves, I grabbed the bodice pieces from Simplicity 1076 (also used here), and centered them on my fabric pieces. Then I rotated them out so that the sleeve edge would be straight vertical and could be folded in to the center. I sewed the side seams, cut the neckline, made the facing and added pockets.

The fitted waist is accomplished with an identical arrangement of pleats in front and back. They are 5 cm high, 1 cm wide and 5 cm apart. I had no idea if that was going to work, but my pin-try-on indicated that it might, so I just went for it. The side straps are caught in the outer pleats. Once that was all sewn down, I put it on again to mark the button holes. For the first time ever, I sewed buttonholes on my Pfaff! The buttons were added, lovely green ones with a small pattern that I have an entire tube of. Added the hem and sewed the facing edges over. The dress was completed at about 17:20, right in time for a small gathering. All in all, less than 24 hours from fabric to finished dress. Quite a decent turn around! For the event, I chose to wear it with my tiny petticoat for a little bit more oomph. I really enjoyed wearing it.

Graduation Skirt

At the end of January, there was a graduation ceremony again. So I wanted to make something nice. This time I decided to go for a skirt. I had found some blue sparkly stiff stuff that I figured would work nicely. I wanted to try the vintage Simplicity 1076 pattern again. I’d traced it before and used an adapted those to get the pattern to fit my body. The fabric was quite weird and the sparkly threads got caught by the needle and partially ripped out sometimes, but I don’t think anyone could see. I also added some more adornments to the skirt. I started with adding loops to the back to create a corset closure.

I bought two types of ribbon to thread through the loops, and in the end decided to use the black ribbon because I thought it looked better. After finishing the whole thing, I thought that the front was a little boring. So I searched through my stash and found some buttons that I harvested from a jacket and added those to the front.

The skirt is fully lined and the lining doesn’t have the pleats. The skirt also has pockets, because otherwise skirts are not useful. They are nice and large and manage to hold my phone and the schedule for the day and all kinds of other stuff without showing much.

\

On the day, I wore it with the cut out shirt and a blue scarf that I bought ages and ages ago. Quite a few people said they liked it. It was a lot of fun to twirl around in it. Since then, I have started a button-down shirt but haven’t managed to finish it, perhaps I’ll get around to that soon-ish.


Test version

During the last month of my thesis, I was also working on a dress. My mom found some old bedsheets and I grabbed them to act as a form of muslin type stuff, to test out clothes. I’ve had a vintage pattern (Simplicity 1076) in my drawer for a while now. The measurements on it were smaller than mine, so I figured I’d make it out of said bedsheets and test it out. I traced the 2 pattern pieces from the top and added a little width to the sides. Yes, bad method, I know, slash and spread and stuff – but I tissue fit the front and the darts seemed to hit at the right place. So I just added some more to the side seams.

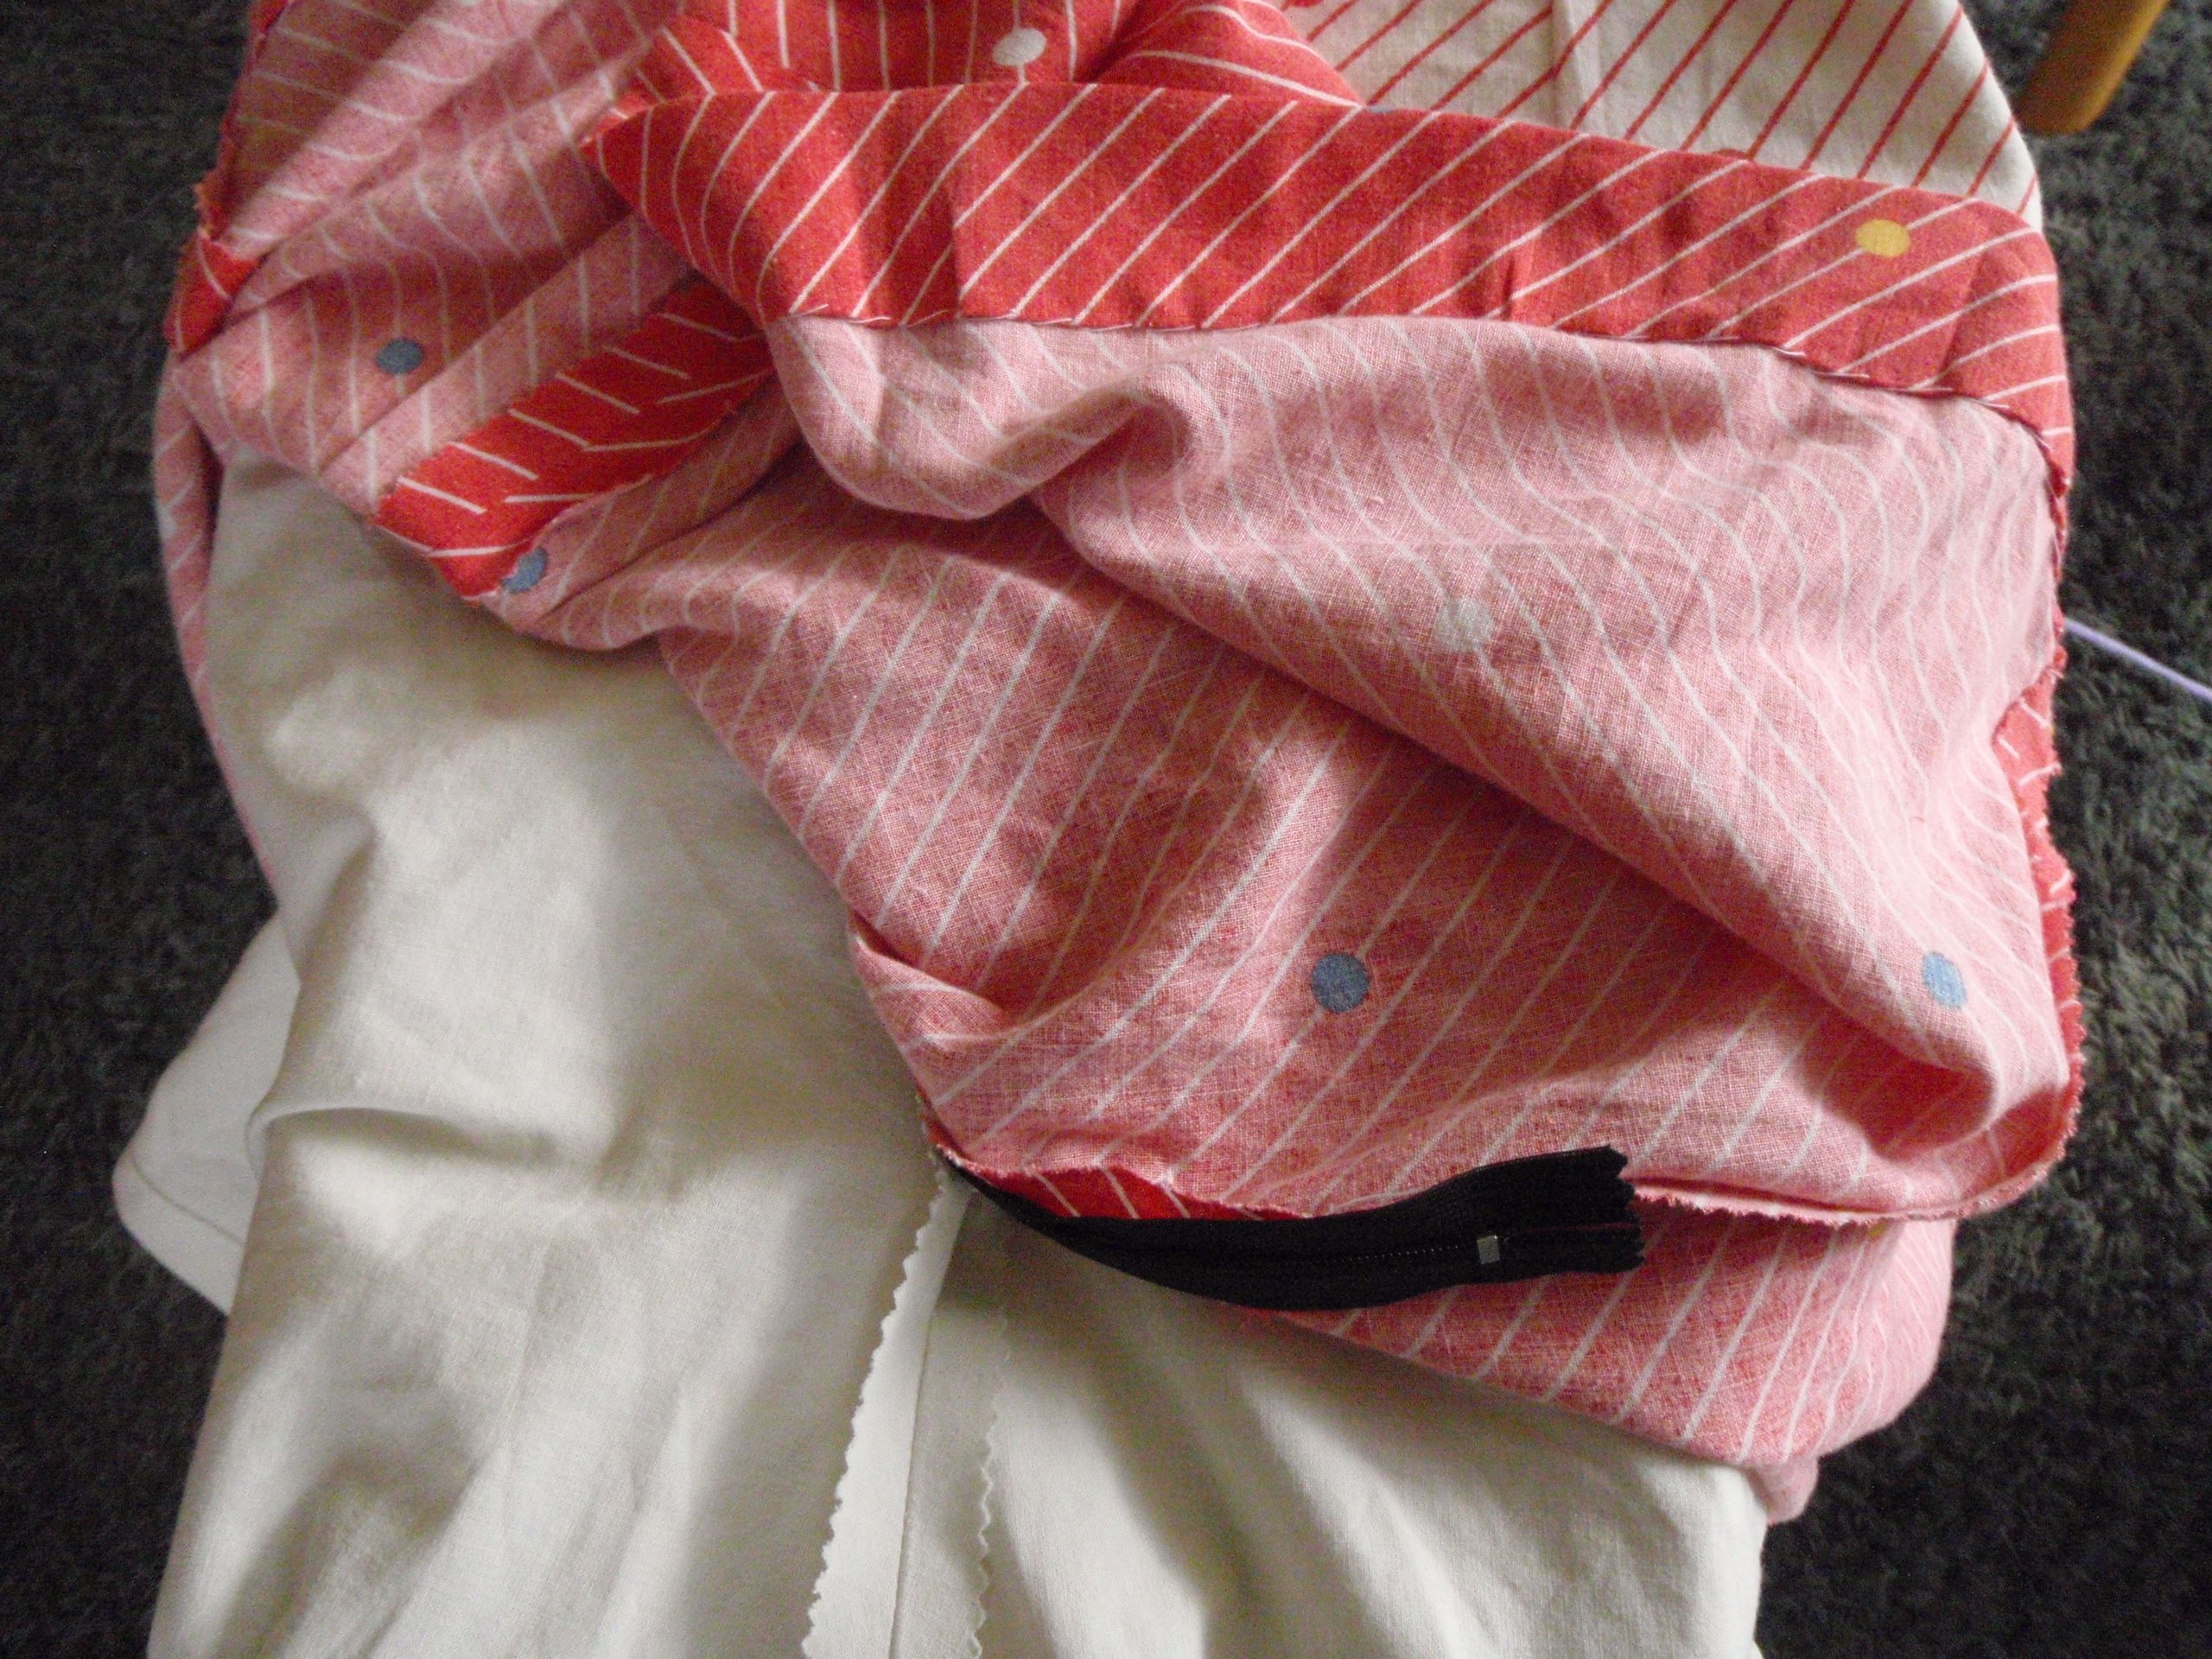
For some reason the front skirt pieces still matched the front bodice pieces, so I cut those out as they were. I thought it would be the same for the back pieces, however, I was sadly mistaken. In order to not have to recut, I just let out the pleats a bit, and then it fit. I did my first actual blind zipper with my (relatively) new blind zip foot. Absolutely fantastic, very easy, very clean, very nice.

Got the dress on me, it was see through as hell. (What do you expect with million times washed bedsheets girl.) So I grabbed myself another bed thing and made a lining. The lining was much more stable then the toplayer so it really helps to give it some structure. Stitched it all together.. it was too big in the bodice. I felt like a fat little blob because it gave me no shape at all. In went those side seams, which looked better. Still had a huge amount of pooling at the lower back. What’s a girl to do. Take in more!! This time I took in the back darts. It really helped a lot. Got rid of the pooling and gave me a waist. I’m loving it now.

After all this chitchat, I hope you would like to see the dress. Here it is:

Front Back Insides

Front, back and inside view. For the insides I chose to pink all the seams (first time for everything right) and do a deep hem on both layers, mainly to make it fall right. I even hand sewed the hem, white thread and taking a stitch in the white stripes on the skirt. It’s completely invisible.

Oh.. where is that zipper  Full lining

Left is the back, with no obvious zipperage if you ask me, and right the full lining, nice and white, no more underwear on show.

So this dress now gives me a shape, it twirls, and it makes me happy. Even though it was meant as practice, I might now actually wear it. Moreover, I adapted my tracings such that making it again will be much quicker (hopefully) and I can make it in something that is.. age appropriate?

At least I enjoyed myself, and I’m proud for finishing something. At last.