Funfetti Mystery Knit

Knitting a mystery rainbow scarf.

January 29 was the start of my next Mystery Knit Along (MKAL), this one was
Funfetti MKAL
 by : : : Katie Degroff Knits : : :. It called for 200 grams ish of fingering weight yarn, and then 200 grams ish of two or six or twelve contrast colours. I opted to split two skeins of Alpaca 4 ply into three, so I wound up with six colours. Since I just purchased new yarn dye in almost a rainbow, I figured that would be a great way to test those too.

The main colour was then a combination of violet and periwinkle. The contrasts were A: Neon Red, B: Neon Orange, C: Neon Yellow, D: Blacklight Blue, E: Aqua Tropic and F: Crocodile Green. Most of the colours work well together although the Crocodile Green does feel like the odd one out. Out of my new dyes, Croc Green, Aqua and Neon Yellow are my favourites.

When it came to knitting, it was a lot per installment. The construction was interesting. We started with a diamond shape with rounds in the different colours. Then we put that one aside and started working on a section where you increase in the middle but eventually start decreasing on the ends, so you end up with a ‘house’ shape. We did that for a few of the clues before going back to clue one and starting to add to that one too.

The final clue was to fill in two rectangles to connect the two sections we had been working on. This was quite satisfying because it was the last clue and a much smaller number of stitches. I was debating whether to do the colour changes at the end because it would leave so many ends, and while I decided to go for it, I opted out of the last colour and only did five colours. I think this worked fine.

The end result is a long rectangular scarf, with one of the short ends straight and the other side pointed. Since there are so many colour changes, weaving in the ends was a project in and of itself. It really is quite big. I don’t think I should opt for 400 gram scarves in the future. This one will end up being gifted away since I’m not enjoying the purple colour for anything I would wear.

Still, the MKAL was well organized. The forums were fun and the designer was very helpful. I just chose colours that I didn’t like even though the yarn I used was great.

Doggy Bag

Adding some embroidery to a double handle tote bag.

I was browsing Etsy (always a bad idea for the bank account) and found a bunch of super cool cross stitch patterns. This galaxy animal paw from OhMyStitchesShop spoke to me. My brother’s partner is graduating as a vet and they own dogs, so I thought this would be fun for her. There are so many stitches in this, I highly underestimated how much time 5552 stitches would take, even in eight different colours.

I started with the big pad and finished it fully apart from the little stars. I did a part of those in white, before I decided that I wanted to use glow in the dark thread for those, to be extra appropriate. So I took the white out and went on to stitch the small pads and then added the glow in the dark.

To make this a useful(ish) gift, I decided on making the embroidery the front pocket of a tote bag. I stitched some white cotton to the back of the embroidery and attached that to the purple fabric that I used for my Edwardian skirt. Since I am short and I know how annoying it is to have bags drag on the floor, I added a double handle. On the inside are short straps, and there are long ones for over the shoulder too. If I ever make myself a tote, I’m totally doing this again.

The project was finished and mailed. I hope she gets some use out of it and I had a lot of fun making it. And have thus since learnt that I prefer my projects either smaller, or coming in bite sized pieces, more on that later!

Fuzzy Earrings

One step fuzzy earrings to liven up your face.

Have you ever wandered into a shop, saw some very cute fuzzy balls and immediately wanted to make earrings out of them even though you do not wear earrings? Well, that’s exactly what happened here.

I found the last package of five fuzzy balls, two pink, two purple and one in another colour that I have already forgotten. They had some gold-coloured hardware on top with a hole in it. So I bought them, some gold-coloured earring hoops and hangers and asked a colleague if she would be interested. She was, so I just attached the two pieces and called it a day. I think they are adorable.

Purple Eyelet Scarf

Flower eyelet pattern for a purple scarf.

After the success of the knitting machine eyelet scarf, I figured it was time to finally knit up a skein that has been in the stash for years. I’ve held on to the yarn since it was bought during the closing sale of a yarn shop. The intention was to make a scarf for a former colleague whose favourite colour is purple. I forgot what kind of yarn this is and I didn’t dye it myself. I did not use a pre-written pattern for the scarf, I initially just started knitting over 51 stitches and would see where it would end up. It wound up being too short so it was frogged for a second attempt.

Using a closed cast on, and skipping every second needle, I cast on 31 stitches. Then I knit 10 rows and hand-ribbed them. While keeping two columns of rib on the outsides, I started with an eyelet pattern down the center. The eyelet pattern was:

  • 4 rows knit
  • Transfer the first stitch to the left of center to the previous needle on the left and transfer the first stitch to the right of center to the next needle on the right.
  • 4 rows knit (to create 2 eyelets on the first row).
  • Transfer the second stitch to the left of center to the previous needle on the left and transfer the second stitch to the right of center to the next needle on the right.
  • 4 rows knit (to create 2 eyelets on the first row).

Repeat until there is just about enough yarn left to do 4 rows of finishing knit and 10 rows of ribbing. Then weave in the ends and block the scarf to a width of 15 cm on your pool-floor foam pieces. Next, hope that the intended recipient actually likes it.

And she does like it!

Purple Skirt

The Edwardian outfit is extended by a purple fan skirt.

The next part of my Edwardian outfit was a purple fan skirt. I used another pattern by Black Snail Patterns, #0414 Fan-Skirt about 1890. I felt this was probably similar enough to make do for 1900-1910ish times. It’s basically one front piece and two ENORMOUS back pieces, a waistband, placket and pockets. The instructions say to flatline the outside fabric, so I cut out the giant pieces from a purple/black striped fabric and from a white poly-cotton stuff. Followed the rest of the instructions and sewed it together, wrangling this enormous heap of fabric. After essentially getting winded from sewing a single seam, I decided that it might be time to weigh the whole thing; 1.5 kilos, oof. That was too much. I kept 30 cm of the cotton stuff around the hem, stuck it down with steam-a-seam and cut out all the rest, essentially having to remake my skirt again.

It’s got a giant inverted pleat in the back, and closes with a placket and hooks/eyes. I chose to do the subtly pointed waistband (because I love pointed waistbands). This pattern actually includes pockets! As no good skirt is without pockets, I really appreciate that. These ones are a little deep though, I’m not sure I can reach the bottom of the pockets while standing straight. At least that means that I might not need a backpack… The hem is so large that it took me three episodes of Crime Scene Investigation to hand sew it down. I think I may also need to make the bustle pad that is included with the pattern, that would make the back stick out a little more.

The waistband is based on a corseted waist, which means that it’s not too nice to wear without. However, wearing the corset is nice because it distributes the weight. The one remark I have about the pattern is that I didn’t understand the dart in the front. It looked to me that I was supposed to cut it on the lines. That doesn’t seem to be the case, however, since the waistband didn’t fit when I did that. I tried it on the flatlining fabric first, and then decided not to cut the dart on the outside fabric. I still have the pieces of the flatlining that were cut out, so I think I’ll try to make a petticoat from them – I have been thinking that for a few weeks and still haven’t started on that…

Stegosaurus!

Do you know what happens when you end up with an overworked arm while knitting the body of a Stegosaurus? Said Stegosaurus ends up in a corner, in a plastic bag, for quite a long time…

A, mounted skeleton in right lateral view and B, laid out with missing elements reconstructed before mounting. Images copyright The Natural History Museum.

I did work incrementally on some of it’s yellow parts, the big purple parts mostly being completed in the session that finished my arm. It still took over a year to complete this Jurassic monster. According to the Ravelry, I started it in August last year. However, after knitting a big scale here and there to get back into knitting, I finally managed to get all 35 parts finished today! Then it took all afternoon to stitch the scales to each other and to the body of the purple giant.

Since it didn’t seem to be completely symmetrical, stitching on those scales was quite.. annoying. It felt like I stitched each one on at least twice, to much chagrin. However, they are fairly equal now, even if you can’t really see that on the pictures. I think a real Stegosaurus is also not supposed to sit like a dog, but since its legs move, I wanted to position them in an alternative way. It’s still pretty cute, so perhaps I’ll start a new dinosaur in the future still.

Baby Dinosaurs

Some time ago, we did a one day table-top session in our larp. At some point I got the knitted Allosaur I was (am, it’s been thrown in a corner) working on out to show. I also had the book, Knitting Dinosaurs, with me. I then got a request for a Triceratops. Now, I didn’t feel like knitting the full size Triceratops, as that one is large! However, the book also has a pattern for Troodons, very small dinosaurs. I figured I could improv the additional features around a Troodon base and have them done quickly. That’s exactly what I did.

First, a Triceratops (purple and red). The defining elements were its four equally long legs, its collar and the horns. The legs were created by simply making four back legs and attaching those. The collar was improvised from the Triceratops pattern in the book, but smaller. It’s a little big, but who cares! The horns were short icords attached to the head, because a Triceratops without horns would just be a Cera, right!

Triceratops Triceratops

Triceratops

The second was a Parasaurolophus (white and red), which completely the normal Troodon with the addition of one horn on its head. There was some shaping involved and the person who received this Dinosaur thought it was a duck at first, when it was upside down.

Parasaurolophus Parasaurolophus

Parasaurolophus

The last was a Tyrannosaur Rex (green). It’s a Troodon body, Troodon back legs and shortened Troodon front legs. I made a little ridge along its back to make it stand out a little. I also added the teeth to make it more intimidating and T-Rex-y. I don’t know if that worked.

T-Rex T-Rex

T-Rex

All dinosaurs have safety eyes with white felt behind them to mimic real-ish eyes, see the last picture for all the dinosaurs for a close-up of their faces. Their legs are attached in such a way that they can still move. That’s why the dinosaurs can both sit and stand. This was a successful project and I still have two Troodon bodies lying around that can still become dinosaurs!

All

Purple Pterodactyl!

From the same book that produced the Plesiosaur, now comes the Pterodactyl!

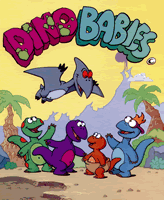
It all started from the plesiosaur and when I showed it and the book around. One of my friends seemed to like it and really liked the pterodactyl that’s also in the book. I told her I’d make her one. She requested the colour scheme from the Dinobabies pterodactyl, Dak. He is purple/pinkish with a white belly. I got some yarn for my birthday that was a pretty good  to pictures I found of Dak.

Dak

I knit mostly according to the pattern, although I did make some changes to make it look more like Dak. The instructions were followed for the legs, although black toes were knit. It was also according to instructions for the tummy, but guestimated where to start adding white to create the belly. I followed the instructions for the head (including errata), but decided not to change colour. I didn’t make the arms, although he did get strips of knitting along his wings to simulate arms. There are black fingers following the pattern for the arms. For the wings, I didn’t want him to have trapezoid wings, so I followed the pattern to where the fingers are, then I increased a stitch along the top in every row and decreased a stitch in the bottom every other row. This gave the wings more shape. He does have more of a tail than Dak, but less than the original. Last but not least, he’s got a neck! This was completely improvised.

Side Front

Here you can see the knit-in belly and the toes, also visible are his arms. I added red buttons for the eyes. I really do think that the colour matches quite well.

Back Side

These two really show the shaping on the wings (there is some!), and his little tail on the left. The right picture shows the neck, which he has, and that you can still move his legs around to suit the occasion. I think my friend liked him, so I’m proud.

I really like the book. I also started another one right after finishing Dak. That one is an Allosaur. I also made some small ones, where I took the body and legs from the book but improvised the defining features. You’ll probably see those around here too at some point.

Alice’s Tea Party Skirt

A while ago I found some purple and white border print fabric on the market. I couldn’t help myself and bought it and of course showed it of to my coworkers immediately. The plan was to finish the skirt in a week or so. This was a good plan, although I managed to screw it up royally, naturally.

The plan was a simple gathered shirt with pockets with a waistband. I had one cut of fabric which consisted of two bits sewn together, I’m thinking it was the end/beginning of a new roll or something. I first removed the stitching and cut the bits into the height I wanted. I then seamed the bottoms with sticky iron on stuff, serged all the edges and attached them. I found some old slanted pockets and put those in. I then tried to make the waistband, that was a complete disaster. Enter the ‘unfinished projects box’. It was balled up and dumped in there.

I took it out a while later and gathered the whole business. This made it look even more hideous. Back it went into the unfinished projects box.

Then I took it out at the beginning of the month. First things first, discard the waistband idea and cut square pockets from the fabric. This worked, I only later found out that I completely failed in making the pockets sufficiently deep for putting my hands in if I wanted to have the waistband all along the edge. I took out the gathering and redid it using the lining. Eventually sewed a casing to pull the elastic through. Almost all the gathering is in the back now, with pockets on the front. Because the elastic kept twisting, it’s been sewn on at regular intervals.

During the last session of this skirt the aim was to finish it before going to bed. This did mean that due to exhaustion and frustration, several parts had to be redone twice or three times. Conclusion, this is not a smart idea. Moreover, I haven’t completely solved the ‘if I put something heavy in my pockets my skirt fall down’-problem, but I’m thinking of ideas, and it was 2:30 and I HAD to sleep. Anyway here it is, front and back.

OLYMPUS DIGITAL CAMERA OLYMPUS DIGITAL CAMERA

So why is it called Alice’s Tea Party? Because there are teapots and rabbits and butterflies and mushrooms and cupcakes and all kinds of cute Alice in Wonderland themed bits on it, if you ask me. Below the pockets and a close up of the back, with all the gathering.

OLYMPUS DIGITAL CAMERA OLYMPUS DIGITAL CAMERA

I am very happy that it is finished. I like it a lot, because of the print on the bottom. I think it’s really cute. That one problem still needs to be solved, but I’m thinking of some sort of waist stay concoction that could solve the issues. Lastly, it’s all nice and finished on the inside with lining and everything.

OLYMPUS DIGITAL CAMERA OLYMPUS DIGITAL CAMERA

Next up is a larp present, basically a copy of something I use myself. You’ll see…