Yellow Summer Coat

Making a light, bright summer coat that will hopefully protect against the rain.

I’ve wanted a thin but water and windproof summer jacket for a while now. I never really found the right fabric so it never really happened. But then I ruined my dinosaur coat with an ironing mishap and started looking for replacement dinosaur softshell fabric. On that same website (Takoy.nl), I discovered something called ‘summer softshell’. They told me that it was a light, breathable but waterproof fabric. I chose the mango yellow version. Since it was softshell, I also hoped it wouldn’t fray and I ordered enough to make the Susan jacket from Pattydoo again. This was the same pattern as I used for the original dinosaur coat.

This new jacket is not identical to the first coat that I made. For one, I decided to not include the zip-on hood. It’s now attached with only snaps which seems to be working fine. Since it would be a summer coat, I didn’t include the knit cuffs but I did include the sleeve adjusters. Third adaptation was to change the pockets. The reason the dinosaur coat died was because I tried to patch the pocket with an iron-on patch and then accidentally melted the zipper. I always wanted to stuff more into the pockets than they could realistically hold. I figured the solution for this was the create more space in the back of the pocket such that the front and back of the pocket weren’t exactly the same size; limited by the width of the center front coat panel. The back of the pocket now has a pleat on it so it can expand and not rip, hopefully. It seems to work so far.

Sewing this was quite smooth sailing. The fabric was very well behaved. I did use very thin pins because normal pins refused to go through. The only thing that really required unpicking was the bottom of the sleeves. In my infinite wisdom, I’d forgotten to read through the original post where I mentioned taking 3.5 cm of the bottom of the sleeves and these new ones were full length. I’d already put on the velcro for the sleeve adjusters all the way at the start, so that had to come off and be reattached 3.5 cm higher. I have now marked that change on the pattern just in case I sew it again. Since just yellow would make for a somewhat boring coat, I put in a contrast zipper. I then also added contrast binding the certain sections of the inside to make it a little more fun. I’ve worn this coat a fair few times now and it’s nice. We’ve been experiencing a little bit of a drought recently, so I haven’t tested it in heavy rain yet. I’m keeping my fingers crossed that it will hold up!

Pants!

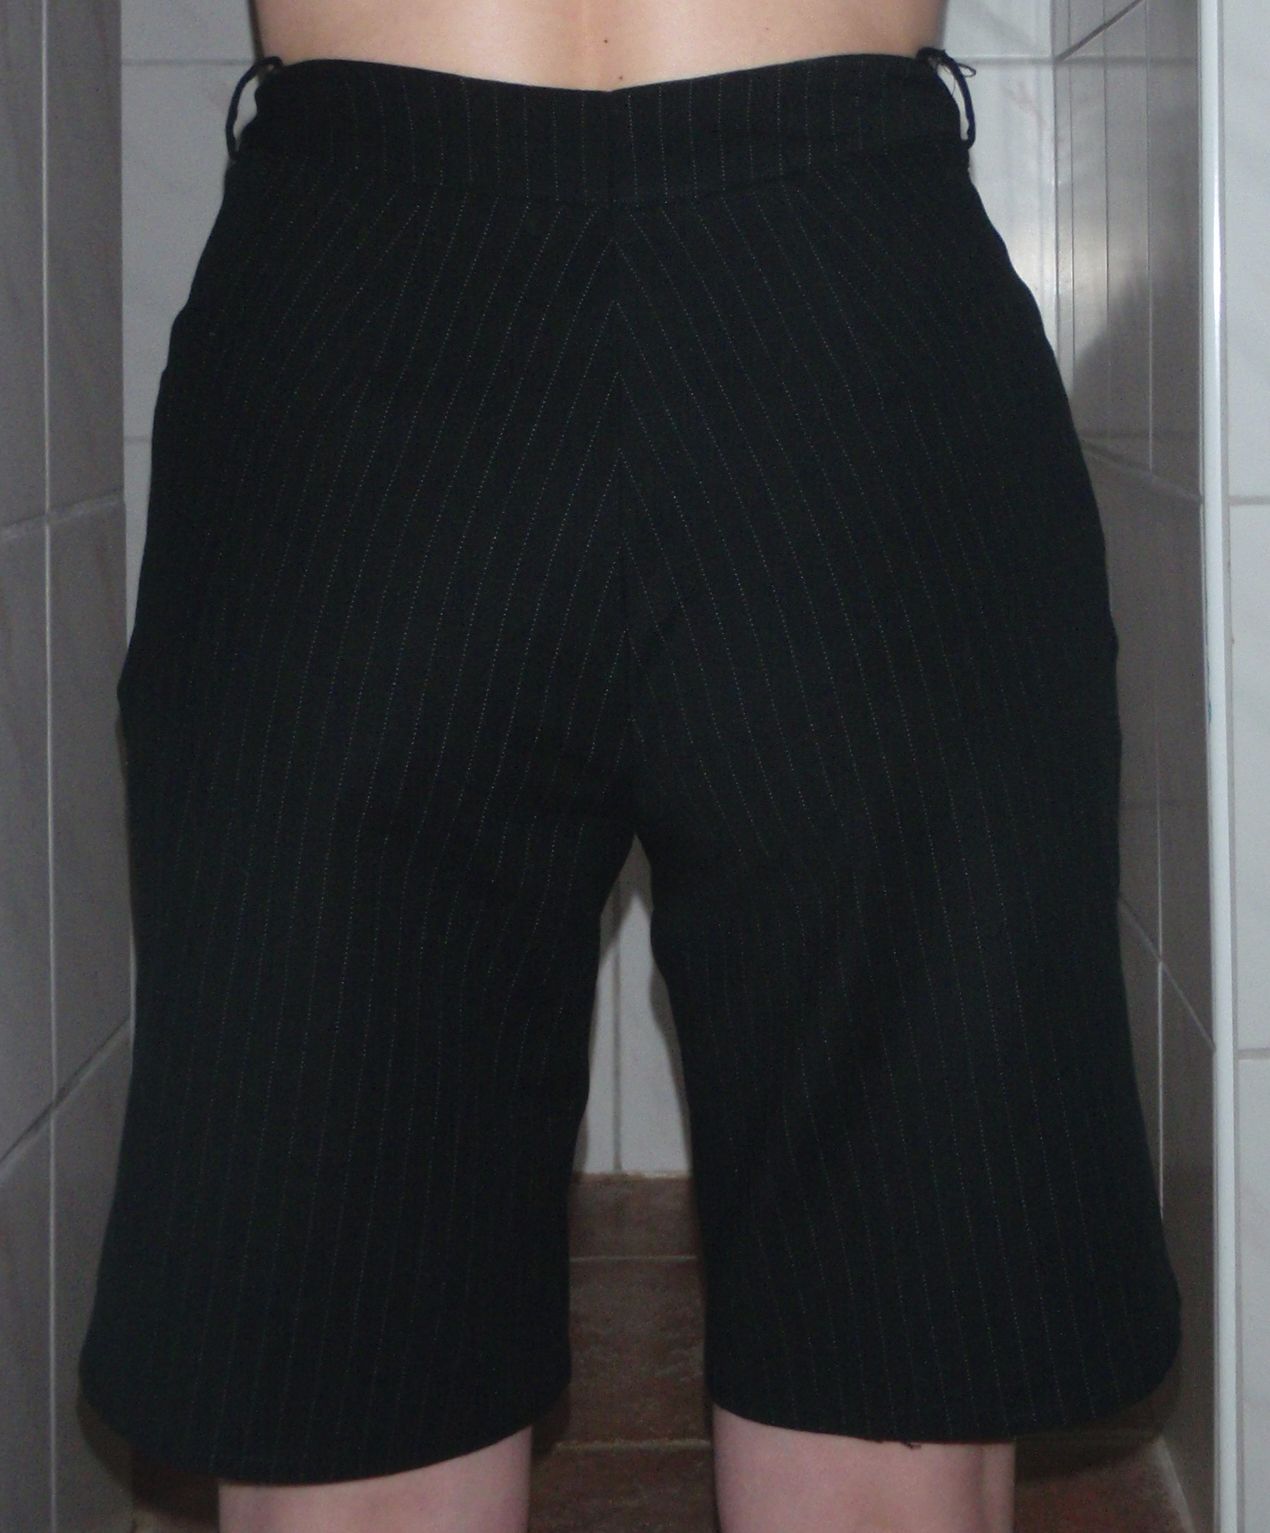
As I said yesterday, I also finished a pair of shorts. I still had some left over fabric from this  dress, and as I’ve said before, I love the fabric. It’s just really nice to both sew, and touch and do stuff with as far as I’m concerned. I have had the idea of making a pair of pants from a navy linen for a while now, but pants are always a nightmare for me. The shorts you will see shortly are meant as a wearable muslin (yes I know, some people don’t believe in those) for those navy ones which I will make full length.


This in theory seems like a good idea. However, I forgot to add more room in the crotch section to play around with. So this one is not really to satisfaction fit wise (although I’m sure I’ll wear it) in the crotch, although the length is absolutely perfect. I don’t like my shorts too short. They also come up a little high in the waist, and although I like coverage, this might be a little too much.

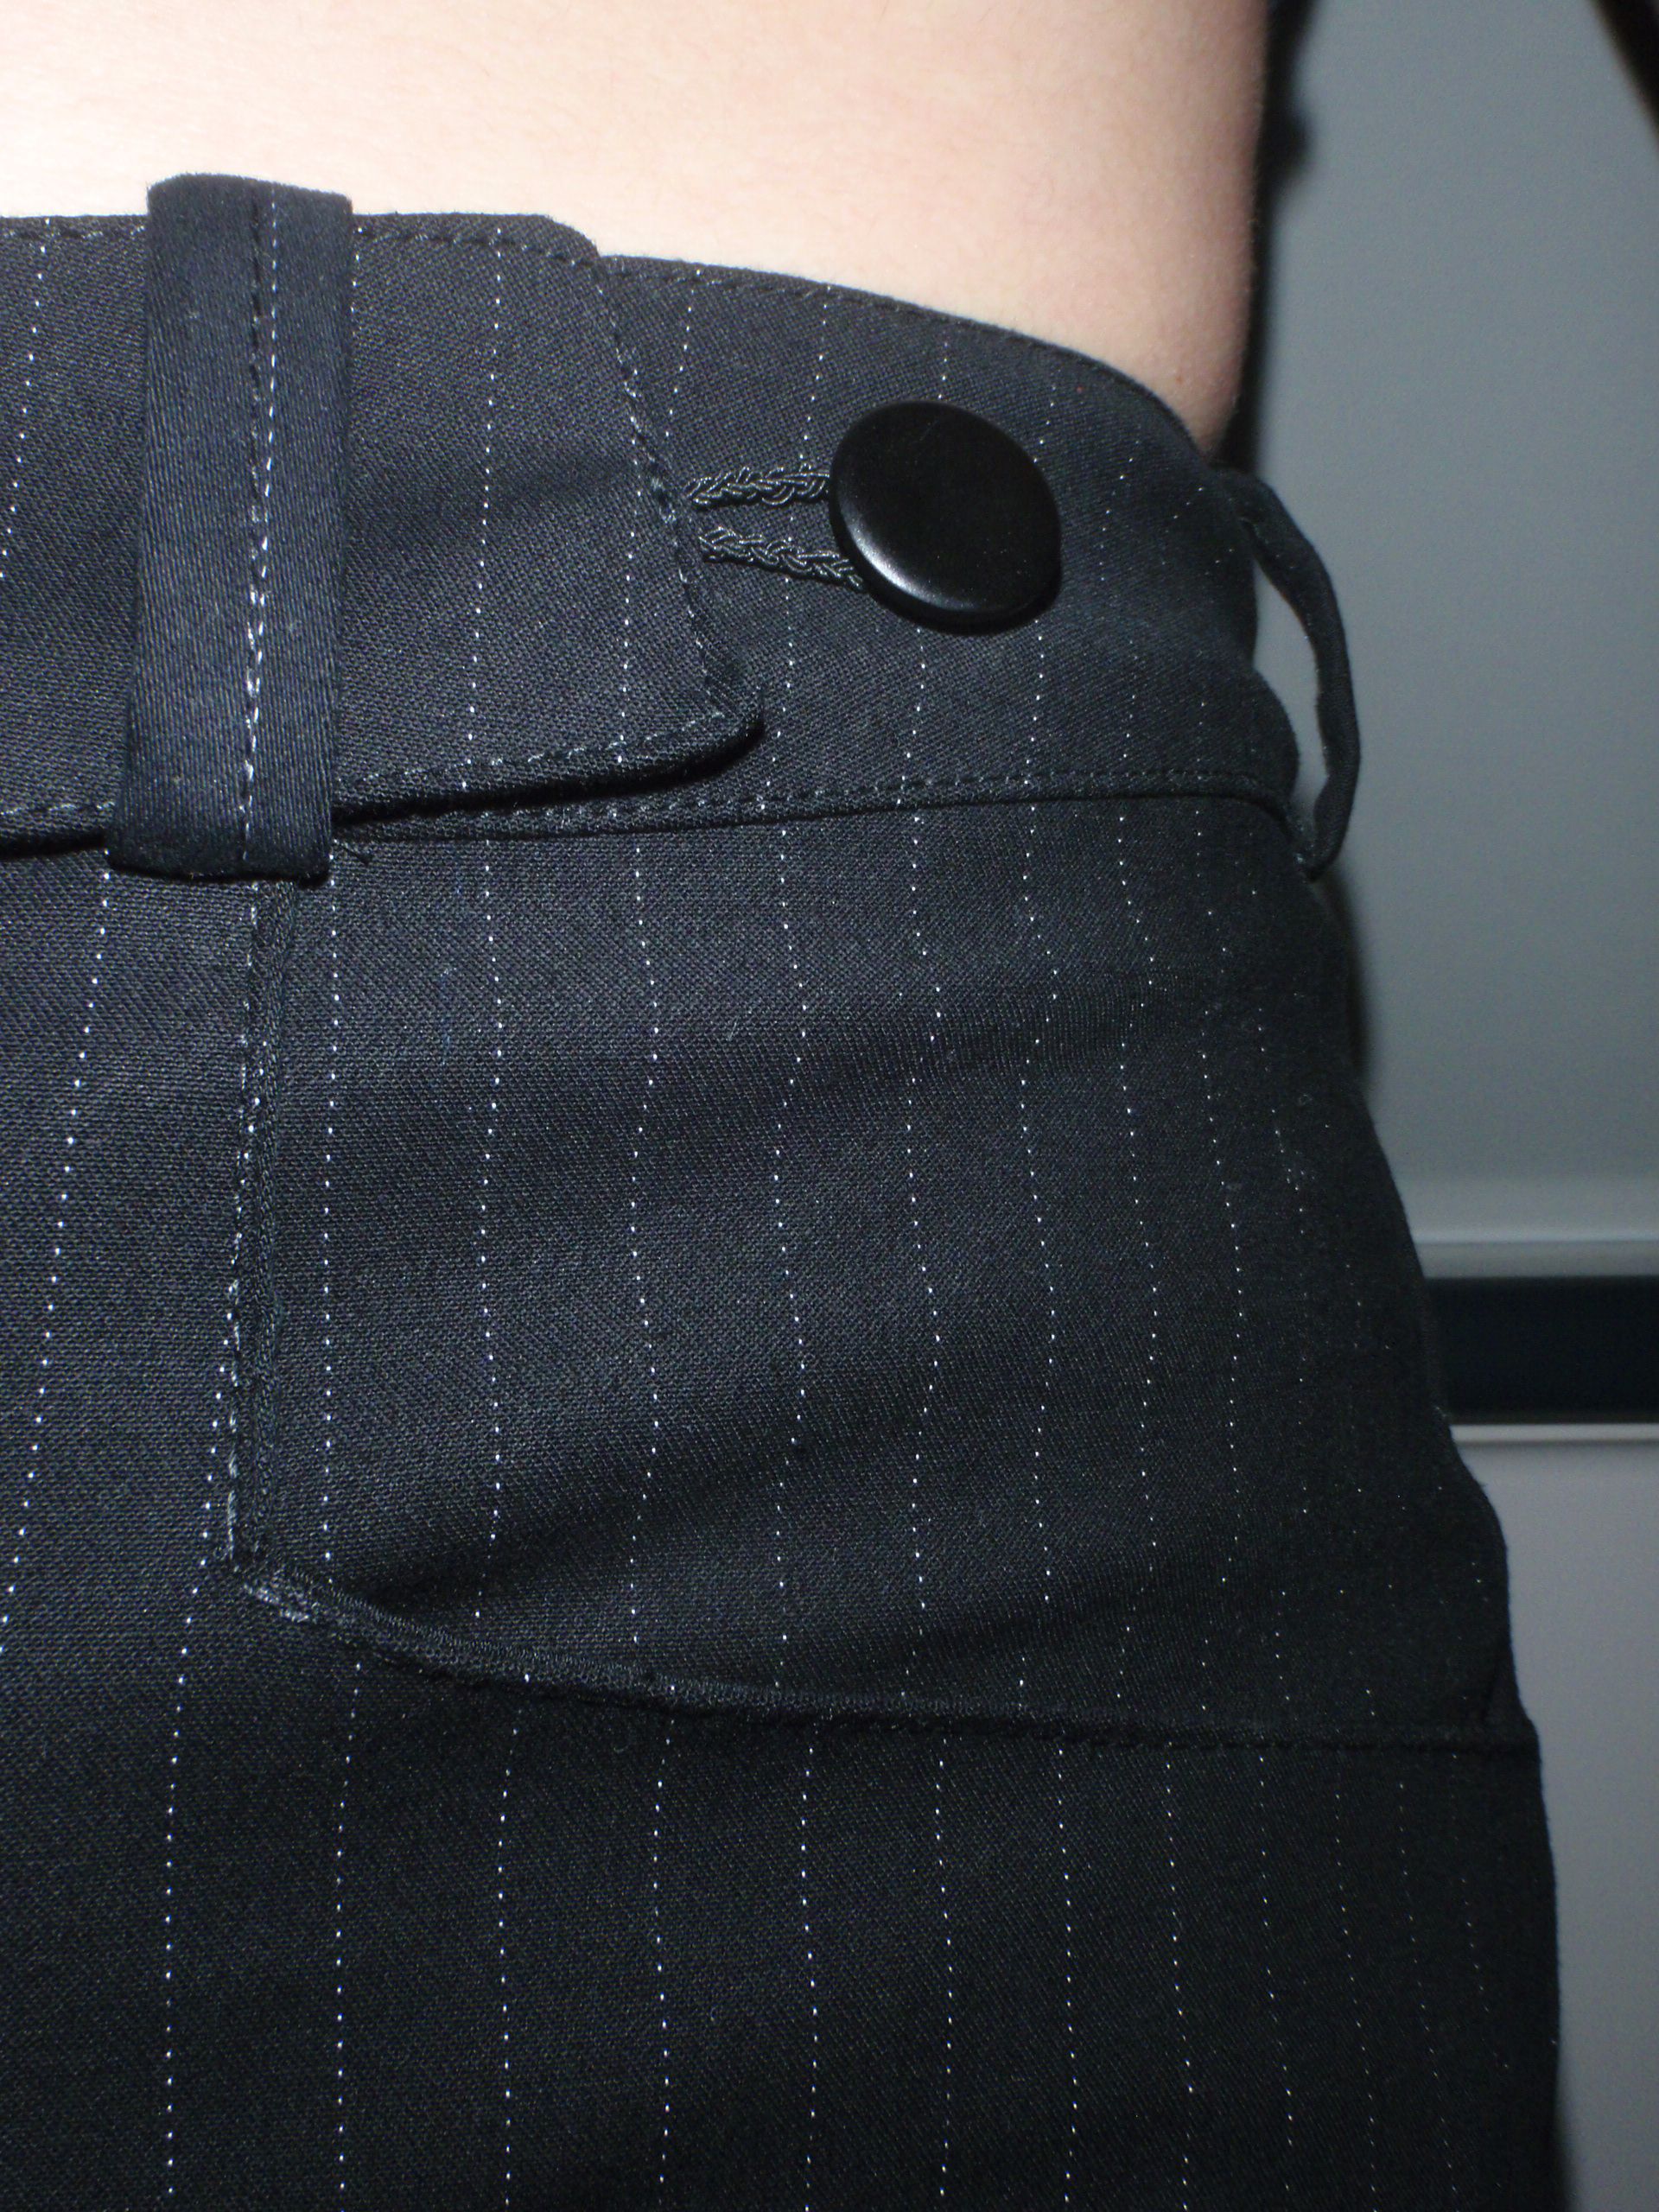
Live and learn people, live and learn. I have now learnt that on these pants slanted pockets, like in these pants, stand out a lot and make me look really fat so I changed them to squareish pockets which don’t stand away from the body. Furthermore, I learned that I need more room in the front crotch because the inseams are too close to the front for my liking. I also learned that my ass is strange and needs a lot of taking in at the top, and therefore an extension on the bottom of the waistband. I’ve learned how to make fancy zipper fly thing from this wonderful tutorial, without which it would have looked a million times worse (*takes a sneak peek at her first attempt at pants and groans in disgust). I did some topstitching around the waistband which also makes it look much nicer. I added belt loops somewhat following this tutorial (although not fully because I attached them differently (the fabric was too thick to be backed over like that). I tried using my blind hem foot to make a blind hem, and failed miserably, twice. So I gave up and just double folded over the hem and stitched it. I did use my blind hem foot for the topstitching and the zipper outside (and of course the zipper foot for setting the actual zipper). I braided some elastic and attached it to the waistband to go around a button, because the band was a little to short to accommodate a button after the belt loop. I put in a hook and eye thing for pants for the first time. Also, I matched stripes in the front and back! Sadly the sides were impossible to match/I didn’t think about doing that. I made do with small bits of fabric and cut the back waistband pattern to be able to piece it from scraps of fabric.

All in all I think I learned a lot from this project. Now hopefully the weather will clear up and I’ll be able to wear it outside!

Finalemente

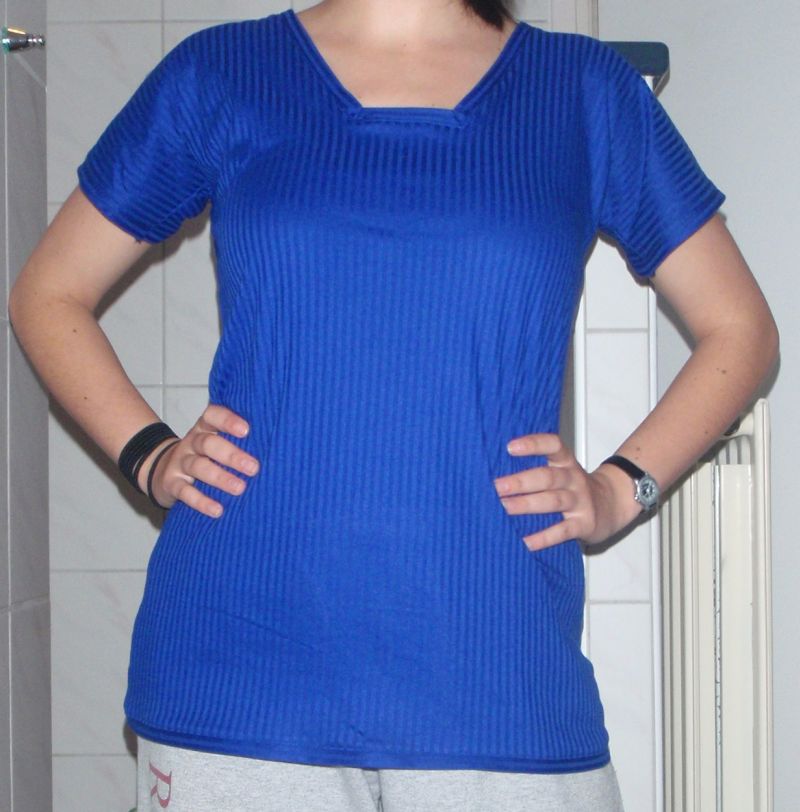
I have.. finally finished the shirt I started making ages ago. It’s another blue one, made from the same fabric as this one, but now with a nice neck and hems. It of course took forever to finish it. I’ve had it serged and ready for final touches (attaching the binding strips to each other at the corners and an extra row of stitches to keep the serged ends under) for at least a month now. However, I never did find the time or willpower needed to actually finish it.

Tonight I finally did, this might be because I had started another project last week (some shorts) that were also in the last stages of finishing, but I’ll tell you about that tomorrow.

So now the blue shirt is up and ready to be worn! As of right now I’m still very happy with it, although I haven’t road tested it yet, due to it only being done a couple of hours ago.

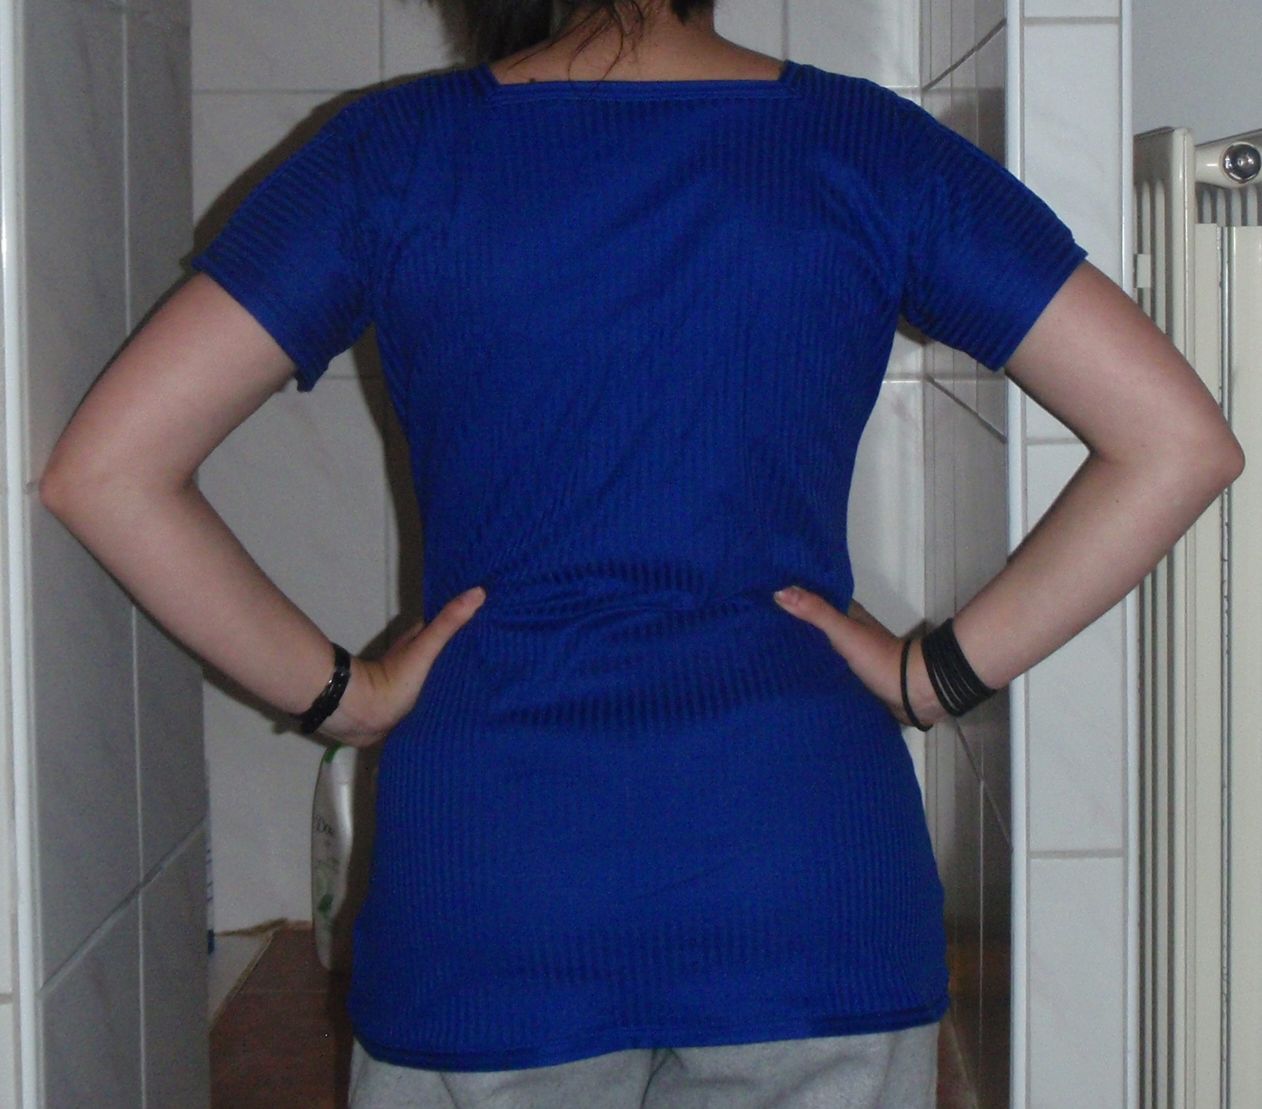
This is the shirt, the front has a sort of U(?) shaped neckline, and the back a square one:


It should be nice for summer and I’m planning on wearing it frequently, just like I do the other blue top. I also hope to do some more sewing as I’ve got break from school now. Finished it all up and although one result was disappointing (and has now thrown away my chances for a cum laude distinction; gah, I hate policy!), the others were all good and the year has been successful. Up to a new year with new challenges, changes and people!

Happy crafting!

Wedding Madness!

We received an invitation a couple of months ago for a wedding. My cousin was going to marry the mother of his 2 children. So I figured, what a good opportunity to make a dress. I started one, and discarded it quite soon after (it was hideous, and didn’t fit at all). I think the pattern was just screwed up because even the models looked like it didn’t quite fit.

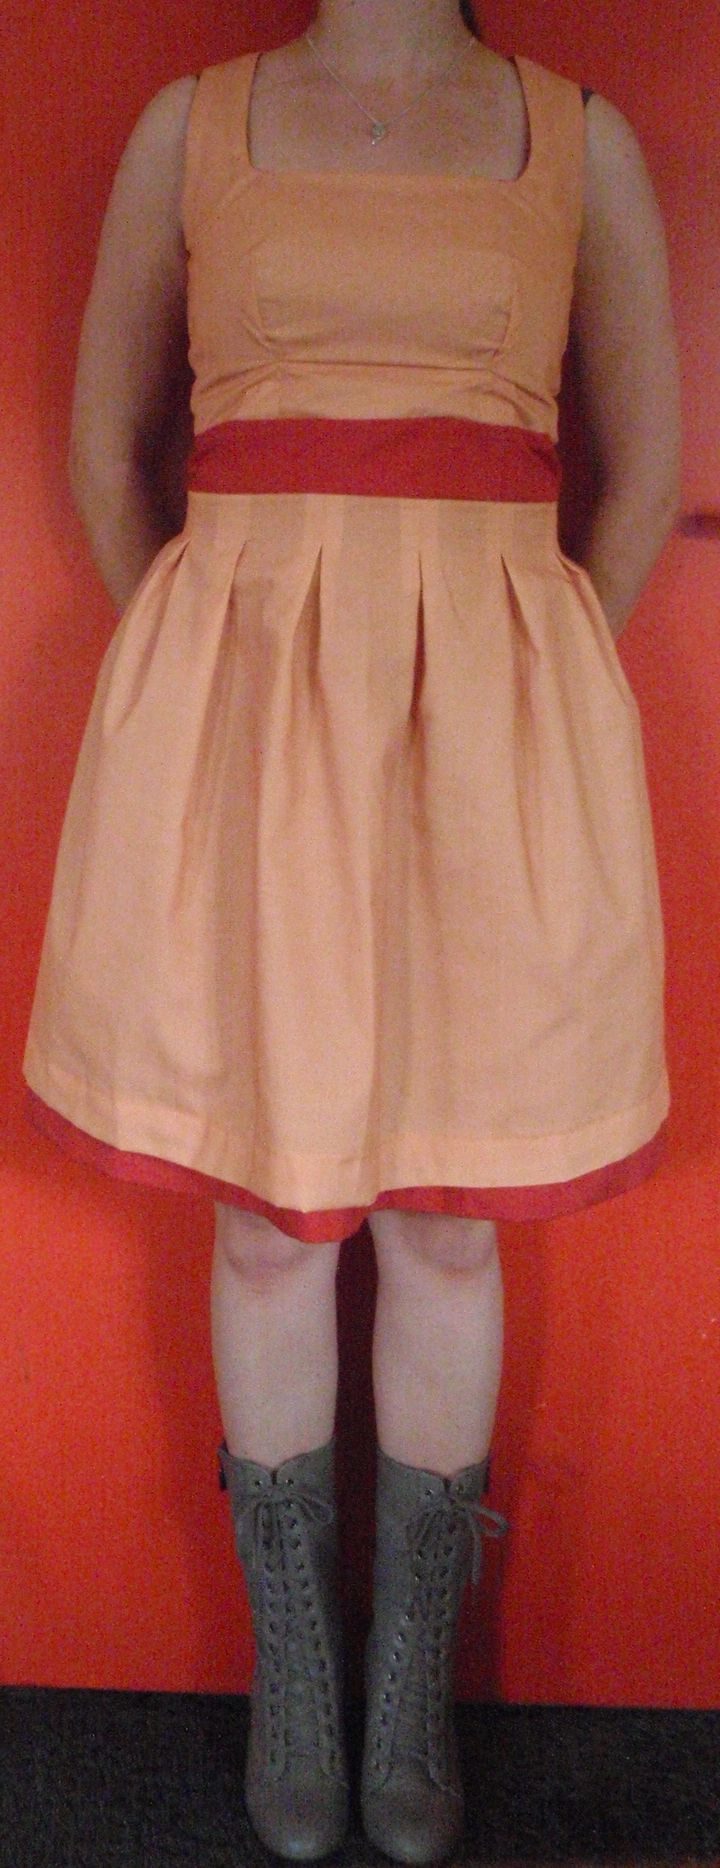
Some time after the first try I was wondering around burdastyle, where I found a really nice dress (link). With a free pattern. So I figured I’d attempt that. Figuring out how the top should fit took some time. And I had to make it in the evenings because I was working that week too. Which was troublesome. After I’d finished the top bit, I had to attach the waistband, which took one or two more evenings, which sounds long, but alone it’s very difficult. And of course zipper troubles, which took forever. In the end I was literally sewing until the minute before we left. I cut of the last bits in the car and arrived splendidly at the party. I had a very nice time and got a lot of compliments, about my hair, appearance and dress. That made me very happy.

Here’s the result of my hard work:

Dress

Well Hello There Finished Project!

So I tried it yesterday, making something little. But I couldn’t even copy the pattern right, thus gave up and went to bed. With a “try again tomorrow” sort of idea.

And I did, I started something when I came home, and it’s finished now. So I’m pretty happy. It came about like this: I’ve been reading about Colette patterns for ages now. Some of my favourite blogs mention them quite often. However, I’ve always found them really expensive and not very interesting really. So I never purchased any. But there’s a new pattern out. The Sorbetto top (here), which is free. And us Dutchies sure like our free stuff. Today I got another reminder that it existed from one of the bloggers over at the sew weekly. So I thought, it’s supposed to take little to no time, it’s free, and it absorbed basically very little fabric (I’m quite tiny so I only needed the length of the top in fabric).

And they’ve been right, it is really easy. It’s free, and it looks quite ok. I just followed the instructions. I would actually make it longer next time, since it barely covers my waistband. And I might make the arm holes a little bigger. I made it in the same fabric as my UFO dress from the vintage Simplicity 1236.  But this one is finished! Unless I decide to add some buttons or something, but that’s not necessary yet.

And this is the result:

Sorbetto Top

I’m so happy I found my craft gene again!

Just for fun

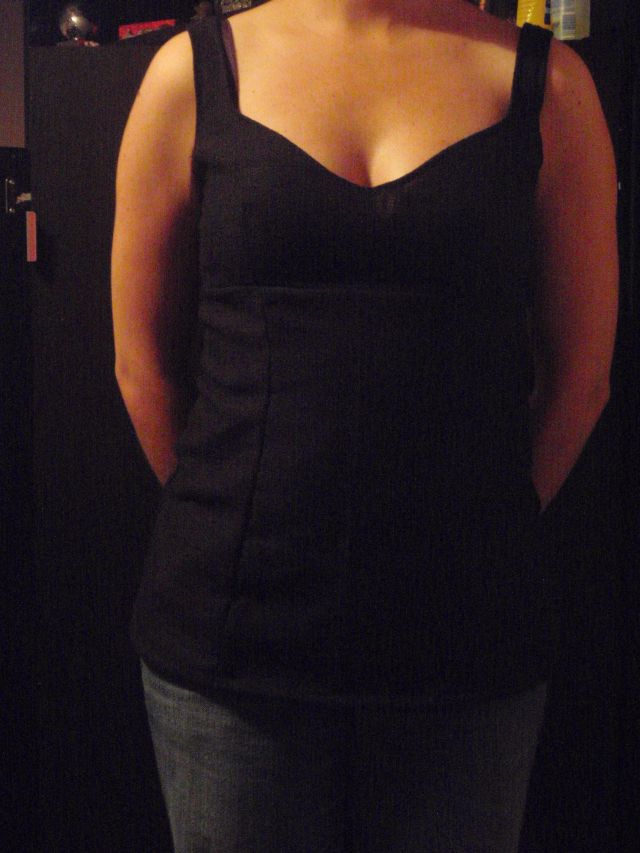
So 8 days ago I handed in my exam for the course I was taking at home, next to my internship. Having finished the exam meant I had no more homework to do, and lost of spare time. Thus, I had to start doing something else. After reading a lot I felt like a project, preferably a new project. Since I’m sort of not interested in all my UFPs (which is why they are UnFinished Projects), I wanted a new one. This time I wanted to do something different. I’m used to being cold, and covered up. I feel naked very, very quickly. Knee high skirts are short for me (although, those are the only length I have since I rarely wear any skirts). But since I’m changing my life around a little, I figured I could change my wardrobe a little. So I made a top, based on a wedding dress in one of the sewing magazines I have. It looked quite low-cut, but I liked the shape so I tried it with a bit of (I think) black linen. And I personally think it worked out great. Here it is:

Top

It’s quite dark, since I always finish my projects at night for some reason and then want to take a picture as to not forget to do so. I quite like the top, I just took the pattern pieces from the bust part and added 35 (I think) cm of the skirt pieces to it, and it fits fine. It’s wonderful that you cannot see the thread at all since I’ve had some problems with the machine and if you look really, really closely it shows. I showed it to a friend and he thought it was fine, but it’s really strange to be able to see your bra when you look down, I’m very not used to that. Still I wore it today and it was fine, might shorten the straps for a new attempt. Anyways, I finished this one somewhere in the middle of the week I think, just didn’t find time and energy to write this, too busy reading. But today I’ve also worked on some projects, I’ll share later. So until the next.. craft away.

From UFP to FP

UFP, UnFinished Project
FP, Finished Project

I think you can see where I’m going with the title of this post.
Today I finally finished one of my million UFPs. This one in the shape of a dress I practically finished over two years ago, only one little thing needed to be done.. The Hem.

I don’t know about you, but I’m terrified of hemming. I’m always afraid I’ll make them too short, or incredibly uneven or that I accidentally cut something of that I wasn’t supposed to. But in order to really finish a project hemming needs to be done. And being without a dress form and never trusting my own eyes when it comes to having a straight hem, I need at least another person to help me with this.

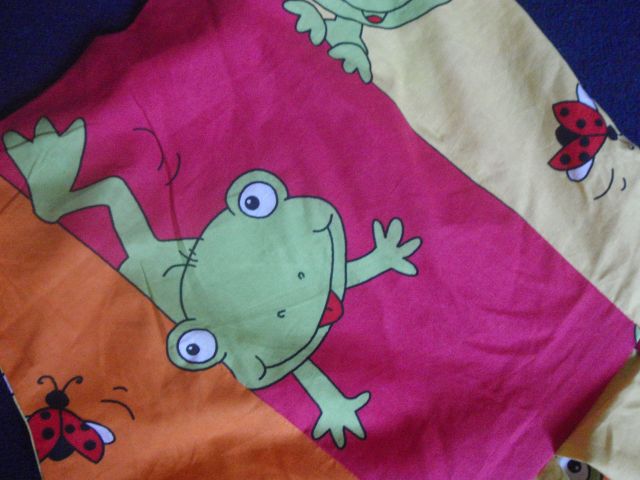
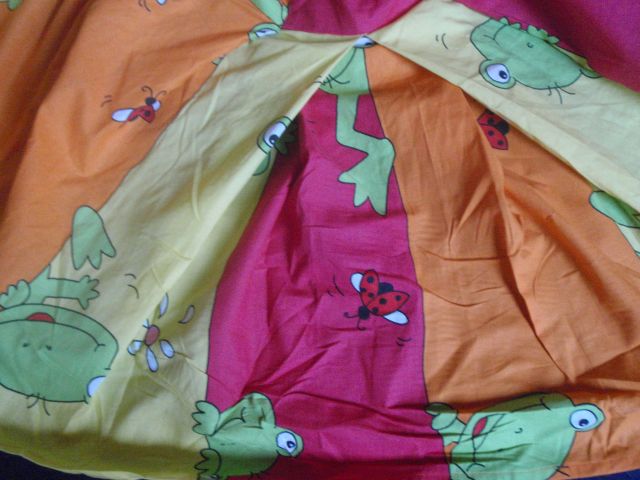
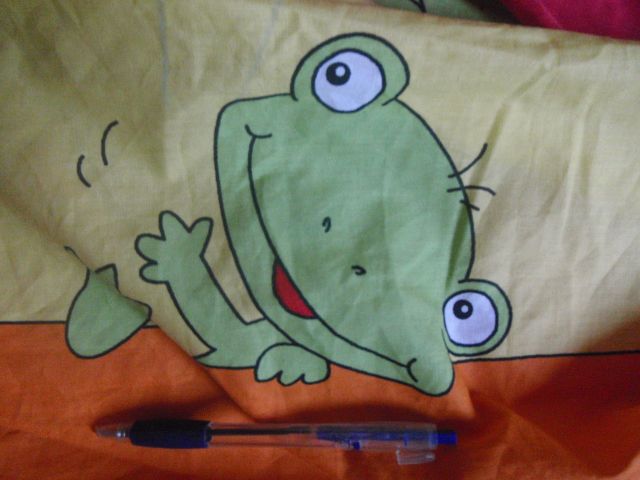
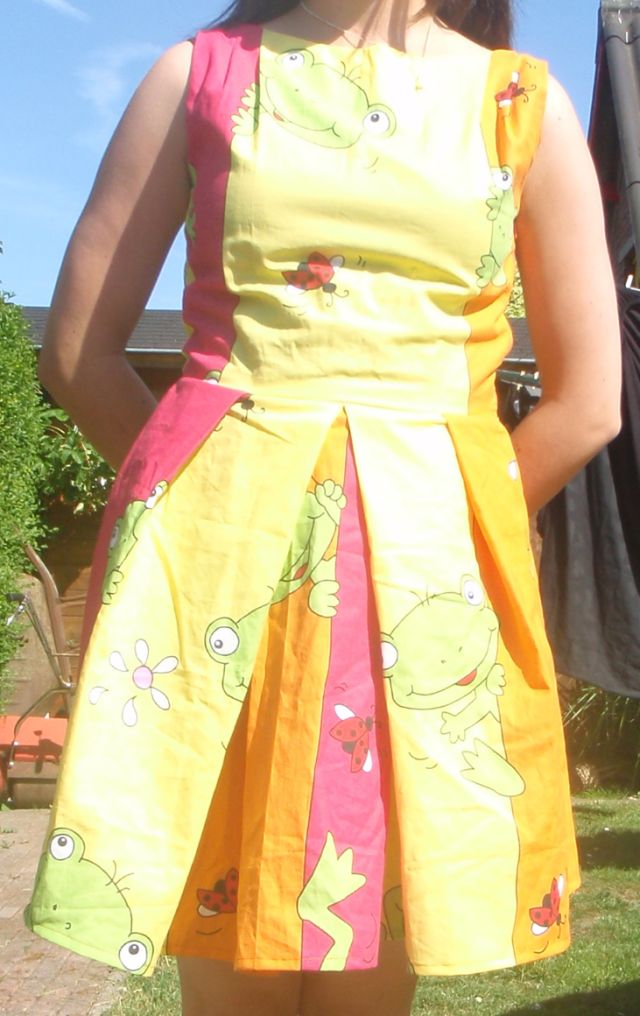
So today was a wonderful sunny day, I was reading in my bed for most of the morning. When I finally got up my parents announced that they wanted to go camping tonight with the two of them, so I helped them pack a bit, still in my pyjamas. Eventually I decided that I needed to put on some real clothes. But the only thing I wanted to wear was this dress that I had, which was almost finished, only the hem needed to be done. The reason I wanted to wear it is because it is a perfect summer dress, yellow, orange and pink with big green frogs and red ladybugs (I think it’s supposed to be kids curtains).

Frog Frog Frog with pen

The most right picture has a pen to show scale, they are really pretty big, my cute frogs. I really like the ladybugs too.

So I put it on and walked downstairs to show my mother. She told me that it looked pretty straight and that I should hem it the way it was. So I did, and it worked (I was amazed). Something I’ve dreaded for over 2 years was finished in half an hour. Eventually I also decided to add pockets, since dresses without pockets are like a bike without a key, nice to look at but not very practical. And that worked too, I put in somewhat invisible pockets in the side seams, and even remembered to colour coordinate so they would not be very obvious.

And here it is.

Finished Dress
This is the finished dress

Sorry for the colours, but I wanted to take a picture outside, but the sun was somewhat too bright I think. So the frogs are not really very visible, but they are definitely there.

So what did I learn from this project? That two years ago my sewing skills were abominable (the inside looks like it’s been chewed by something), that pockets next to zippers aren’t nearly as difficult as I thought, and that with a little help hemming is easy. I hope this will help me overcome some fears and hem more in the future. Lets finish up some other UFPs soon!