Cover-Up

Some people are natural heaters, some people are natural freezers. I’m a freezer, which means that I’m cold a lot. So, I’m always looking for that extra layer. At long last I figured out I needed a bolero. I re-found the Your Style Rocks free pattern ‘Our Own Pretty Ways‘, a hooded bolero pattern. I like hood and I liked the style of this one, so I decided to make it.

First step was printing it out and taping it together, that went swimmingly. Then cutting out the pattern pieces and figuring out the fabric. I wanted to see if it could fit on the fabric left over from the red dress, and it did! I did have to eliminate the hood lining, but I found a solution for that. It sewed together easily, I made it basically in one evening, with an hour or  so for additional finishing. These patterns always seem to go together well (at least the two I’ve tried).

Close Hood

I made two main changes. The first was not lining the hood. I didn’t have enough fabric for a full lining, and I quite liked the pop of the red. I solved the exposed seams issue by cutting a strip to go over the centre back seam of the hood. I also cut a second front of the hood as a type of facing in order for the drawstring to be applied. The second change was to cut of the end of the sleeves and apply them like the bottom band. I thought that would be a nicer finish. I also stitched along those seams again to create a coverstitch type look (and to keep the seam allowances out of the way). There are three hooks and eyes to close the front and shoelaces as drawstrings.

 Stitching Bolero close

I like how it looks, and I sort of feel like Morticia Adams with the long sort of bell sleeves..

Bolero front Bolero back

I also quite like it with the red dress from yesterday. Which means that I might actually be able to wear the red dress to work, or something. Maybe not, we’ll see. They are getting used to my ‘interesting’ clothing choice, I think.

Dress bolero

I’m also knitting cable socks, planning plaid pants, making cards and working on my coat, so hopefully I’ll have something to post soon again.

The Red Dress

Some time ago I bought a very pretty knit fabric, one side was red, the other side was black. I couldn’t figure out what to do with it, it was too pretty to simply make a t-shirt, to light to make a real sweater, and I had no inspiration. However, at some point in November, I realised I needed a new outfit for a party.

The story for that is the following. My dad turned 65 this year, and in the Netherlands you get your first payment from state pension three months after your 65th birthday. We decided that it was sufficient enough a reason for a party, especially as the birthday itself was not really celebrated. So it called for an outfit.

I scoured the internet and my stash of pattern magazines. I couldn’t find anything. Last ditch effort was looking through all my pinterest boards to see if I liked anything. And, surprise! I did! It was this pin that set me off, and I soon found the back by clicking through to the original listing. I decided to recreate that dress in the red/black fabric, as I thought a contrast flap would be nice. I also found 11 shiny silver coloured buttons that I figured were perfect.

Insides Shiny button

The pattern I used was my t-shirt pattern, lengthened such that it was one meter long, then I freehanded a seam to mimic the original. I also made sure I had two centre fronts and two centre backs, to be able to clean finish the flaps. The stretch is along the width, not along the length so sewing the seams was clean sailing. I did in the end take out quite large chunks along the back seams to counteract (what I think is a) swayback. I did not feel like sewing buttonholes in this fabric, and as it is stretchy I can get it on over my head, so there was no need for closures. This is the end result:

Dress front Dress back

I like it, it is comfortable and quite warm due to the doubling of the centre panels. People at the party also liked it, so that was good! Next up, different project from the same fabric.

Rain

It currently feels very autumny (i.e. rainy), in the Netherlands. This would usually not be a problem, with me having central heating and a roof over my head. However, I will set off again this Friday for some larping. Rain and larp are, in my opinion, not a good combination for a few reasons. First, I get cold ridiculously fast and generally don’t warm up by myself, and rain is cold. Second, rain makes things wet. Not all my things are waterproof, ergo, my stuff gets wet. Some of the stuff won’t mind, but other stuff does mind. My feet for example, aren’t usually covered by the most waterproof substances out there in the world. So when the setting up crew posted the picture below to Facebook, I had to think of a plan, stat!

Rain

Now, we are all hoping that the rain stops quickly and doesn’t return until, say, Wednesday. The other thing we are hoping for is that the water that is now there will drain away quickly. However, in case thing two doesn’t happen, I need something that will keep the feet dry. To accomplish this, I decided to purchase rubber boots. I do own red rubber boots, but they are at my parents house, so that doesn’t work very well.

This plan did pose another problem.. Rubber boots don’t do very well in a medieval setting, especially when they have a floral design (couldn’t find plain black ones in my size). I need to cover those babies up with something. So in the same shop (where they have EveryThing), I also bought a faux fur pillow case, thinking that I could make some faux fur boots. I basically drew around the boots, added some length to the top, cut it and sewed it. Then I attached elastic at two points in order to keep the cover on the boot. I’ll let you know if they worked out!

On and off Bottom

Most left is the boot, without cover, middle left a boot with cover, middle right the bottom elastic and most right another boot with cover. You can see the ‘improvement’ the cover provides. At least when you consider them needing to be semi appropriate in a medieval setting. The other improvement is that the top doesn’t cut into your leg when there is a layer of faux fur in between. Now off to bed to see if I can get enough sleep to get the remainder of my stuff ready in time for tomorrow.

Forgotten Graduation Dress

While writing the beginnings of the next post, I found out that I’d never told you about the Graduation dress I made for this years Summer Graduation (this was June…). I still want to because I really like that dress.

Years ago I was wondering around the interwebs looking for nice patterns when I found the Eva Dress pattern by Your Style Rocks. I thought it was really nice, especially since I like cowls. It also seemed fairly easy to put together, so for last summer’s graduation I decided to make it. It started as about 2 meters of black knit fabric with horizontal wavy stripes in red, yellow, blue and green. I cut out the pieces, but made some modifications.

  1. Shortening the dress before even cutting it out, I’m only 158 cm (5’2”, approx.) and skirts hitting below the knees isn’t too flattering for me. So I took off around 9 cm.
  2. Using only the lining piece from the middle section but reversing it to serve as the actual middle piece. I didn’t really like the gathers and didn’t think it would work in this fabric. I also put it on the crossgrain to create some difference.
  3. I added a hook and eye to the back, where the instructions tell you to sew a pleat.

It went together really easily and hemming actually wasn’t a disaster either, although it is quite a deep hem. Yay! I like the shape, the skirt is the right length, I like the colours, I’ve actually worn it to other events too and I think it’s just cute.

Front Back

Here you can see the front and the back of the dress. I’m still not entirely sure if placing the middle on the cross grain was a good idea, but I also don’t really care I think. You can also see the pleat in the back.

Neck Hook & Eye

Some details, the cowl neck, which may be a little wide, but it’s fun to wear. Also, the hook and eye that holds the pleat in place.

Hem

Last but not least, this is how deep I needed to hem it. I did serge all the insides, but I think my serger is a little on the fritz so it’s not always very pretty. Next post will be the Convocation dress, the dress I made for this week’s official event.

Interrobangs and Cats

A while ago, I was browsing the internet (and pinterest) looking for interesting earring inspiration. I found a few pins that I really liked, namely this one, this one and this one. And some others, what the heck, here’s my entire board of crafty things. Anyway, a friend of mine had her birthday a while ago and I still wanted to give her a small present. So I delved into the fimo stash and produced ‘inspired’ by earrings from the three pins above.

Let’s start with interrobang. The interrobang is a symbol used to ask a question in an exited manner, expresses excitement or disbelief in the form of a question, or to end a rhetorical question. It was a marketing idea in the sixties and never really took hold (Wikipedia), but I for one love both the name (BANG!) and the idea it expresses. Nowadays, the interrobang still isn’t used, but we do use the two symbols the interrobang is composed of separately. Say what‽ or She’s pregnant?! (Again Wikipedia). I came across the name at some point in the past when I was reading a post about (potentially) useful punctuation marks. That might also be where I learned that the &-symbol is called an ampersand. Which is information I actually regularly use in my day-to-day life.

So, I didn’t make the interrobang, I just really wanted to talk about it. I did make earrings with a loose ? and !, one for each ear. Black & Metal, a good combination right? I deviated from the original by putting the pin through the question mark completely. I actually like this maybe better? Anyway, here they are:

 Bang! Hanging Bang!

The second was an adaptation from the other two pins, one for each ear. So one dangling cat, and one graceful jumping cat. Well, my cat faces aren’t nearly as nice as the inspiration, but I still quite like them. The friend did say they were heavy, so we’ll see if they work out. It was mainly for fun anyway. So the pictures you’ll see will have a plastic cookie box in them. My ears aren’t pierced and I couldn’t find anything that would work well to show they were supposed to look, so a pierced cookie box it was.

Front Side-ish

 Side Butts

I also need to improve on cat faces and I still want to try the biting shark, and maybe mix it with a surfboard or something. For now though, I liked the results and I think my friend was somewhat interested in them. I had to wait until I’d given them to my friend before I could post them, you understand. On a different note, now I can already tell you that my next installment will be about the pants I finished yesterday and test-wore today. Very high waisted, woolen red pants. I love them.

Bats!

What do you do when you have to housesit the building you work in and literally only have to get up every two hours? Do you also race home to collect your fimo stuff and create little bat earrings with your friend? Well I did, in the first weekend of this month.

We found the inspiration here, and decided to make our own versions. Mine are a little cross eyed, which was exactly was I meant them to look like.

I smoothed over the back such that they are one whole. I like them. But I haven’t got my ears pierced, so I think that I will hand them over to a friend. I think I’ll make some more fimo stuff in the future. I forgot how much I liked it, I also found some more inspiration which I’m gathering here. If you’re ever interested.


Woolly Necklace

No, not a woolly jumper yet, although I’m getting there. I am slowly finishing up a green sweater with a side front closure and weird collar. However, in the mean time, I made a few necklaces. I have a colleague who owns a necklace made of a lot of rolled fabric strips in coordinating colours, all in hues of blue. I really liked that idea and when I found some interesting yarn on sale, I figured I’d try to recreate that necklace. This was the yarn and the first part of the necklace.

OLYMPUS DIGITAL CAMERA

I wanted to figure out a way to make the necklace without using any knots in the yarn. So I looked through my stash of jewellery equipment and found some bits that have a hole in the top and fold over to grip whatever you put in. I had about 20 of them. I made the first necklace, the red one and didn’t have enough bits to make another one. So I looked through all the shops I could think of to find bits to make more necklaces. Couldn’t find any, and I didn’t know what those things were called, so ordering them was difficult at first. Using some interesting methods I eventually found out that I was looking for “Fold Over Cord Crimp Beads”, and I got 3 packets of 150 bits in 3 colours.

OLYMPUS DIGITAL CAMERA

To make the necklaces, I put the yarn in the bits, fold over the sides and cut of the yarn that comes out the top. I do this for 8 or so strands and then I string them on a jump ring. Another jump ring is added and the other ends are strung on another jump ring, then the second jump ring with closure are added. This produced, in my opinion, a nice finish. You can also first braid part of the strings or add a metal chain or two. I personally really like the mixed media approach.

OLYMPUS DIGITAL CAMERA OLYMPUS DIGITAL CAMERA

I have made three so far. Of which I only took pictures of two. I sent the third one to a friend, I hope she likes it.

OLYMPUS DIGITAL CAMERA OLYMPUS DIGITAL CAMERA

This one has 5 red stands, one black and a doubled chain, the bits are silver coloured. This one was the first attempt and I really like it. The second one, below, used all the colours, two strands of each, one chain and old copper bits. I twisted this one a bit before I put it on. Which is an alternative method of wearing it.

OLYMPUS DIGITAL CAMERA OLYMPUS DIGITAL CAMERA

So this was my new project. I like it and I have still quite a lot of the yarn left over. This means that I can experiment and make all kinds of things, using this approach. Maybe even add large beads or knot, braid or twist strands. The options are endless!

Shorts

I’ve been participating in Me Made May ’13 this month. There is one problem. I’ve made quite some dresses and skirts, but I don’t regularly wear them. With being forced to wear me made items, I do have to choose some of those. Yesterday I found out what I find the biggest problem with dresses and skirts. Nothing covers my legs! Yes. This is obvious indeed.

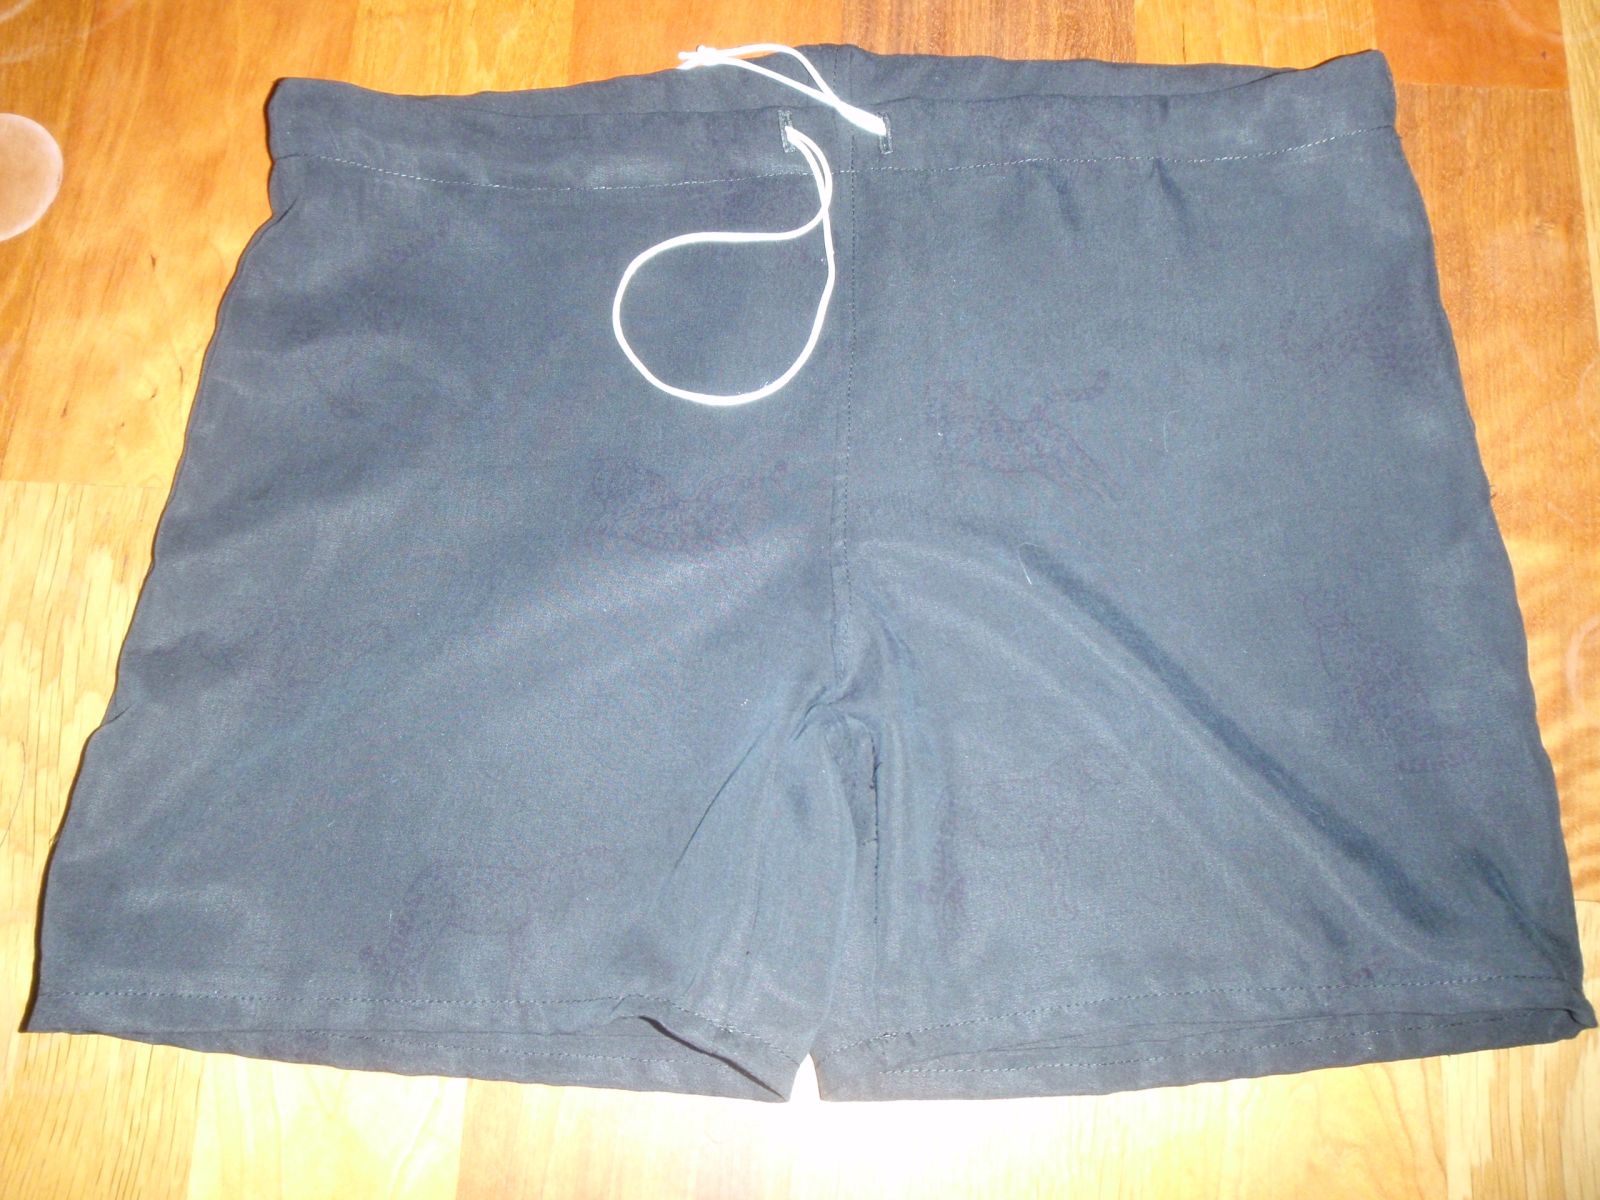
So is the solution. Shorts! Makes me feel decent, but no one can see (unless I bend over and touch my toes and hike up said skirt). I found some slinky stuff in the stash that I’ve tried to use for a blouse before, but that project failed. It’s got little cheetahs or jaguars or other large catty creatures on it, almost invisible though. I semi flat felled the crotch seam, french seamed the sides and inner leg seams, doubled over the hems and the top and put some elastic through it. While the fabric was really shifty, I managed to finish it within 3 hours or so, a record! It’s not a nice pair of shorts in any sense of the word, but it does serve its purpose. The pattern is the same as for my pajamas (here and here).

Front and inside respectively. If you look closely you can see the cats on the left.

Shorts Shorts

Sewing for someone else

I got asked if I wanted to help someone. It was going to be an easy alteration to a vest that was too big. I said yes, and he came over for me to pin. I never hit him (yay!). It took 2 centimeters in each side seam, and 1 on the shoulders, but it does look a lot better now. It even looks quite nice on the inside:

Shoulders Side seam

If I do say so myself. It fits a lot better than it did before. Not so very much too big. I don’t know if I’ll do it again, because it’s nicer to make things for me (I follow in the steps of the Selfish Seamstress), unless they are real presents. So we’ll see in the future what happens.