Impromptu Sweater Dress

From flat fabric to dress in less than a day.

This morning after slowly rolling out of bed at 10:20, I wasn’t sure what I was going to do with my day. So I did some hula hooping as a form of exercise and decided that I wanted to wear a sweater dress. Small problem, I don’t have one of those. However, I do have the Lekala Tunic Pattern nr. 4742, the Pattydoo Nelly sweater pattern and a large fabric stash.

I pulled out this sweatshirt type fabric with a soft grey fuzzy backing and got to work. First, I brought the Lekala pattern back to its original state without the shortening required for the flamingo sweater. I grabbed the hood pieces from the Nelly pattern and pinned it all to my fabric. I added a little length to the bottom of the dress pieces and cut it all out. Sewing it went smoothly, only one unpick where I put the center front hood facing bit in the wrong way round.

Around 16:00, I had a full dress together and was trying to decide what to do with the sleeve ends. I didn’t really feel like hemming them and then I remembered that thumbhole cuffs *exist*. So I made some of those, following some tutorials on YouTube. The bottom of the dress was hemmed and then I had to mend a tiny hole on the front. 17:15 and the whole thing was done! Less than a working day to finish this thing. It’s nice and warm, just in time for summer (not), and I am yet again certain that I will never participate in a speedy sewing competition…

Cowltopus

Joining a mystery knit along to make an octopus inspired “cowl”.

For the first time ever, I participated in a Mystery Knit-a-long (MKAL) last month. A KAL is a project where you get some part of the instructions and should complete those in a set time period. Mystery just means that you haven’t got a clue what the end result is going to be.

Sometime in September, I saw the announcement for the Cowltopus MKAL by Laura Nelkin, an MKAL that was to take place in October. It was on sale and it seemed like a fun idea, and I really like octopuses, so what could go wrong? Well, I forgot about it until about two days after the first clue came out and I hadn’t done any of the prep work. The prep included finding the right yarn and swatching it. I found the yarn I wanted to use, but it still needed to be dyed.

The pattern calls for DK weight yarn around 225 m/100 grams. There should be a main colour and a contrast colour, and both can be composed of mini skeins or just a single colour skein. There should be contrast between the MC and CC and gradients are encouraged. So I looked on the internet for different kinds of octopuses and settled on the quite elusive Glass Octopus Vitreledonella richardi. To match the inspiration, my MC was one full skein of Ultra DK in light blue. For the contrast, I chose to split a skein of Ultra DK into four section and dye them in a gradient from yellow to chestnut/brown.

Once the yarn had dried, the gauge swatch got going. The swatch indicated that I had to size up my needles a little because I couldn’t get gauge otherwise. The first clue had come out on October 3rd, and was supposed to be done by the time clue 2 would be released a week later. I managed to get my yarn dyed and swatch ready by the 7th. On the 13th, I finished clue 1, to get right back on with clue 2.

Clue 2 went really smoothly and was actually finished on time, done by the 14th. This wasn’t super challenging yet, so I sailed right through it. The only new things were magic knots and needing to pay attention to the stitches. The third clue was where it got interesting. There were two options, brioche knit or ribbing. So I decided to learn something new and got going on the brioche. It wasn’t as scary as I was worried about. The instructions and video companion were very helpful and it all went according to plan.

Clue 4 was the last clue and where we were finishing the cowl – that turned out to be a hood. It was more brioche but now with waves in it. Actually quite fun to knit! The pattern is designed in a way that you shouldn’t run out of yarn unless you choose to ignore the instructions – my bad. I was supposed to start the end with 4 grams remaining, but I had 3.6 grams of yarn left. In the end, I had to tie in 15 cm of leftover yarn from the dying process to get the last few stitches finished.

I enjoyed learning new things and not knowing exactly what was going to happen throughout the KAL. I’m not discounting doing one again even though the resulting hood isn’t totally my style. I’m very happy that one of my colours was solid, because the finished hoods from other knitters are overwhelmingly busy. I’ve not found much reason to wear it yet, so I’m not sure what I’m going to do with it. Sometimes having a fun process is more important than having a good result.

Come Rain, Come Dinosaurs!

When the world still doesn’t think adults should wear dinosaurs, you make it yourself!

I finally, finally (!), managed to cut into the most expensive fabric that I’ve ever bought a long length of. This softshell fabric with dinosaurs has been hiding in my hoard since September 13, 2017 when I bought it at the Stoffenspektakel in Goes. The 13th of September 2020 was coincidentally the day that I started cutting out a new rain/fall coat. I only found this out when I went looking for the date when I bought the fabric and was pleasantly surprised.

On to the coat. The pattern is the Pattydoo Susan with optional add-ons of a concealed zipper in the hood and cuffs. One teeny, tiny problem with this pattern is that it is in German. My German is nearly non-existent. Why choose this pattern then? Well 1. Because it’s awesome and only 3 euro (HOW?!). 2. Google Translate exists and 3. They made an instruction video in which they show all the steps (still in German though). I hoped that with the video, I’d manage to figure out how to make this thing. So about 296 replays on – I kept repeating every second sentence they said to figure out what to do – and I have my coat!

Finished inside neckline and hanging loop, neck protection and hood snaps, concealed neck zipper, double sided zipper.

I’ve never made as many trips to sewing stores as I have done for this coat. That’s partially because I kept forgetting that I should bring the fabric if I wanted to colour match. I’ve gone for thread, and then for elastics, and then for velcro and then for zippers, and for more zippers and for cuffs and for the adjuster-things on the hood.. Let’s just say that the local shops must be fed up with me and my stupid German project. Anyway, once I’d gathered most of my materials, I had to start cutting into my precious fabric *Gollum noises*.

Hood with adjusters, hood back adjustment strap, concealed zipper and pieced center hood piece.

Once I had nearly all pieces cut out, I had about a meter of fabric with both selvages left. However, I also had a pattern piece that would need to go lengthwise and therefore would steal a further 40 ish centimeters from that rectangle, just by itself. For some reason I couldn’t bear the thought of cutting into my pristine fabric and therefore cut it from a bit that was too small. My hood thus has two extra seams in the top where I pieced the ‘Kapuzenstreifen’ together. It’s not noticeable at all, so I’m quite happy with this solution. Next to the hood thing, I only made minor changes to the pattern. These include a hacky swayback adjustment (taking in the back seams from armpit to waist by a up to 2 cm) and shortening the sleeves by 3.5 cm or so. Apart from that, I pretty much followed the movies exactly.

Pocket opening, pocket inside and sleeve cuffs.

While the pattern has pockets, they are quite shallow, so I can’t stuff them full of whatever my heart desires. This is unfortunatly a feature of the pattern since the pockets are set in the side front seam and extend to center front, which isn’t very far. However, the way they have you sew them in is ingenous. There’s a built in zipper and it is automatically concealed. I also really love the concealed zip at the neck so you can remove the hood. This version is much nicer than the one I cobbled together on my red coat.

All in all, I enjoyed working on the project. The cutting and sewing stage only took three days, but the gathering of materials and taping the pattern together added another couple of hours. I seamripped maybe three bits in total? The pattern itself is completely glorious in its markings that all fit together absolutely perfectly. I’d already bought another Pattydoo pattern for a sweater that may be jumping ahead in the queue a little. For now, I’ll just continue to swan about in my dinosaur coat and be quite proud of myself for finishing this thing!

Red Coat

At some point in the past, I bought between 4 and 5 meters of some thick red fabric. Vaguely wool-esque, but probably mostly poly-something. I’d planned to make a coat out of it, and some time in November, I finally started on the project.

I found the pattern in Knipmode 9-2019, pattern 15 – Robe Manteau. It was never going to be that simple though. Changes and alterations would be needed. First, it was going to be shorter than the original pattern, mainly because I’m short.  Next, the neckline was going to be altered dramatically, because I’m always cold and therefore having such an open neck was not an option. I settled on this type of neckline, and used the scale model to figure out how to make my own collar. Cue pieces of paper stuck to other pieces and pins everywhere! I also wanted a hood and stole the pattern from Simplicity Naaimode 14 model 51 (also known as Simplicity 2056) but reduced in height.

It took me forever to decide on all of this, and then I started with an old tablecloth to see if the pattern even fit me. It did, mostly. The only change to the original was in the back center seam, where I took out a lot at the top and added some in around the waist; and reduced the length of course. Then I started cutting out the outside and the waterproof and stitched them together around the outsides on almost all pieces. The only ones where I varied that were the center fronts, where I didn’t want to have 5 million layers, so I settled on using the waterproof as lining, and the pocket flaps.

The pockets are lined with the super soft white plaid fabric used for poppys. That was the start of the project. Then loads of pushing really heavy fabric through my sewing machine to sew the outside together. Once the outside was complete (apart from the hem), I needed to puzzle the lining together. The lining was an off-cut of fabric with white flowers, teal and red. There were practically no left-overs once I finished cutting out the lining.

The lining was hand sewn in because it was just easier than trying to wrangle 26 kilos of fabric under my machine (perhaps that was a slight exaggeration, but you get the drift). The zipper is two way, the hood can be detached with another zipper and it’s got elastic pulls. I’m quite fond of it, even though it started pilling about 10 seconds after I first put it on. We’ll see how damaged it gets over the course of this winter. The fun thing about a new coat is that I have an excuse to make new hats and scarves, so expect some black knitting in my future.

Christmas Knit Gifts

This post was written a while ago, but the post has made me wait until one of the gifts arrived in New Zealand, that took a while..

Poinsettia

When I was making and sending my Christmas cards, I wanted to include a little gift for a friend of mine who is currently in New Zealand. She’s bought poinsettias for the past few years and managed to keep them alive through to July or so, so I decided to make one for her to see if the Christmas spirit transfer. Sadly my card hadn’t arrived yet by Christmas, so I don’t know if it worked.

The free pattern for this little flower was found on Ravelry – it’s the knitted poinsettia by June Gilbank. It has you make six large green leaves, six smaller red leaves and some yellow stem bits. I ignored the stem bits and chose to do some french knots instead. This was a very quick knit and quite easy to put together. I liked the way she finished the back with a knot and very limited weaving of ends.

Friend of the Forest hood

The second gift was a hood – the friend of the forest hood by Gretchen Tracy. I’d been wanting to knit a hood like this for a while now and when I found some lovely ‘printed yarn’ (?), I decided to go for it. However, I was also making a very red coat at the time. I wouldn’t be able to wear this hood with it because it would clash something horrible. So I decided to gift the hood to a colleague who enjoys these types of fall colours.

It knit up real easy and quick. I still have the last two colours of the ball left (grey and some more purple) and another ball but I’m not sure what I’m going to do with it yet. So I guess that’ll be a story for another day.

Sweater with Leather

So I discovered that I apparently never posted by sweater with leather that I had mentioned during some MMM post this year. It’s a sweater with an asymmetric zipper that is based on sweaters like in these pins (one and two). I’d wanted something like it for a while, but I think I was scared to cut into it. I believe I based it on the garden party dress top, but it was February when I finished it, so I cannot remember much.

I do know that I got the zipper from my stash where it had been for years. I think I improvised the hood from looking at other pins, but I’m not sure again. I did add some leather bits to give it some more almost nautical look? There’s a bit on the hem, there are triangles at the zipper openings, there’s a bit on the zipper pull and I wrapped some around the hood-cord-ends. I’ve worn it a lot, it’s very comfortable and since its grey, it’ll go with anything. Here’s some action shots from where I wore it at a roller derby game.

That’s all there is too say about it really, since I don’t remember much. However, this way I can link to it if I need to, or when I want to rediscover the pins etc. So I guess you guys are the victims of my memory yet again.

Ochre Obsession

So, I went on holiday and tried on a sweater. It was ochre, from Primark and I loved the colour. The fit however, terrible. The sleeve height was so high, that it felt really constricting. The colour was good, I liked the neckline (even if my friend hated it, he said there was too much fabric) and it had pockets, always a win.

This one is the inspiration

This was the start of my ochre obsession. I really, really, really wanted an ochre sweater now. Since my local fabric shops do not have something like this fabric, I started scouring the internet. I found some fabric that looked nice and even bought some more fabrics because the hoard is never full enough.

I’d already found the pattern I wanted to use, a shortened version of Lekala #4742 – Tunic with Hood. Once my fabric arrived, I was slightly disappointed. It wasn’t stretchy as I’d assumed it would be and one of the cut ends frayed a little. However, I really liked the colour, so I got to work quickly. Shortened the bottom by 12 cm, and followed the instructions apart from using grommets instead of sewing buttonholes. After it was all sewn together, it felt a little tight in the armpit, so I decided to add a little diamond piece of fabric to increase the range of motion.

The hood is ENORMOUS, I think it will fit two heads – I’m guessing something may have gone wrong with Lekala’s sizing there. However, I still like it quite a bit. Because of the size and the position, I’m not sure the hood is super functional as a hood, but I still like the look of it on the front. The fabric is super warm, so I might need to wait for a little to be able to wear it comfortably.

I may want to make something like this again, but some things would need to change. I would want to use a more stretchy fabric such that I could take the side seams in a little and reduce the swayback action going on. The size of the hood would need to be reduced by at least 5cm in height, if not more. I may want to add bands to the sleeves and bottom although I quite like this sleek look too. Now to wait for winter to wear my ochre dream.

Round Up

So.. It’s been a while, but I’ve actually been doing some small things. I felt too lazy to post them before, but now I feel I should, so here goes.

May! I participated in me-made-may and wore at least one piece of self-made clothing every day in May. I also took pictures for the first half.

Fish! I saw a fish pattern on the internets here and decided to make one. So now there is a fish living in my house.

Scarf! I made a another circle scarf, now without any blue to be able to wear it with my other clothes. This one is grey-white and black-white polkadots.

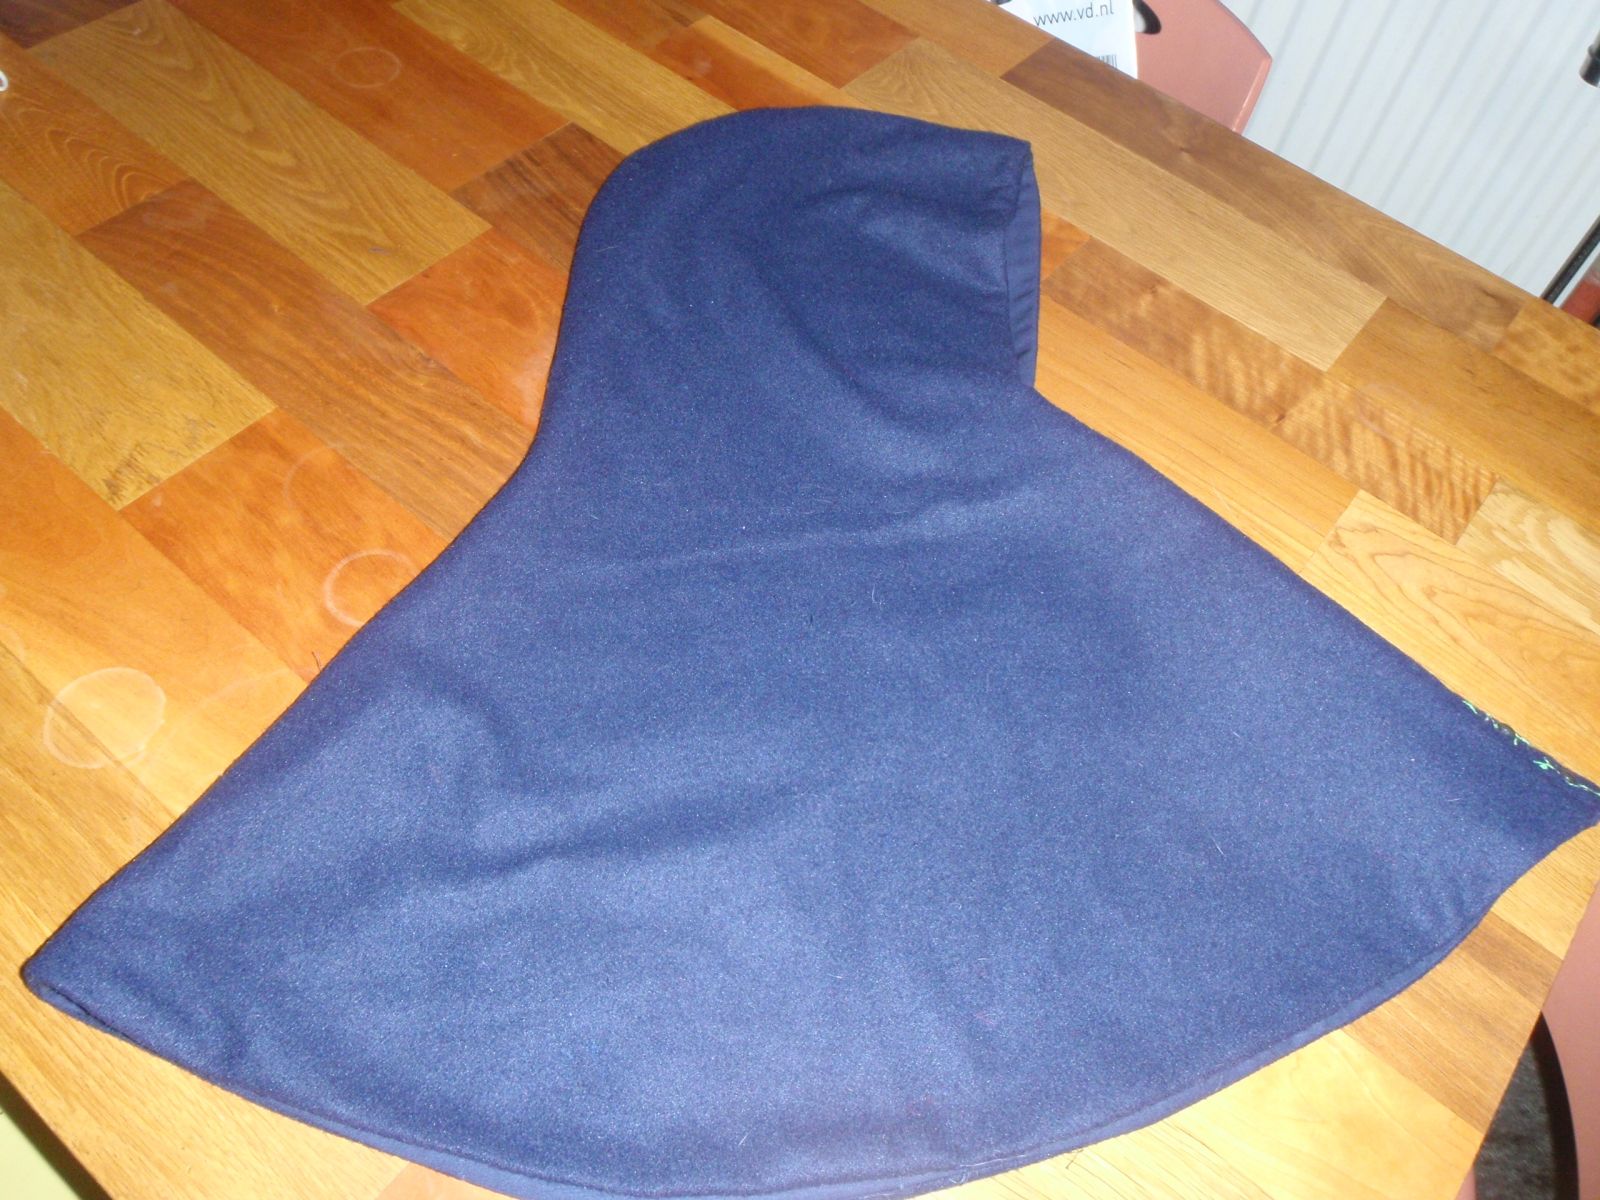
Hood! So part of May was the annual LARP event that I frequent. On the Friday it was due to start, my central heater thing gave an error, so I spent the afternoon calling and waiting for a plumber-type guy to fix it. While waiting, I decided to make a hood based on this pin. I fudged the measurements a bit because I had a pieces of fabric left over from the graduation dress/blue coat that I decided should fit, even if they weren’t exactly correct. I made the thing in about.. 2 hours? I wore it for the weekend and it was nice.

Others! I’ve been working quite hard on two large projects, a graduation dress and a big plushie that have taken up a lot of time. However, they aren’t finished yet (just hems on the graduation dress though), so I won’t post them yet…


Cover-Up

Some people are natural heaters, some people are natural freezers. I’m a freezer, which means that I’m cold a lot. So, I’m always looking for that extra layer. At long last I figured out I needed a bolero. I re-found the Your Style Rocks free pattern ‘Our Own Pretty Ways‘, a hooded bolero pattern. I like hood and I liked the style of this one, so I decided to make it.

First step was printing it out and taping it together, that went swimmingly. Then cutting out the pattern pieces and figuring out the fabric. I wanted to see if it could fit on the fabric left over from the red dress, and it did! I did have to eliminate the hood lining, but I found a solution for that. It sewed together easily, I made it basically in one evening, with an hour or  so for additional finishing. These patterns always seem to go together well (at least the two I’ve tried).

Close Hood

I made two main changes. The first was not lining the hood. I didn’t have enough fabric for a full lining, and I quite liked the pop of the red. I solved the exposed seams issue by cutting a strip to go over the centre back seam of the hood. I also cut a second front of the hood as a type of facing in order for the drawstring to be applied. The second change was to cut of the end of the sleeves and apply them like the bottom band. I thought that would be a nicer finish. I also stitched along those seams again to create a coverstitch type look (and to keep the seam allowances out of the way). There are three hooks and eyes to close the front and shoelaces as drawstrings.

 Stitching Bolero close

I like how it looks, and I sort of feel like Morticia Adams with the long sort of bell sleeves..

Bolero front Bolero back

I also quite like it with the red dress from yesterday. Which means that I might actually be able to wear the red dress to work, or something. Maybe not, we’ll see. They are getting used to my ‘interesting’ clothing choice, I think.

Dress bolero

I’m also knitting cable socks, planning plaid pants, making cards and working on my coat, so hopefully I’ll have something to post soon again.

Costume hood

For my new back-up character I wanted to make a costume. I already drew a sketch (here), and started on the skirt (which still does not have a hem by the way). I started the hood the day before yesterday. I had made a hood before out of fleece and drew around it, this made my pattern. I cut it out of the same fabric I used for my coat (which is actually almost finished, just sleeve ends and hems). Found some fabric for lining (the same as I used for the outside of my other costume (here).

Sewed it all up except for the front, since I wanted a button closure. I don’t know if it’s historically correct, and I know my buttons aren’t, but I liked the idea. Then I decided I wanted to add a button band, and wanted some embroidery on it. So I googled and googled and drew and drew and came up with an ivy pattern to connect my buttonholes. It took until late that night to finish it. The next night I sewed on the buttons and the band, and it was finished! Here it is, let me know what you think.

Hood side Hood

The button band is embroidered with ivy leaves. The vines are darker green and the leaves are lighter green. The vines were stem stitched and the leaves back stitched. The buttonholes were done by machine. I’m really happy with it. I like the ivy a lot. I’m starting to wonder if I should embroider it on everything in the costume.

Button band Detail