
Every year it is the same question, will I send out Christmas cards this year? Real ones, with paper and that (if I don’t hand them over to the recipient directly) go through the mail and stuff. This year, the choice was easy. I was in a shop, I saw a kit for making paper Christmas balls and decided I could use the idea for my cards this year.
The shop sold craft paper blocks which I got one of, bags of buttons in different sizes (120 in a pack), metal loops for ornaments and gardening wire. I had my card almost ready!
I’ll explain what I did, there are more pictures below. First, I’ll show you the ‘instructions’, I drew them and then created them in Photoshop (not very well, but still), I copied my own handwriting and printed 3 of them on 1 red A4 piece of paper. I then signed my name in the bottom right corner and added some metallic fireworks. The back was used for a personal message and the address.
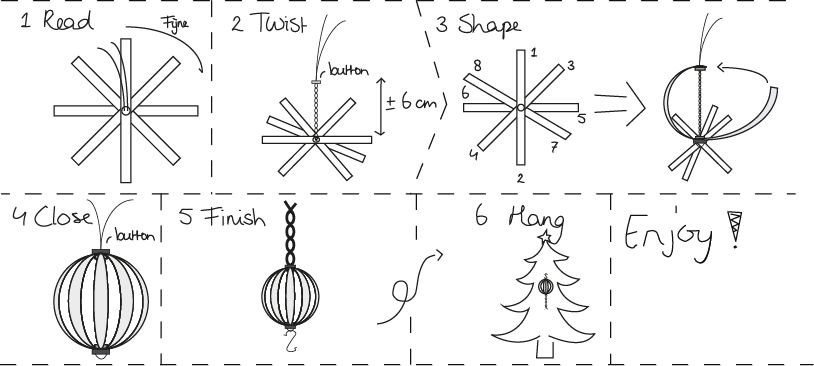
To put the kit together I cut strips of the paper using my paper-cutter machine thing. It can do straight lines, dashed lines or curved lines. I used the first and the last. Then I made holes in the ends of the strips using a hole punch. I noted the middle of the strips and punched a hole there (1). I wrote the text I wanted on the strips (2), the text is (translated) Happy Holidays and a Healthy, Cosy (untranslatable) and Happy 2014. It was written (mostly) on different coloured strips (3). I cut a bit of wire and added the first button (4).

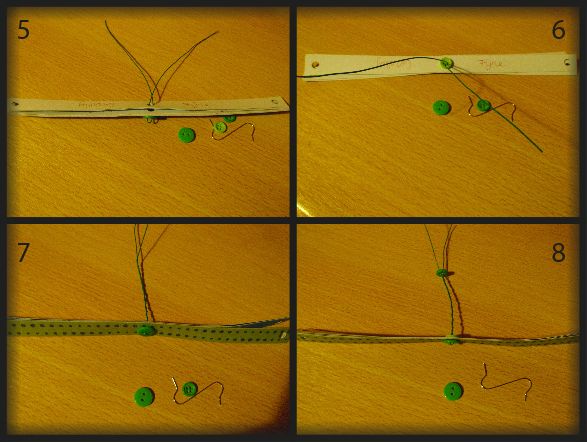
I put the strips on the buttoned wire (5) and added a button on top to keep it in place (6). This was placed with 2 other buttons, a hanger and the instruction in an envelope and sent. To make the ball, you twist the wire (7) and add another button (8).
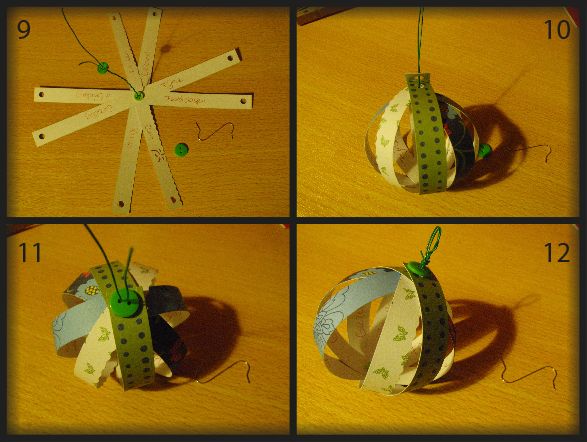
You can read the entire text in now if you turn the strips out (9). Then the ends of the strips are put on the wire (10) and the last button is added (11). Twist the wire a bit and add the hanging loop (12).
That’s it! Then you enjoy the pictures people send you of their balls in their trees. I enjoyed that the most. I had fun making them. Next year, I’m going for a new idea. I got some inspiration from a card we received during the holidays, so who knows…

