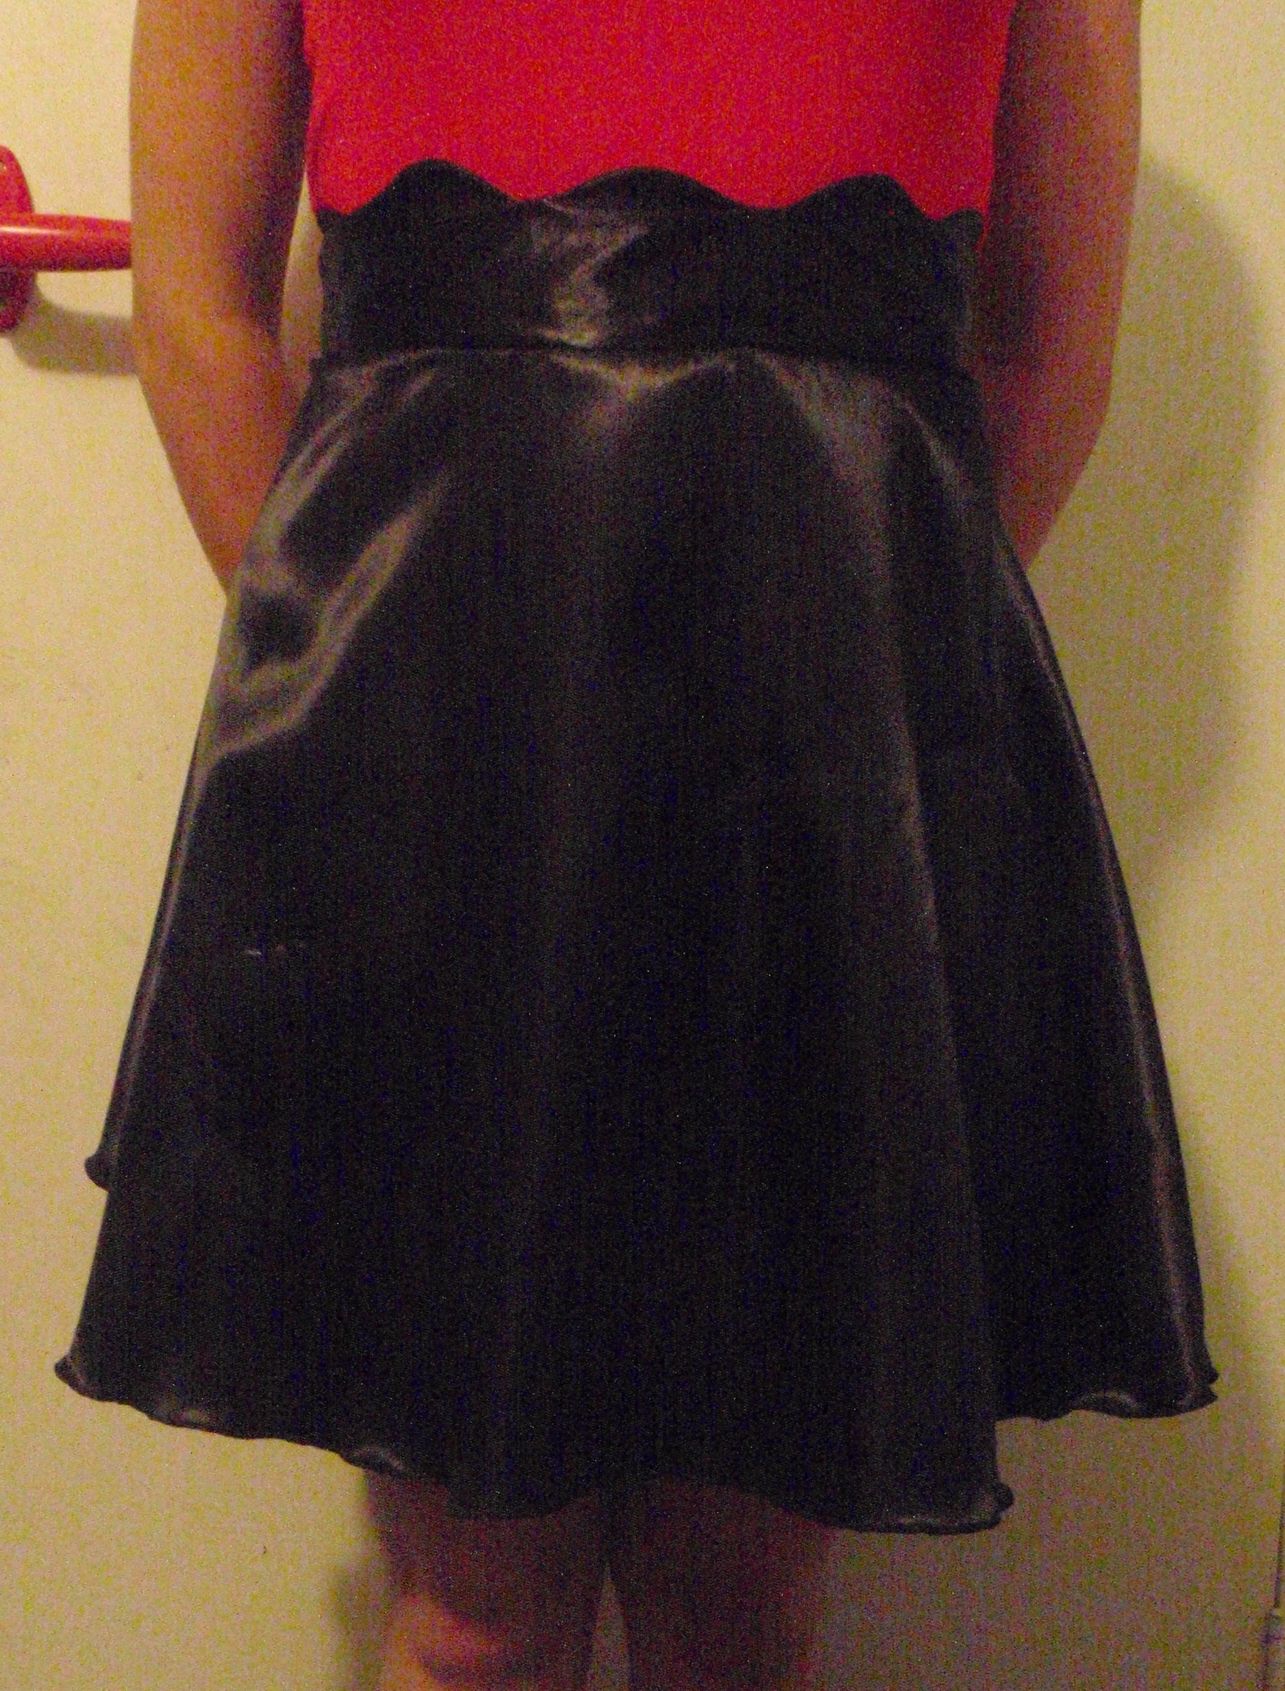
The post title is double true. I made and finished it in one evening (that’s a first for me) and it’s more of an evening type skirt. I made it of the stuff I usually make prom type dresses off. So it’s really shiny and more shiny and quite slippery. Since I half gave up on my pantsuit plan I needed a quick and easy project to make me feel less bad about the defeat.
I used a free pattern from Grosgrain’s free pattern month (link). And I think it turned out pretty well. The reason I chose it was because 1. it was free (I’m Dutch so free is a magic word for me) and 2. it only had 2 pattern pieces and eventually 3 cut pieces. I thought it should not be too hard to put those together. And it wasn’t, easy as pie and fits nicely.
Here’s the finished project:
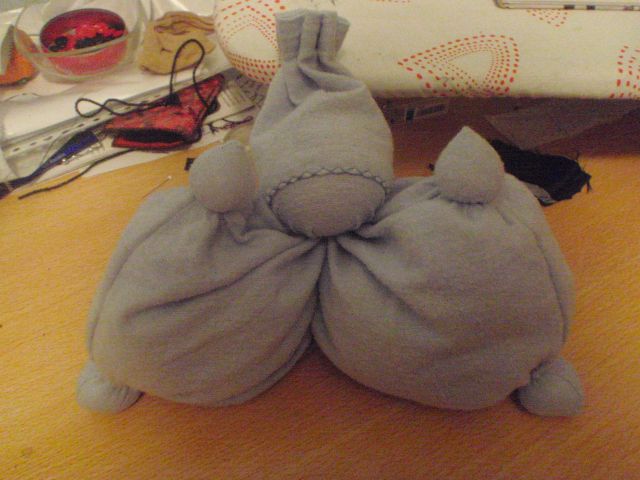
I also made a stuffed puppety thing yesterday which I finished today. I call it a poppy, which is like a cutification of the Dutch word for doll. A co-worker of mine is having a baby soon and it’s going to be her present. I make those quite often since I like them very much. She’s having a boy, which is a good thing since I only have blue fabric. It looks very fat and it is. I have to wash it to unfluffyfy it a bit, but here it is:
P.s. Excuse the mess, I have 2 tables in my sewing room, but one has the machines and the other the mini ironing board (which is what the poppy is propped up against). So I really never have enough space. I also need to clear up, but that’s for a later date.
This weekend was very productive for me. I finished two UFPs and started a new project.
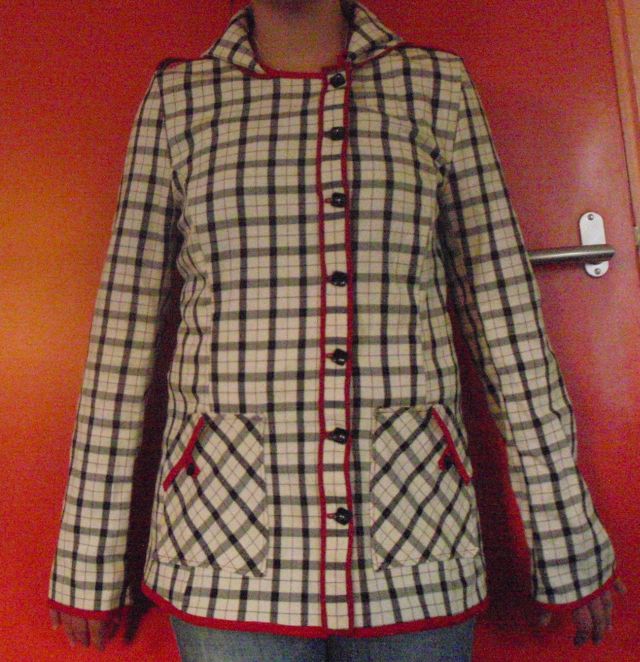
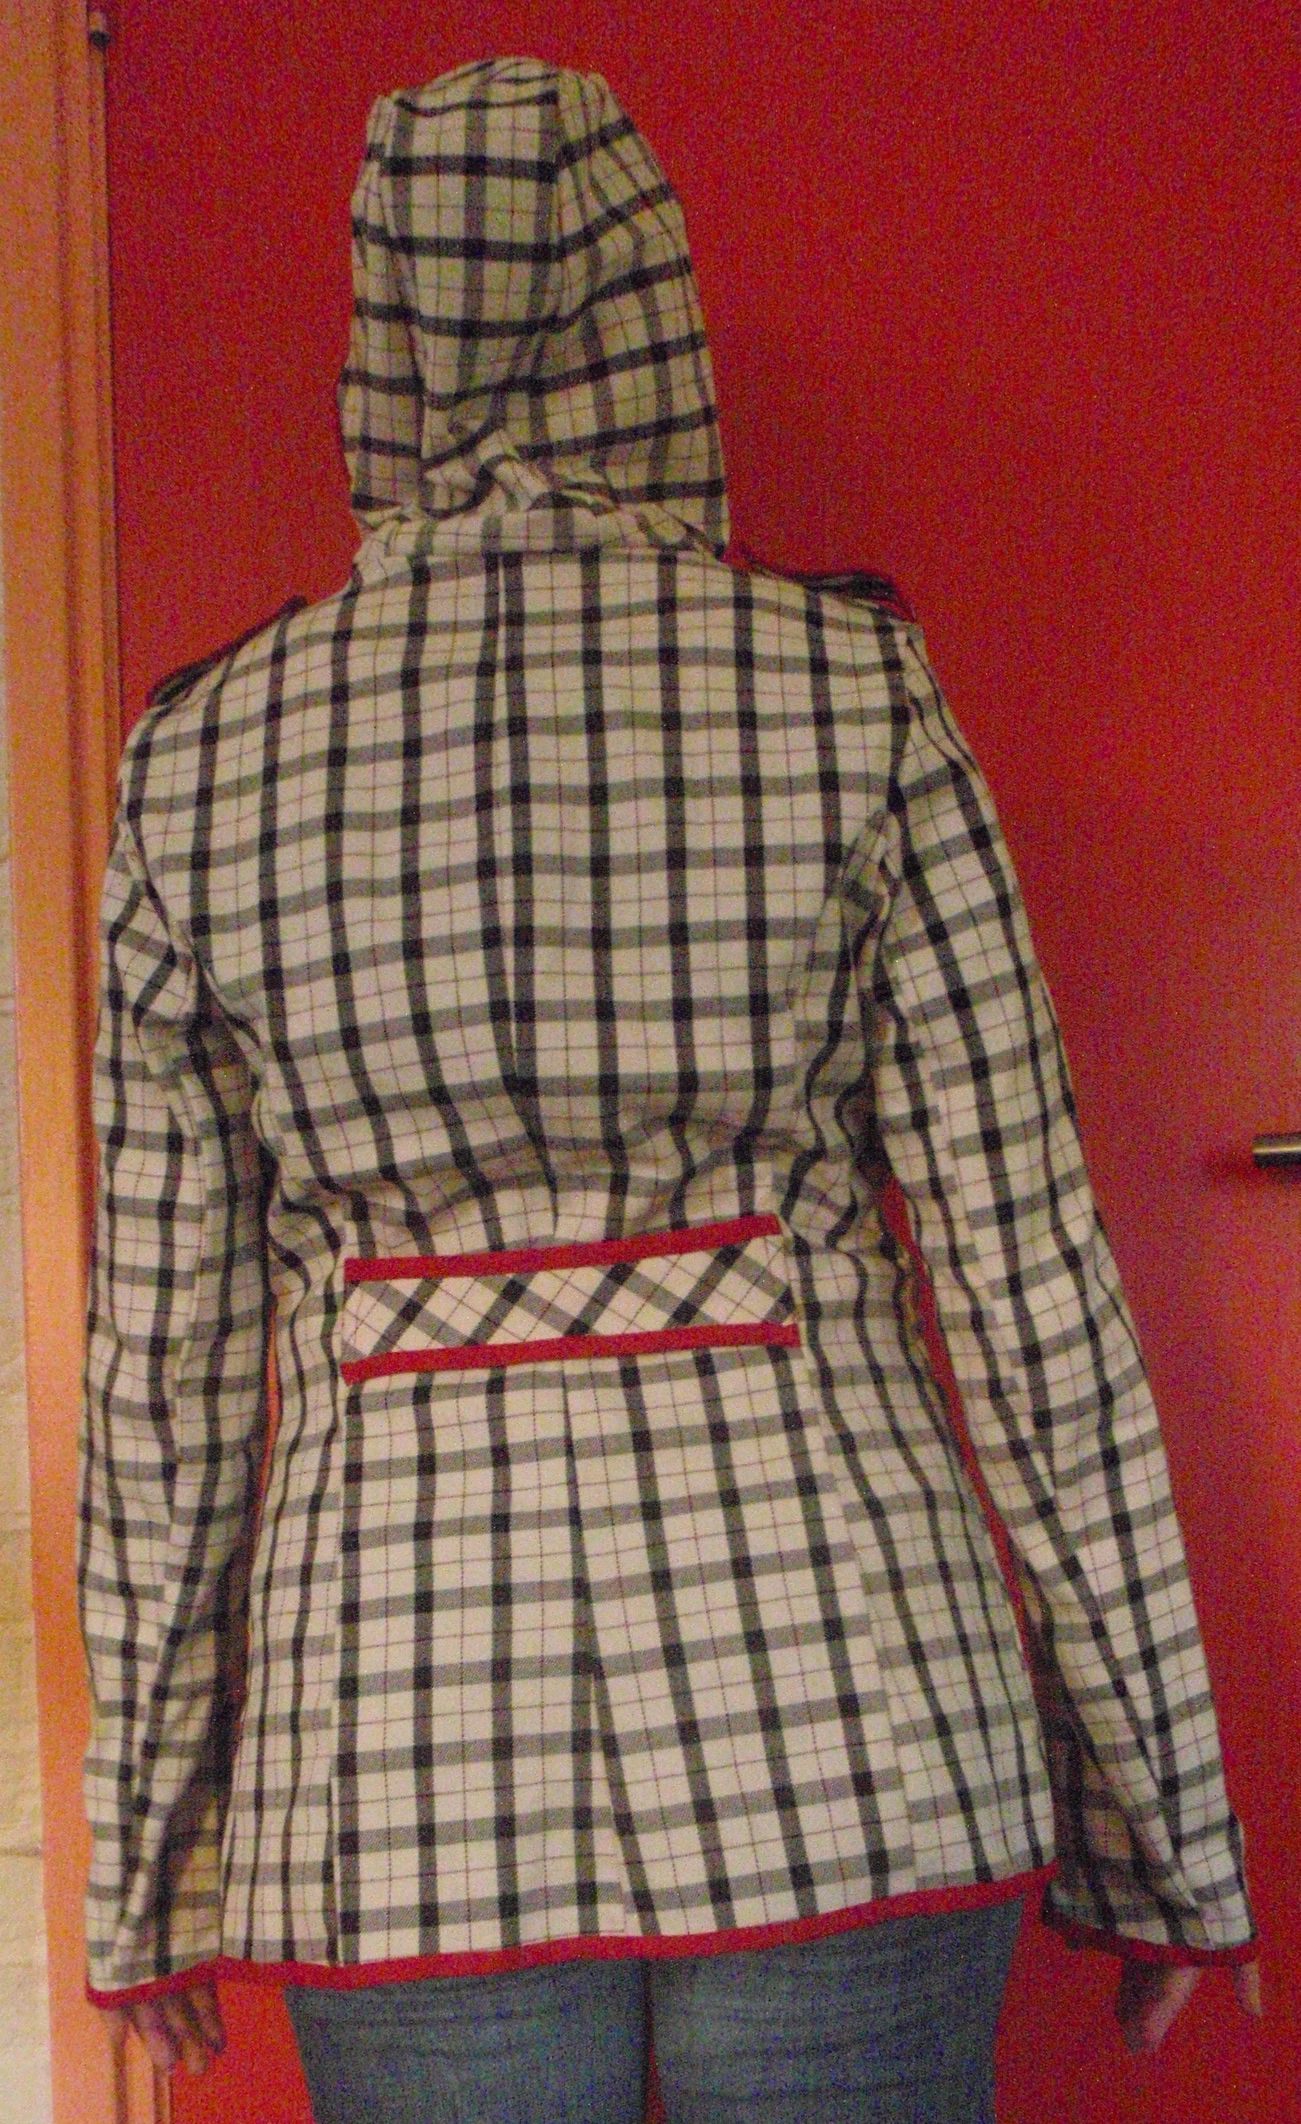
The first UFP to be transformed into a FP was my coat. I started it in summer last year I think. But I stopped it when I decided it was too crooked. The fabric has a sort of plaid-y look, but I didn’t line them up, which I assume will be difficult with princess seams.
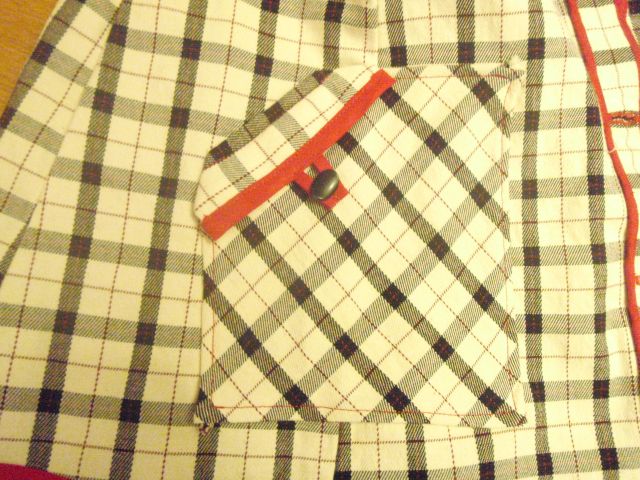
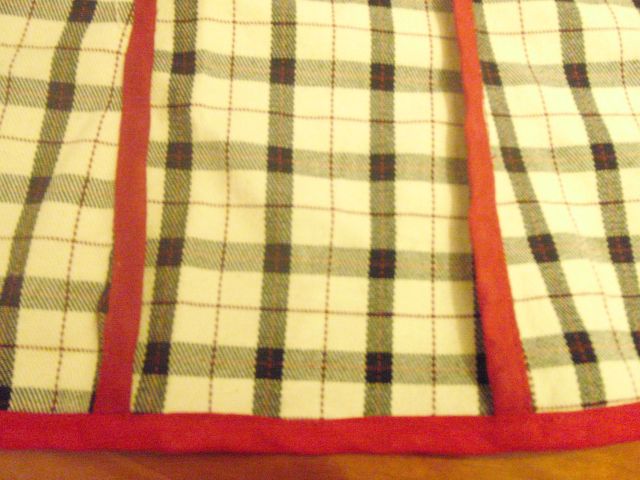
But since I aim to empty my UFP box before the end of the year (I’ve assigned myself that goal a minute ago), I have to work on some projects in there. And I still liked the fabric of the coat so I figured I’d finish it. I made an asymmetrical front, put pockets on and a hood. I finished all the seams and edges with red bias tape (it’s the same colour as the red stripe in the fabric). Here are the pictures, first front and back, then details of pockets and the inside:
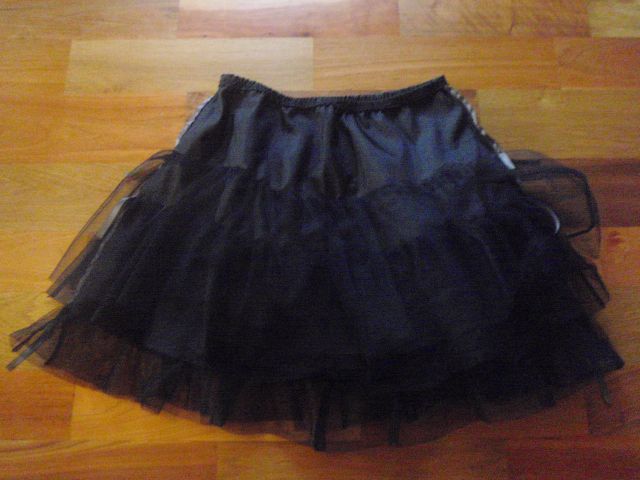
The next project I finished was a petticoat. It’s been laying in the stash basically since I started the frog dress, so two years I think. It was a disaster, since I absolutely hate making ruffles or whatever those things are called that a petticoat are. But I worked steadily, pinned until my fingers were dead and finally finished the thing.
Here it is, I also attached some ribbons on the side to hide the seams but they are not very clear:
So after two UFPs I wanted to start something new (decided I deserved it). So I’m now patching together a pant suit from a free culottes pattern, the vintage blouse pattern and a pattern for some pants (to use the waistband). I hope it’ll work. I’ll show you when (/if) it’s done.
I was looking around Etsy for dresses and I found this one:
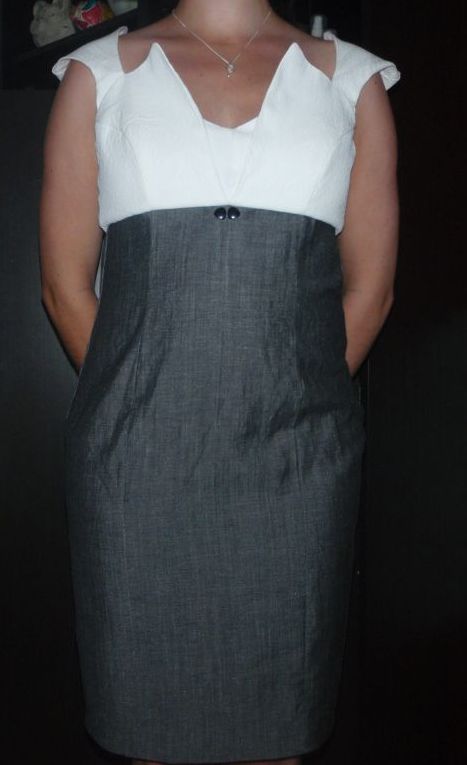
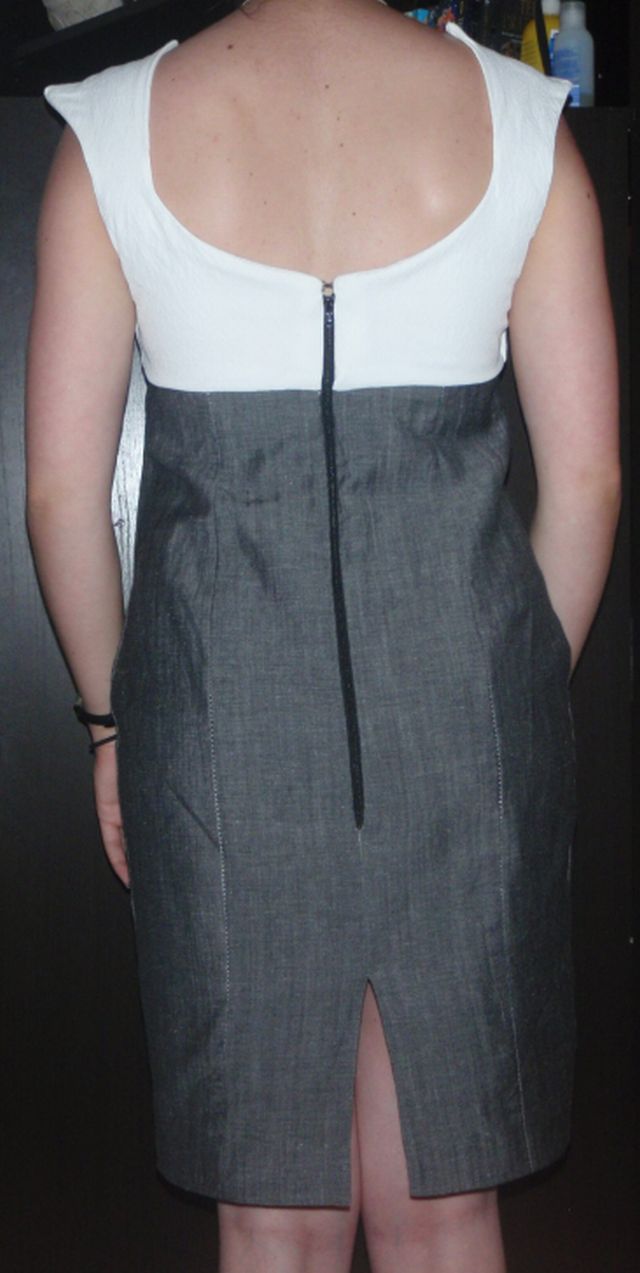
And I thought: “that’s nice, but I’m not willing to pay that amount of money for something which will not fit me”. So I figured I’d make it myself. I’d just gotten my serger and found a free sheath dress type pattern on the internet and started fiddling around. The bottom bit got together without a hitch, but the top bit, well the top bit just.. didn’t. It didn’t fit, it wouldn’t sit right, and eventually I gave up.. Until.. yesterday morning. I’d just finished the champagne skirt and wanted another project, saw this hanging and thought: yes, that’s it. However, since the top bit didn’t fit and I’d make the black top only days ago and that did fit.. I decided to adapt the black top to fit on the grey skirt piece. That did fit, and eventually went on fine. It’s taken me until today to finish it, but it’s done now. And I’m happy with it. I used the vintage dress as inspiration, not as the thing I wanted to carbon copy. So the back is different and so are the straps, but the idea is there. I’m actually pretty happy with it and think it could work really well for anything formal. Or less formal, depending on the sleeve bit you put over it. I’m really happy with the result and here it is:
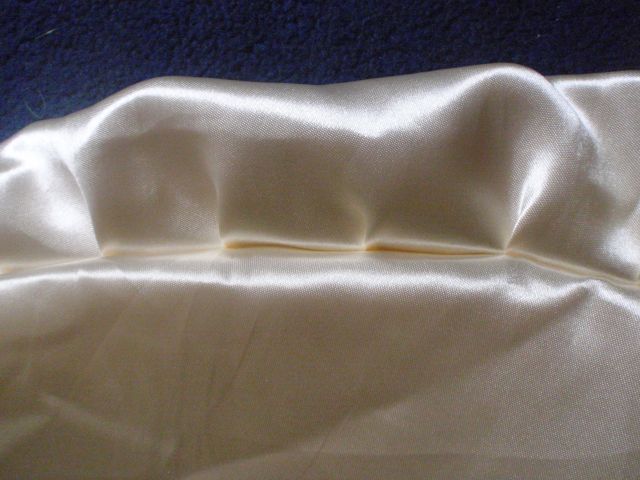
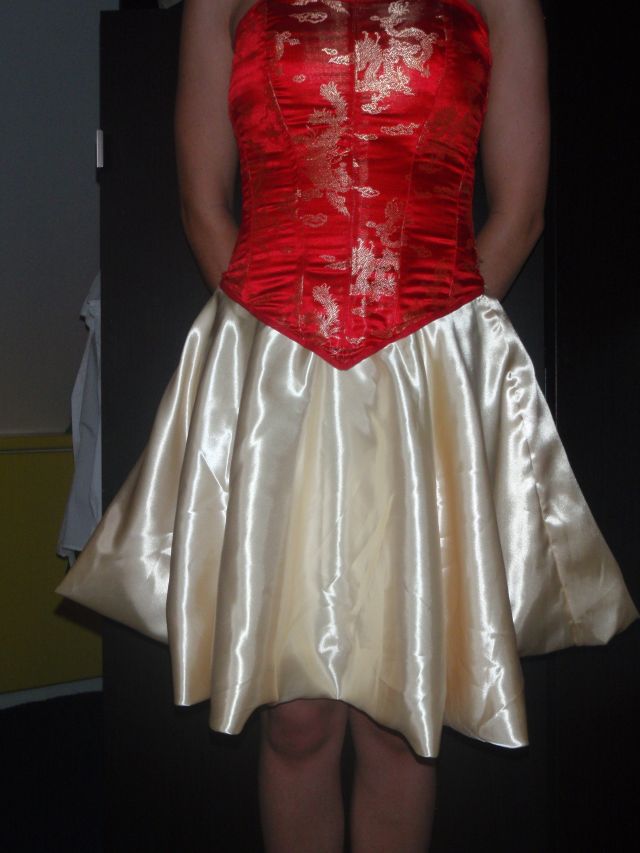
Yesterday I finished what was supposed to be my Christmas outfit for 2010; it obviously was not worn then, since it was not finished. I made a corset of red with light gold fabric with dragons and phoenixes on it. So I wanted to make a skirt to go with it, I chose a light gold-ish fabric for it. I wanted to make a circle skirt, so I did that, but figured it was a little too see through. So I made another identical layer from the same fabric to go as a lining. This was done before Christmas, but the thought of having to hem it all, 2 whole circle skirts, got me down a bit. So I delayed.. and delayed .. and delayed some more. And finally decided to work on it last week or the week before, but I figured that I did not want to hem two circle skirts. So I did a balloon type skirt. But it’s a circle skirt so the outer layer has more fabric, and I needed some folds. It looks like this on the inside:
Left is the close up of the folds, right the complete skirt from the inside. So I sewed it 2 weeks ago, but finished it yesterday. How come? You may ask. I had to do 10 more centimeters and wasn’t feeling like it at that time, so again postponed it. Finally got around to doing it yesterday, 10 minutes, I was done. why did it take me 2 weeks? I guess I’m just a bit lazy. But eventually the skirt was finished half a year after I started it. However, I think I made a mistake with the fabric. It really is too shiny to actually wear outside of costume parties, and I don’t know what costume it could make. Anyways, here is the finished product, including the corset and I hope Pentecost was fun for you too.
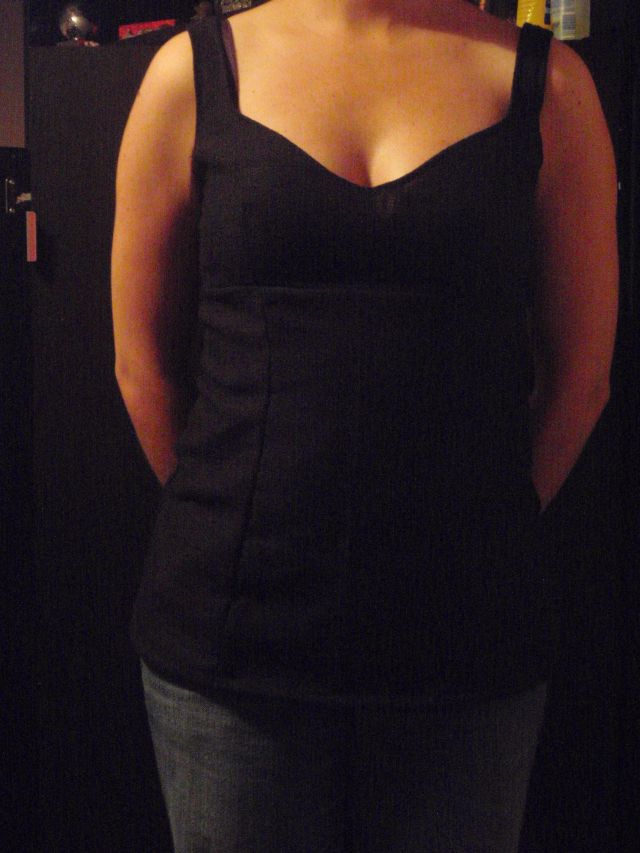
So 8 days ago I handed in my exam for the course I was taking at home, next to my internship. Having finished the exam meant I had no more homework to do, and lost of spare time. Thus, I had to start doing something else. After reading a lot I felt like a project, preferably a new project. Since I’m sort of not interested in all my UFPs (which is why they are UnFinished Projects), I wanted a new one. This time I wanted to do something different. I’m used to being cold, and covered up. I feel naked very, very quickly. Knee high skirts are short for me (although, those are the only length I have since I rarely wear any skirts). But since I’m changing my life around a little, I figured I could change my wardrobe a little. So I made a top, based on a wedding dress in one of the sewing magazines I have. It looked quite low-cut, but I liked the shape so I tried it with a bit of (I think) black linen. And I personally think it worked out great. Here it is:
It’s quite dark, since I always finish my projects at night for some reason and then want to take a picture as to not forget to do so. I quite like the top, I just took the pattern pieces from the bust part and added 35 (I think) cm of the skirt pieces to it, and it fits fine. It’s wonderful that you cannot see the thread at all since I’ve had some problems with the machine and if you look really, really closely it shows. I showed it to a friend and he thought it was fine, but it’s really strange to be able to see your bra when you look down, I’m very not used to that. Still I wore it today and it was fine, might shorten the straps for a new attempt. Anyways, I finished this one somewhere in the middle of the week I think, just didn’t find time and energy to write this, too busy reading. But today I’ve also worked on some projects, I’ll share later. So until the next.. craft away.
I think you can see where I’m going with the title of this post.
Today I finally finished one of my million UFPs. This one in the shape of a dress I practically finished over two years ago, only one little thing needed to be done.. The Hem.
I don’t know about you, but I’m terrified of hemming. I’m always afraid I’ll make them too short, or incredibly uneven or that I accidentally cut something of that I wasn’t supposed to. But in order to really finish a project hemming needs to be done. And being without a dress form and never trusting my own eyes when it comes to having a straight hem, I need at least another person to help me with this.
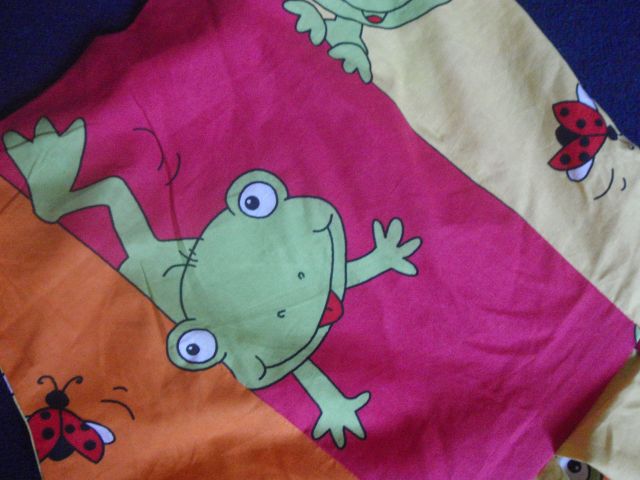
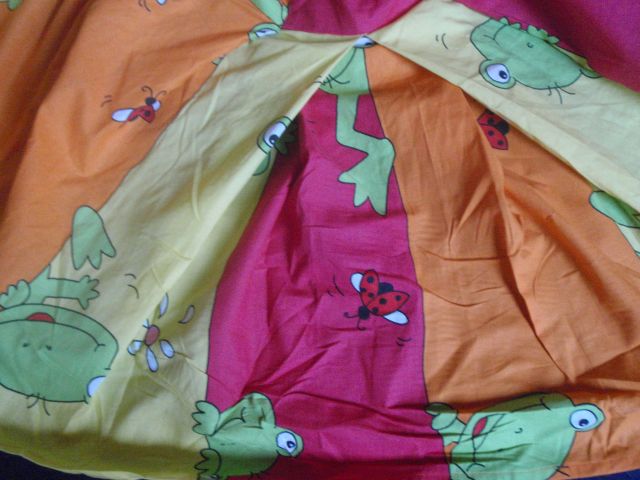
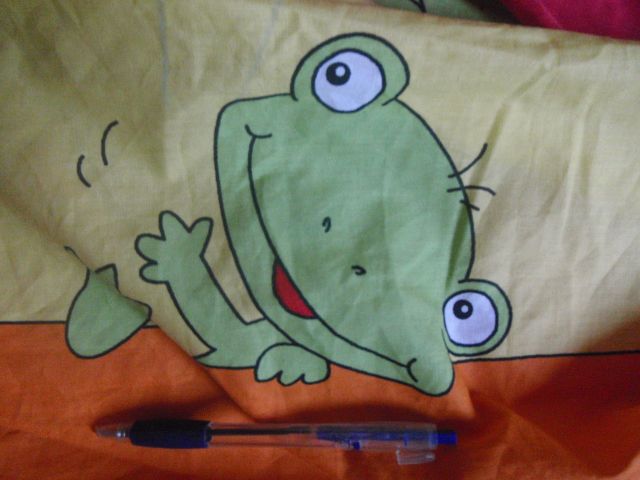
So today was a wonderful sunny day, I was reading in my bed for most of the morning. When I finally got up my parents announced that they wanted to go camping tonight with the two of them, so I helped them pack a bit, still in my pyjamas. Eventually I decided that I needed to put on some real clothes. But the only thing I wanted to wear was this dress that I had, which was almost finished, only the hem needed to be done. The reason I wanted to wear it is because it is a perfect summer dress, yellow, orange and pink with big green frogs and red ladybugs (I think it’s supposed to be kids curtains).
The most right picture has a pen to show scale, they are really pretty big, my cute frogs. I really like the ladybugs too.
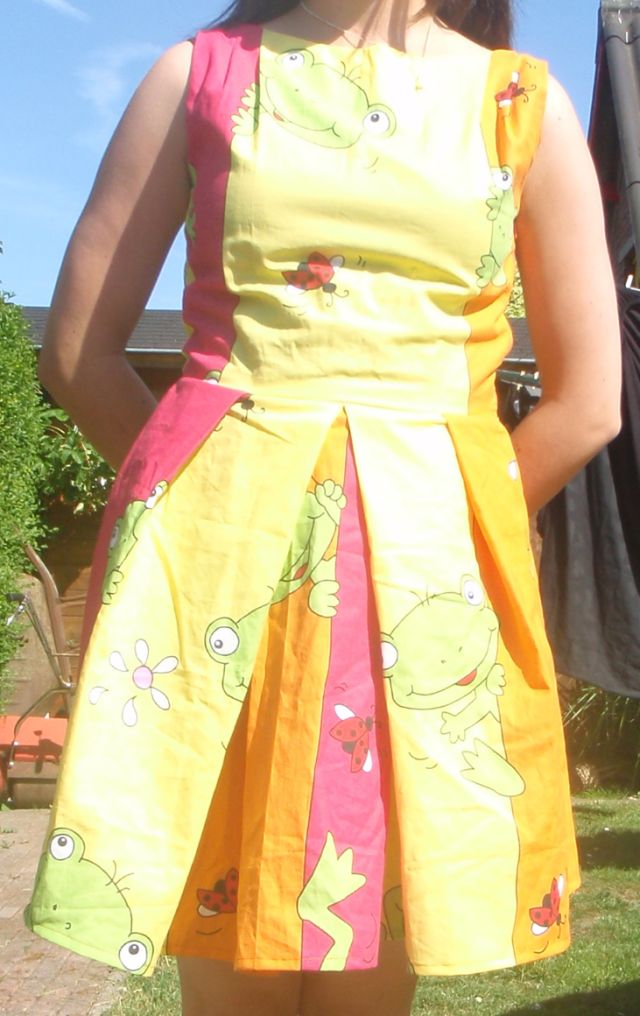
So I put it on and walked downstairs to show my mother. She told me that it looked pretty straight and that I should hem it the way it was. So I did, and it worked (I was amazed). Something I’ve dreaded for over 2 years was finished in half an hour. Eventually I also decided to add pockets, since dresses without pockets are like a bike without a key, nice to look at but not very practical. And that worked too, I put in somewhat invisible pockets in the side seams, and even remembered to colour coordinate so they would not be very obvious.
And here it is.
This is the finished dress
Sorry for the colours, but I wanted to take a picture outside, but the sun was somewhat too bright I think. So the frogs are not really very visible, but they are definitely there.
So what did I learn from this project? That two years ago my sewing skills were abominable (the inside looks like it’s been chewed by something), that pockets next to zippers aren’t nearly as difficult as I thought, and that with a little help hemming is easy. I hope this will help me overcome some fears and hem more in the future. Lets finish up some other UFPs soon!
Today I was supposed to go to the birthday party of a friend of mine. However a few weeks ago I found out that I had a study day today as well. This was only a once a year day and I’ve been struggling a bit with the course matter so it seemed like a better plan to go there. However, I felt a little guilty for not being able to come because he had announced it literally months before. So I decided to make a gift. A special gift. A (mostly)hand-crafted gift.
The plan was as follows. Since I know him from Larp (live action role play) which is, how is it easily and shortly explained?!, a type of role playing. You write a character for yourself that you play in a setting that game masters have written, usually fantasy/medieval like. So you basically, from the moment they announce ‘time in’ to the moment they announce ‘time out’, you play someone else and improvise. It sounds very silly and complicated (especially when I tell you that we fight with swords with a carbon core, foam around it and latex on the outside) but it’s really a lot of fun and you can easily enjoy yourself by trying to make period(like) pieces to wear.
So I figured, what do all people in medieval times need? A pouch to put their stuff in. So I made a pouch. I still had some fabric lying around that I’d used for a dress (it’s not done yet, after 3 years), which was brown and suitable. So I picked that. Now because of the little guilt trip I was having I figured I did not want to just make a plain pouch, so I decided to do some embroidery on it. The first thing that came into my mind was leaves. So I found a picture of leaves and copied those.
I have the worst method of embroidering ever, since I use tracing paper to copy the shape and then pin it on the fabric and sewed directly through and over it, later I rip it of and use a pin to remove little bits. That last bit can be severely frustrating if you have several lines crossing each other. But well it worked.
So after many long hours embroidering leaves onto a rectangular and a round bit of fabric that I’d strengthened with interfacing, I decided I had enough leaves. I cut identical pieces to the embroidered ones and sewed them together (lazy me used sewing machine), and the embroidered ones to. Then I attached the lining to the embroidered bit right sides together while leaving 3 cm or so unsewn so I could turn it right side out. I sew a little loop to the top (inside the open bit which I’d left at the back seam) to hang on a belt and added 8 little loops to the top to be able to close it. Then I hand stitched the lining to the embroidery around the bottom and around the top. Many, many hours after the initial idea had been hatched, three lost needles and many pricks from the things too, it was finished. So I mailed it yesterday and received an email today that he’d received it and liked it. So I’m happy now.
Do you want to see some pictures? If not don’t scroll down.
By the way, excuse the picture backgrounds, I finished it at the office because the four loops I had on just weren’t enough so I added four more at the intern ship I’m doing. And since it had to be mailed that day I had to take picture for evidence there.
From the back all the way round, and the lining.
And here how it looks closed up and ready for use!
Final View
Conclusions: finishing something on time, before the deadline is very, very gratifying. Making something useful is also very gratifying and learning a new stitch can make one’s embroidery look much nicer. I think I might try this again someday people. Although I’d probably clip the seam allowances more next time. I will hopefully do something fun tomorrow.
I know it is only April and that we are officially still in Spring, but I think the weather in the Netherlands disagrees. This Easter was really really hot, so I spent Saturday in the garden reading books I got from the library. Because it was finally hot enough to wear something without sleeved I pulled my embellished top from the closet.
Last year I bought a tube top, I don’t like tube tops because they have no straps and I’m never sure if it’s going to stay up. But this one was red, and had a marvelous colour, and I figured, I can always attach straps. So I did, I made yoyo’s (basically circles of fabric, gather the edge and sew them together) and attached them to the top. They are not perfect bra strap hiders but they are ok enough for me to wear it.
Here’s the picture, what do you think?
Complete top
And here the straps (which is what it is all about right?)
Strappy details frontStrappy details back
Hopefully more interesting crafty things next week. But my internship together with studying a course at the open university makes my life pretty busy. So I guess it is wait and see.
So I finally took a picture. Today I got people telling me I looked like a cook in this blouse. I don’t really care because I think it’s nice and I liked making it. I’m proud that it worked so that’s good, I assume.
Well here it is:
Vintage Blouse
Excuse all the wrinkles, the second button from the top is actually white/pinkish, the rest is all dark.
I worked a bit on my mothers skirt this week. So now I have most of it in one piece. Just need to put a zipper in it (the most horrible part of all), hem it and make sure it fits. Wish me luck on that.
So I started this project of making a blouse from a vintage pattern (Simplicity 1236) in a white linen ages ago. But at a certain moment I was so confused by the instructions that I sort of gave up, put it in a drawer and looked back at it once in a while.
Simplicity 1236
But yesterday I finally had to courage and enthusiasm to try it again. And this time, after again carefully reading the instructions I finally figured out what they wanted with the collar. As you can probably (hopefully) see on the picture though, the bust area of the blouse is supposed to be really baggy, which personally I thought looked really terrible. So I took the darts up about 10 cm or so, so now it’s rather more fitted and I like it much more. I took some buttons that I got somewhere and put those on, and I think the effect is rather nice. The wonderful button making foot and options of my sewing machine were also used gratefully. I even closed of all raw seams, so I’m quite proud of myself.
I’ll show the result later when I feel like taking pictures, and have actually ironed the thing. Anyways, I’m proud of myself for finally finishing it. Only a few more unfinished projects to go.
And I think I’m going to start on one that has been in my head for a while, because I finally figured out a way to make it work. I’ll keep you posted.
Creativity ruled today, I hope to see more of that.
Active filters:
Category
Tag
Post Type
·
No results found. Try a different search.
No results match these filters. Try clearing some, or searching for something else.
No results match these filters. Try clearing some, or searching for something else.