KreaDoe 2013

Weird title, you may think.. Well, it sort of is, we spell crea(tief/tive) with a c usually, and the Doe (Do) is somewhat ambitious, but all in all, KreaDoe is quite a fun fair where you can find all kinds of stalls that sell things for creative hobbies.

One of my friends and I decided to go there to see what it was all about, and possibly buy some stuff. We were both on a budget but managed to keep to it. KreaDoe is filled with all kinds of stalls. Scrapbooking (pass quickly), Beading (stare at everything), Candle making (eeeh.. no), Embroidery (fun! Too expensive), Knitting/Crochet (fun colours but no), Felting (weird, but maybe when I’ve got residual time?) and some unique things.

There were also some stalls where you could follow a workshop. My friend and I chose to do two free workshops, since free is better. We made an artistic bread basket and coloured a Christmas ornament. The bread basket was a bit weird, you got a round batted fabric thing, with 4 areas that you could tie such that they stood up. We got some ‘colours everything’ pens and got to draw. I chose to do 4 different things on the sides, but there were people doing peacocks and owls and all kinds of things. There were some examples so I just took some of them and drew them on my breadbasket.

Here they are,  whales and owl, squirrel and ‘green monster’ (I like this one best).

Whales Owl Squirrel Monster

This is the full thing and how it looks ‘set up’.

Basket Basket

The second thing was to use some permanent markers to draw on a plastic christmas tree ball. I chose to do dotted lines, with a pair of scissors at the bottom. I had quite some fun, my friend drew an angel and stars. It was quite funny.

Ball 1 Ball 2 Ball 3

Super sexy ball this is. Note the little scissors in the last picture.

All in all we enjoyed the fair, even though we didn’t buy a lot. We did get some inspiration for things to craft at home. We are so going to make either a castleball or a nutcastle (this or this) and we might cover a day planner with a nice fabric.

We had a fun day out, and I think it’s worth repeating.

Brown Dress – Now Finished!

Now the reason I finished the Brown Dress today, is that today is the last day of the Sew Weekly Reunion. While I hadn’t officially signed up, since I didn’t think I owned or any of those colours, I think this fits that weird brown colour ‘carafe’. (It’s close enough in my book anyway.)

So I present you my Sew Weekly Reunion piece: The Brown Dress (catchy name, right?)

The Facts
Fabric: Brown linen (? I don’t know my fabric types)
Notions: White and brown thread (does that count?)
Pantone Challenge colors: Carafe
Pattern: I cannot find the original pattern any more, but it was something like this: Medieval dress

With some alterations that I added, such as the neck treatment and the back eyelet panels.
Year: Old.
Time to complete: 5 years, in total maybe 30 hours? It is completely hand sewn.
First worn: For pictures, will be worn in the middle and end of September
Wear again? Yes!
Total Cost: I’m guessing maybe 4 Euro for fabric and thread? (I was really cheap back then, student budget)

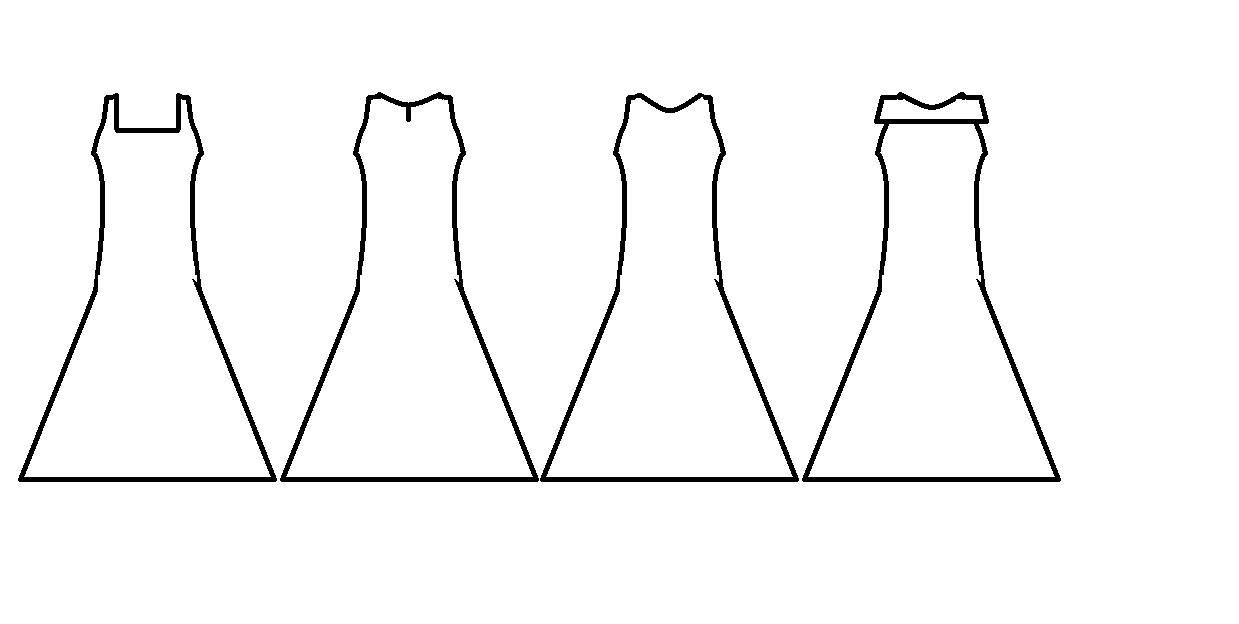
So, I finally decided on a neck treatment for my brown dress (here). I had four different options to choose from and I eventually settled on B (see below). The reason for this is that it’s high, so it’s warm, and a slit is fairly easy to sew if you have 15 odd centimetres of fabric too much at the top of your dress.

tops
(Yes, this is a really quick Paint sketch, gotta love Paint, people!)

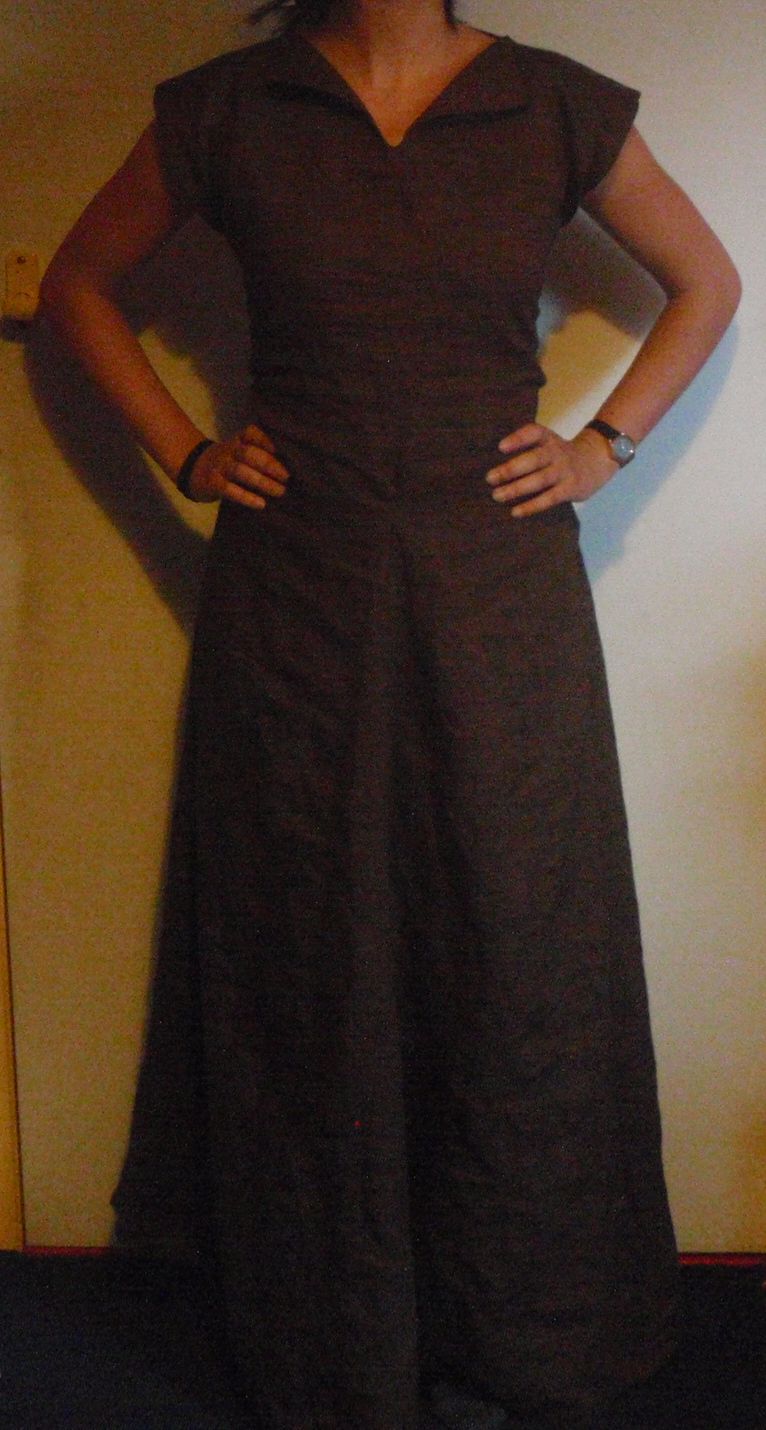
This treatment is also easier to finish as I had an inbuilt facing piece already. Anyway, here is the finished dress!

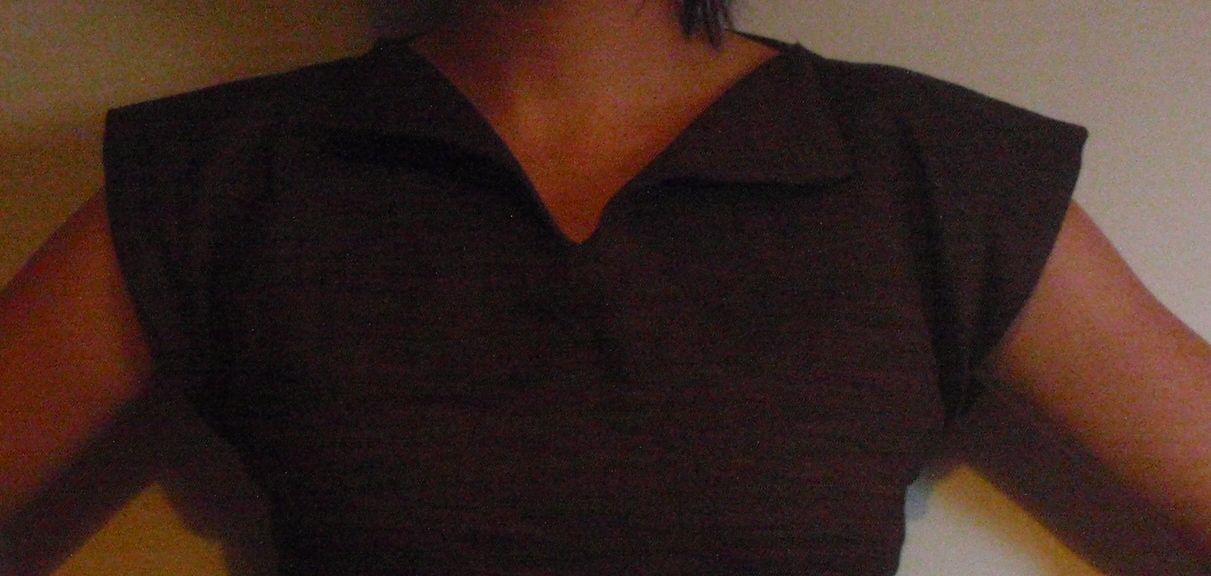
Front Back Top

Front and back go first of course, with a detail of the neck slash opening.

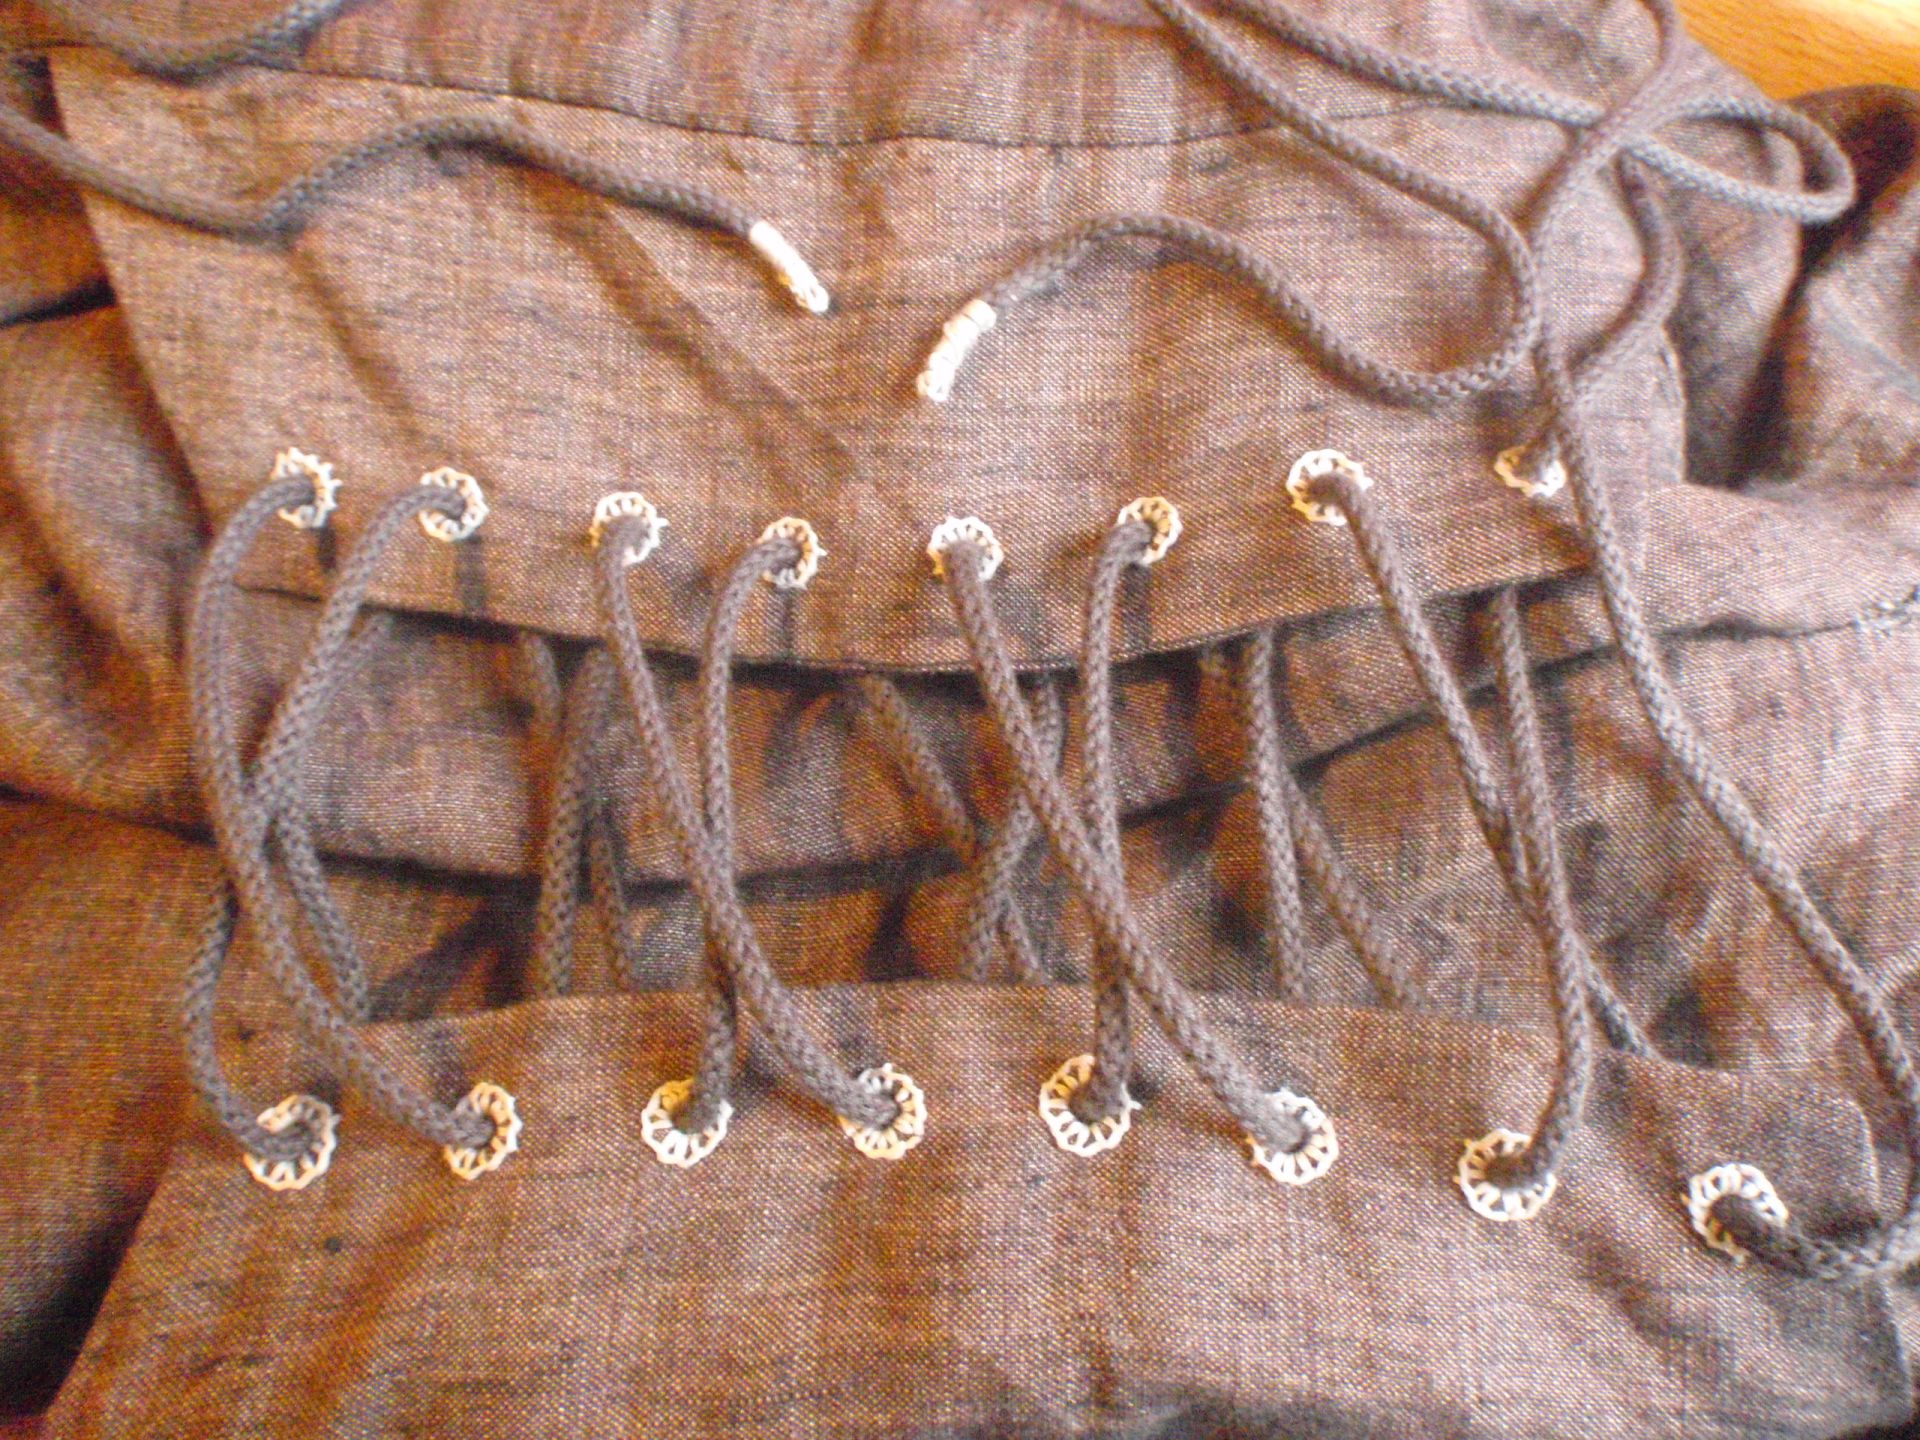
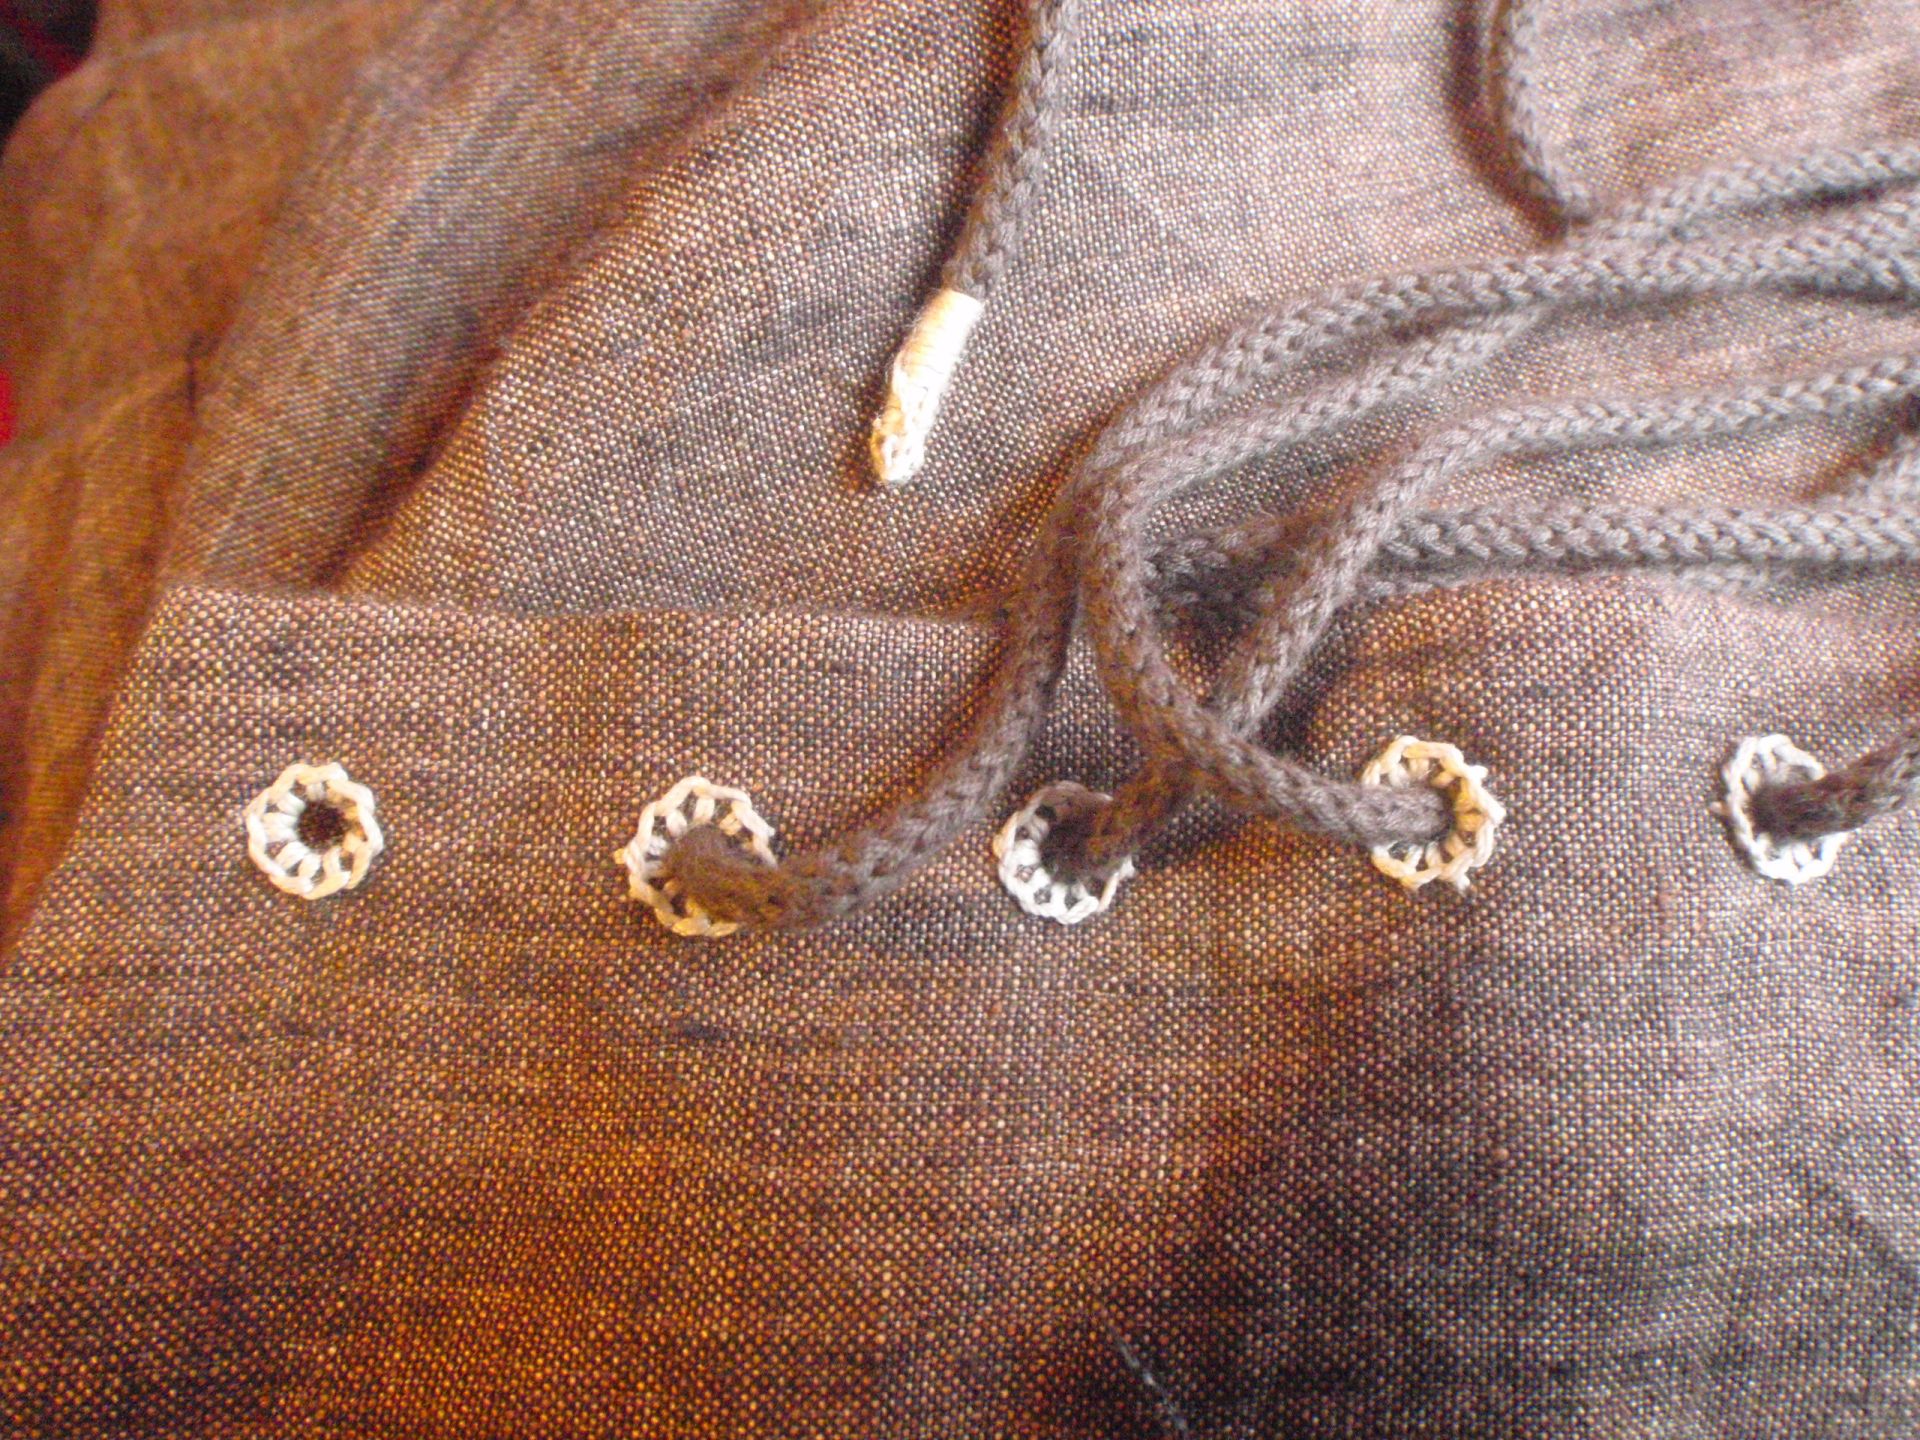
I sewed this thing completely by hand, with only the use of an iron, a metal current meter and a paint brush. Those last two might seem a bit strange, but I had to use an awl for poking the eyelets, and I couldn’t find one. However, the combination of the metal stick and the paint brush to make the hole bigger worked fine. Here is a picture of my eyelets including the ends of the string that I bound so they go through the holes easier.

Eyelets Eyelets

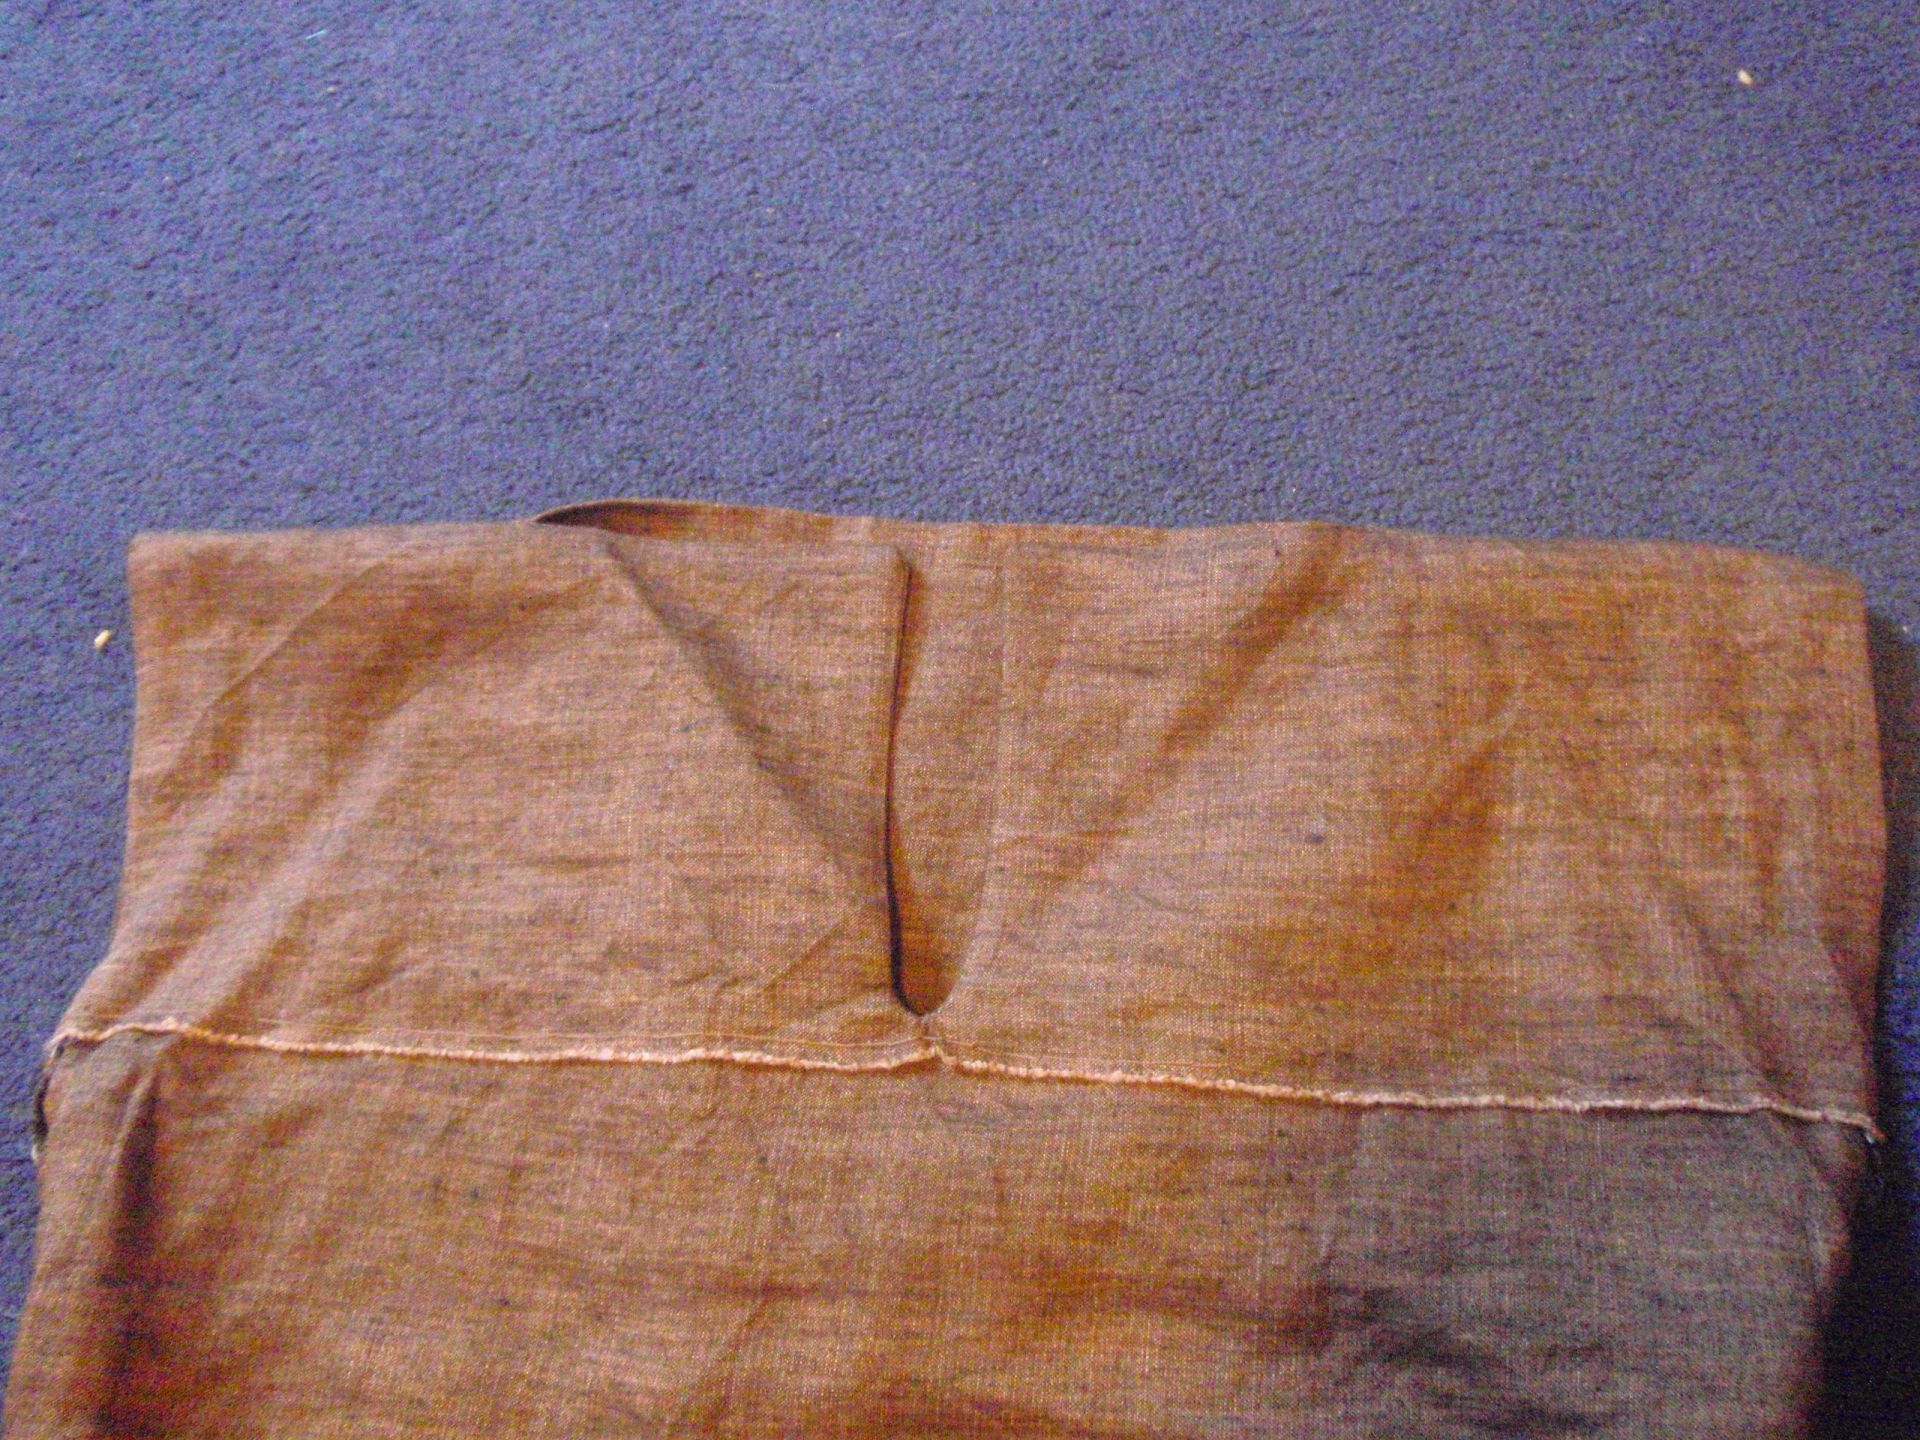
I also want to show you a picture of the insides, first top back and front:

Top front inside Top back inside

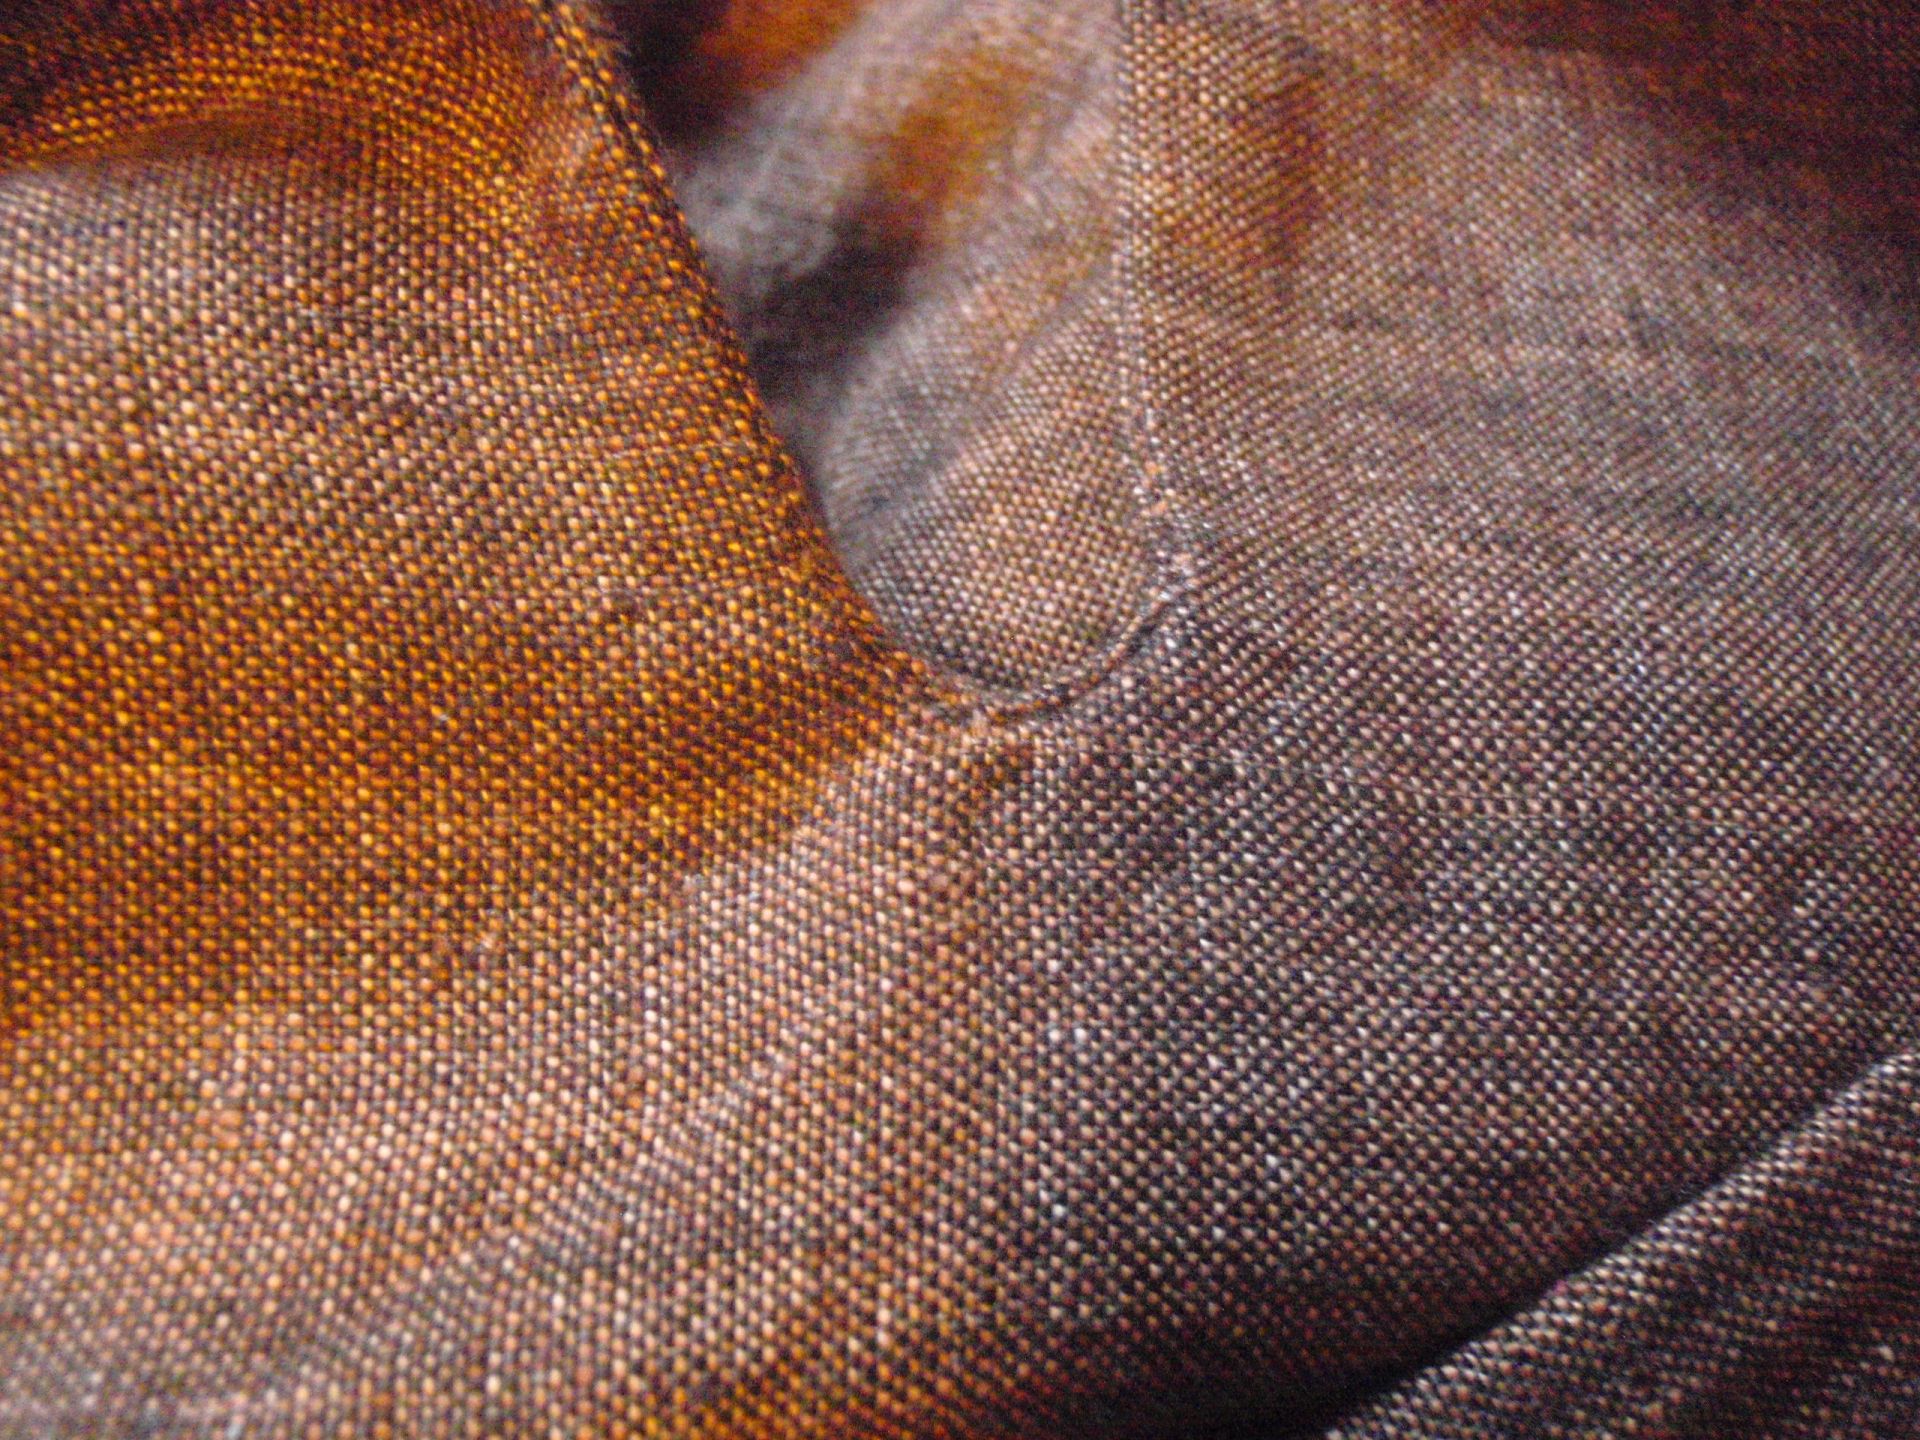
The edges are the selvage of the fabric, so they don’t fray. I did tack them down, but somehow managed to make  those stitches as close to invisible as you can get. I put this down to variegated fabric and matched tread. Below you see the bottom of the slit, clearly the facing had to have been tacked down somewhere there, but I couldn’t find my stitches.

Slit and invisible stitches

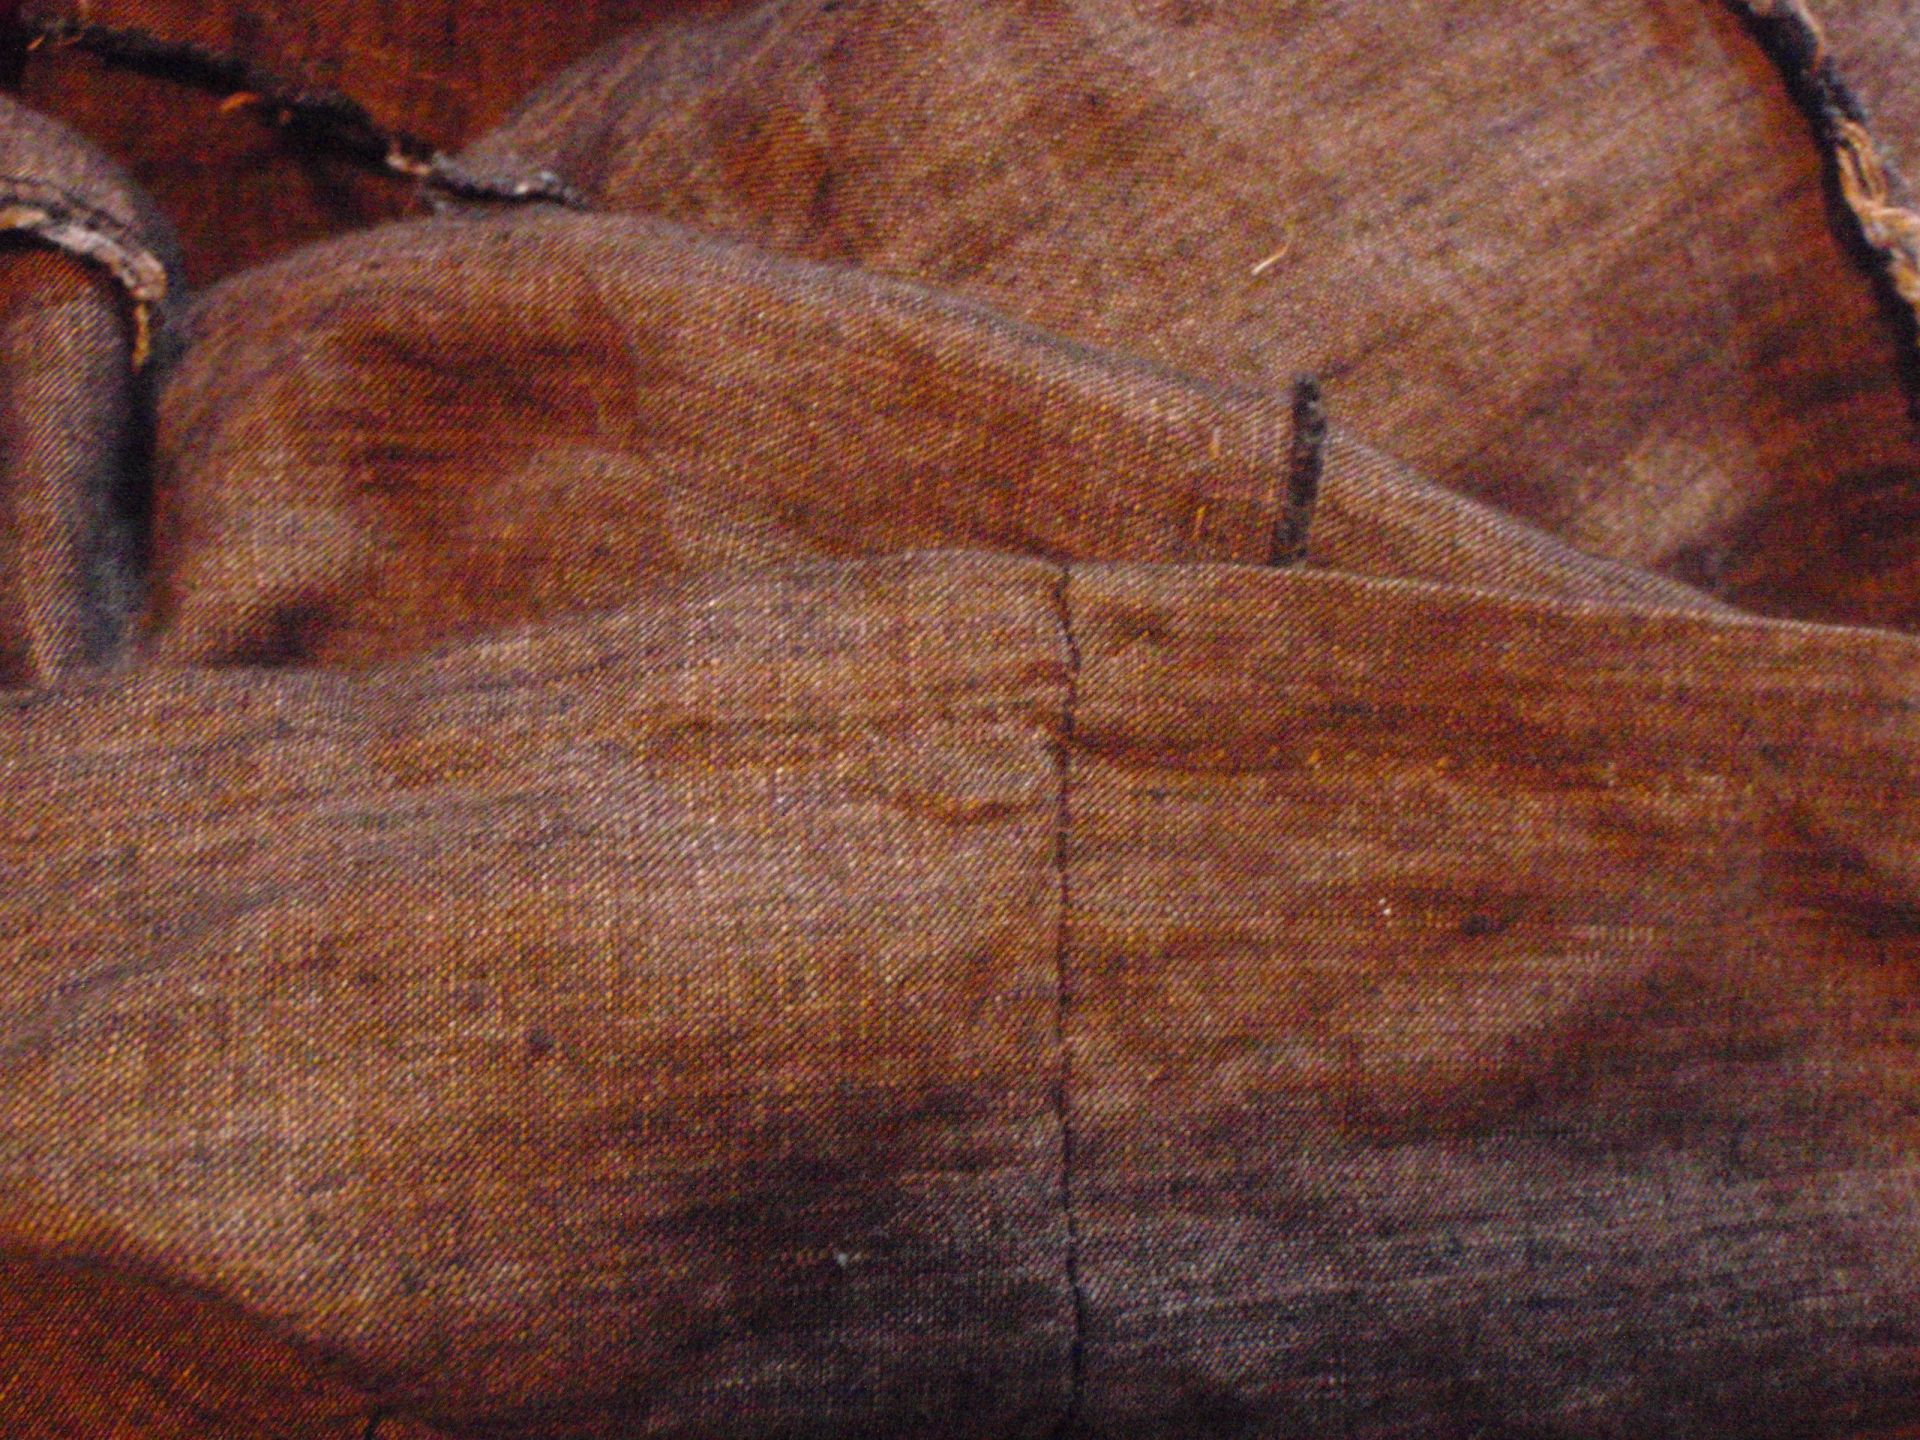
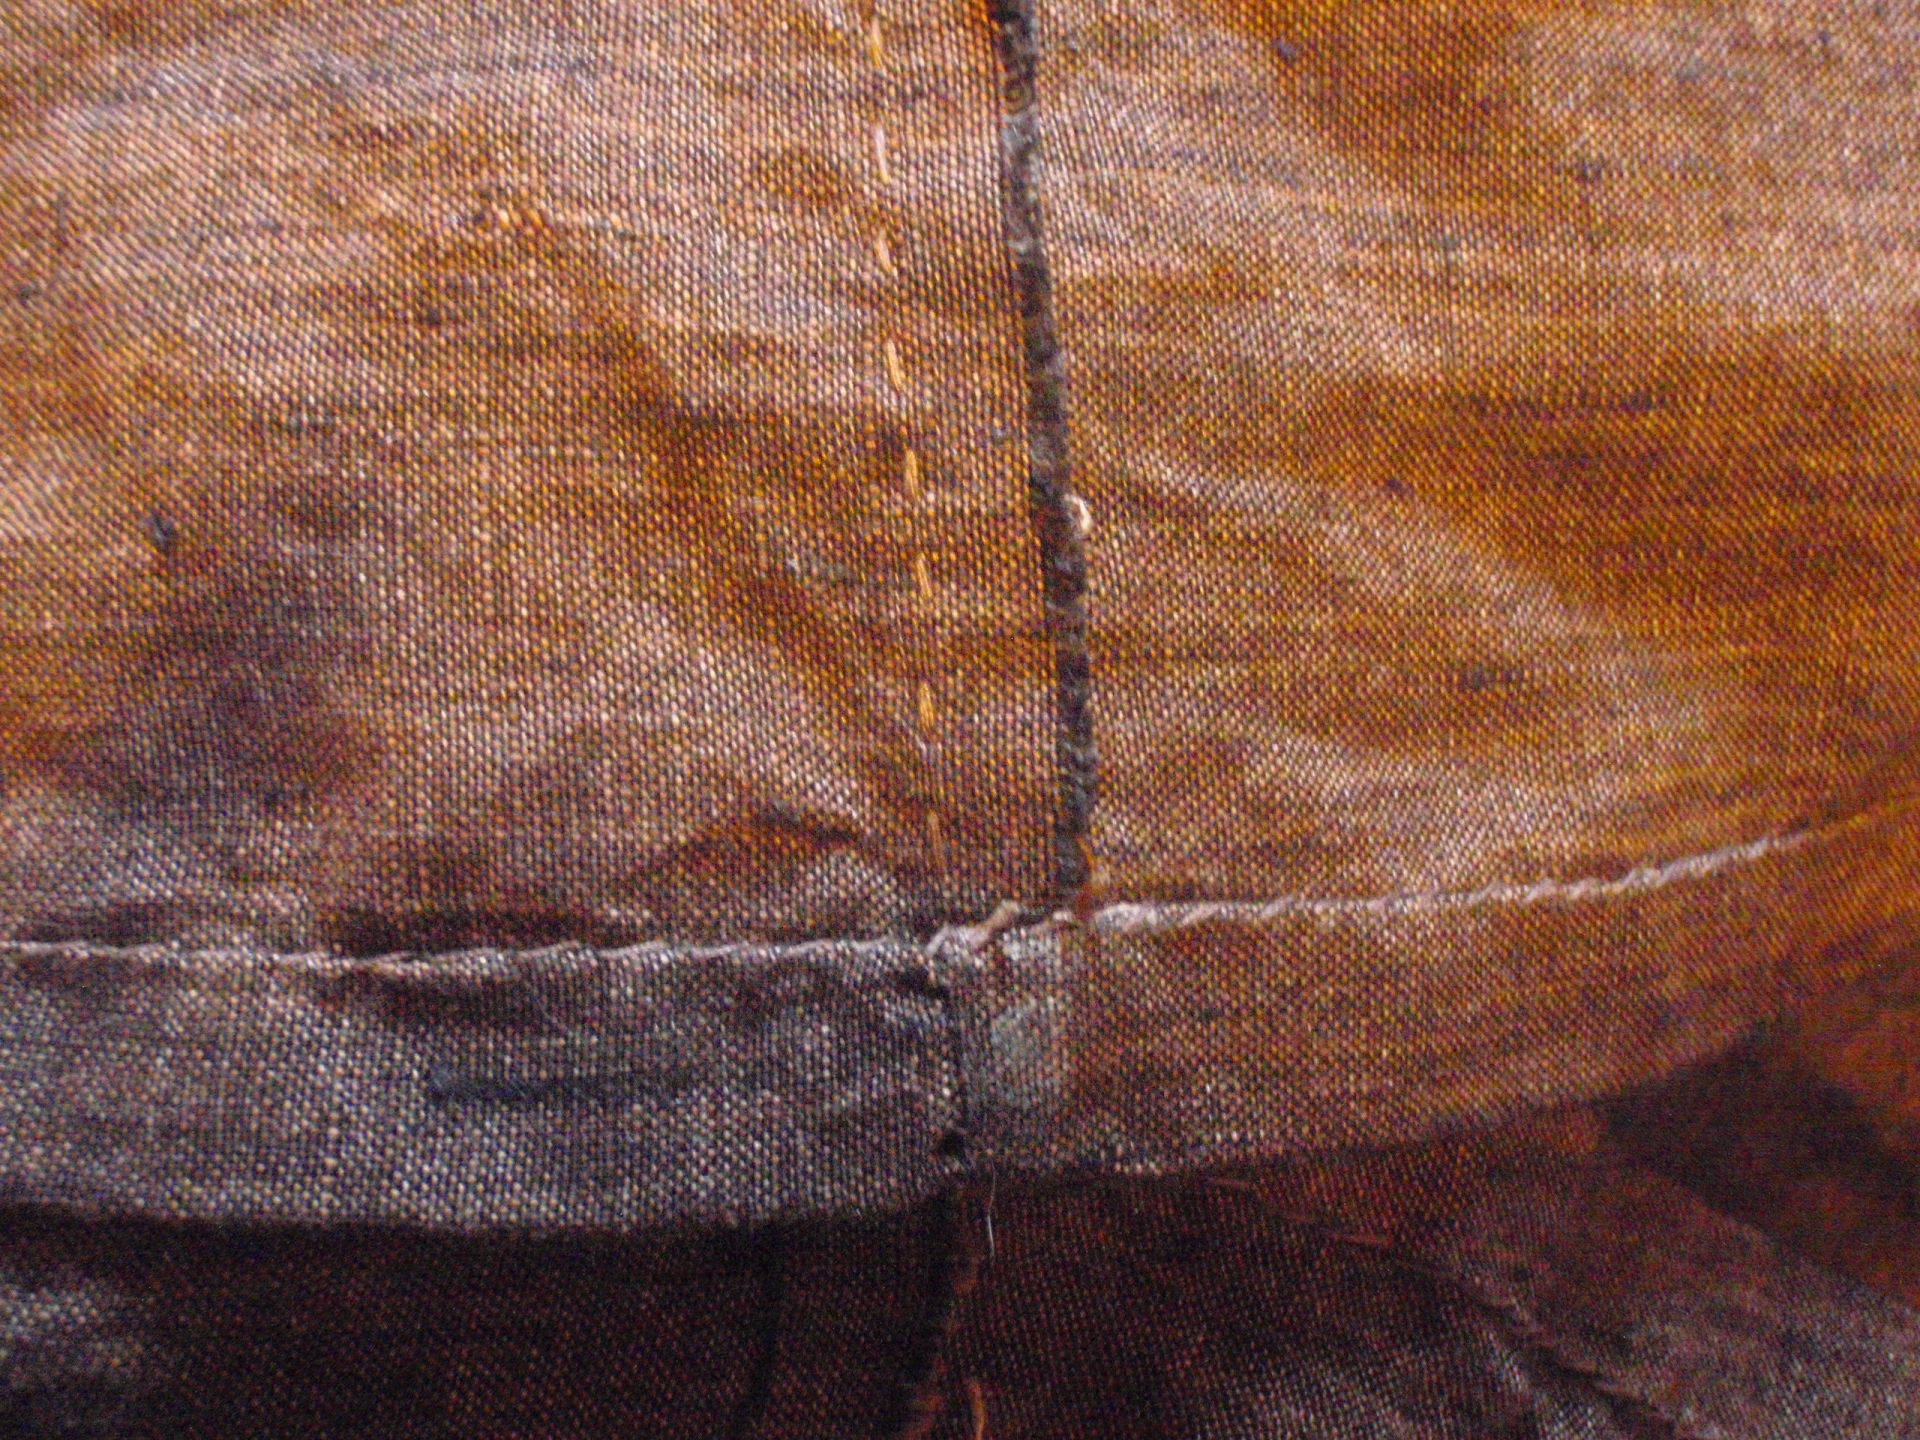
Lastly, the hem. This is also near invisible, which I’m really proud of. Next to it is a shot of a bit of the insides, all painstakingly hand sewn.

Invisible hem Hem


So while it did take quite a while to finish this dress. I’m really happy with it. It fits well, I can dress myself and I have shape (some at least) in it. I’m so glad I managed to find a solution and put this puppy to sleep. Now, I need to finish some other projects!


Brown Dress

After I’d finished the red bag, I wanted a new project. Well, it turned out that ‘new’ is a relative term. The project that I am continuing on is actually my oldest work-in-progress that I’ve saved I think. It’s a brown dress I started 5 years ago. The plan was to completely hand sew a dress that would be larp appropriate. I managed to cut it out and sew in 1.5 of the godets. I basted the other 2.5 so I needed to finish those seams also.

The reason I decided to continue with this project was the fact that I’d found a solution. The problem was that I couldn’t figure out a way to make it fitted without adding a zipper or buttons. The dress is basically straight up and down with 4 triangular bits inserted, so there is no shape. Then I saw a picture were they used two inserts in the side seams which had eyelets in them, and a corset type closure by stringing something through the eyelets.

I found that I had basted a line where I wanted to cut of the bottom to make it straight-ish. I cut of the bottom and use some of the extra’s to make the inserts for the side seams. I also handworked eyelets and now I actually have shape! I have it finished from the boobs down. The problem is the top. I don’t know what to do with it.

Front Back

I had it closed with a shoe lace, so that’ll be a better coordinating piece once I buy it.

Any ideas what to do with the top?

Red Bag

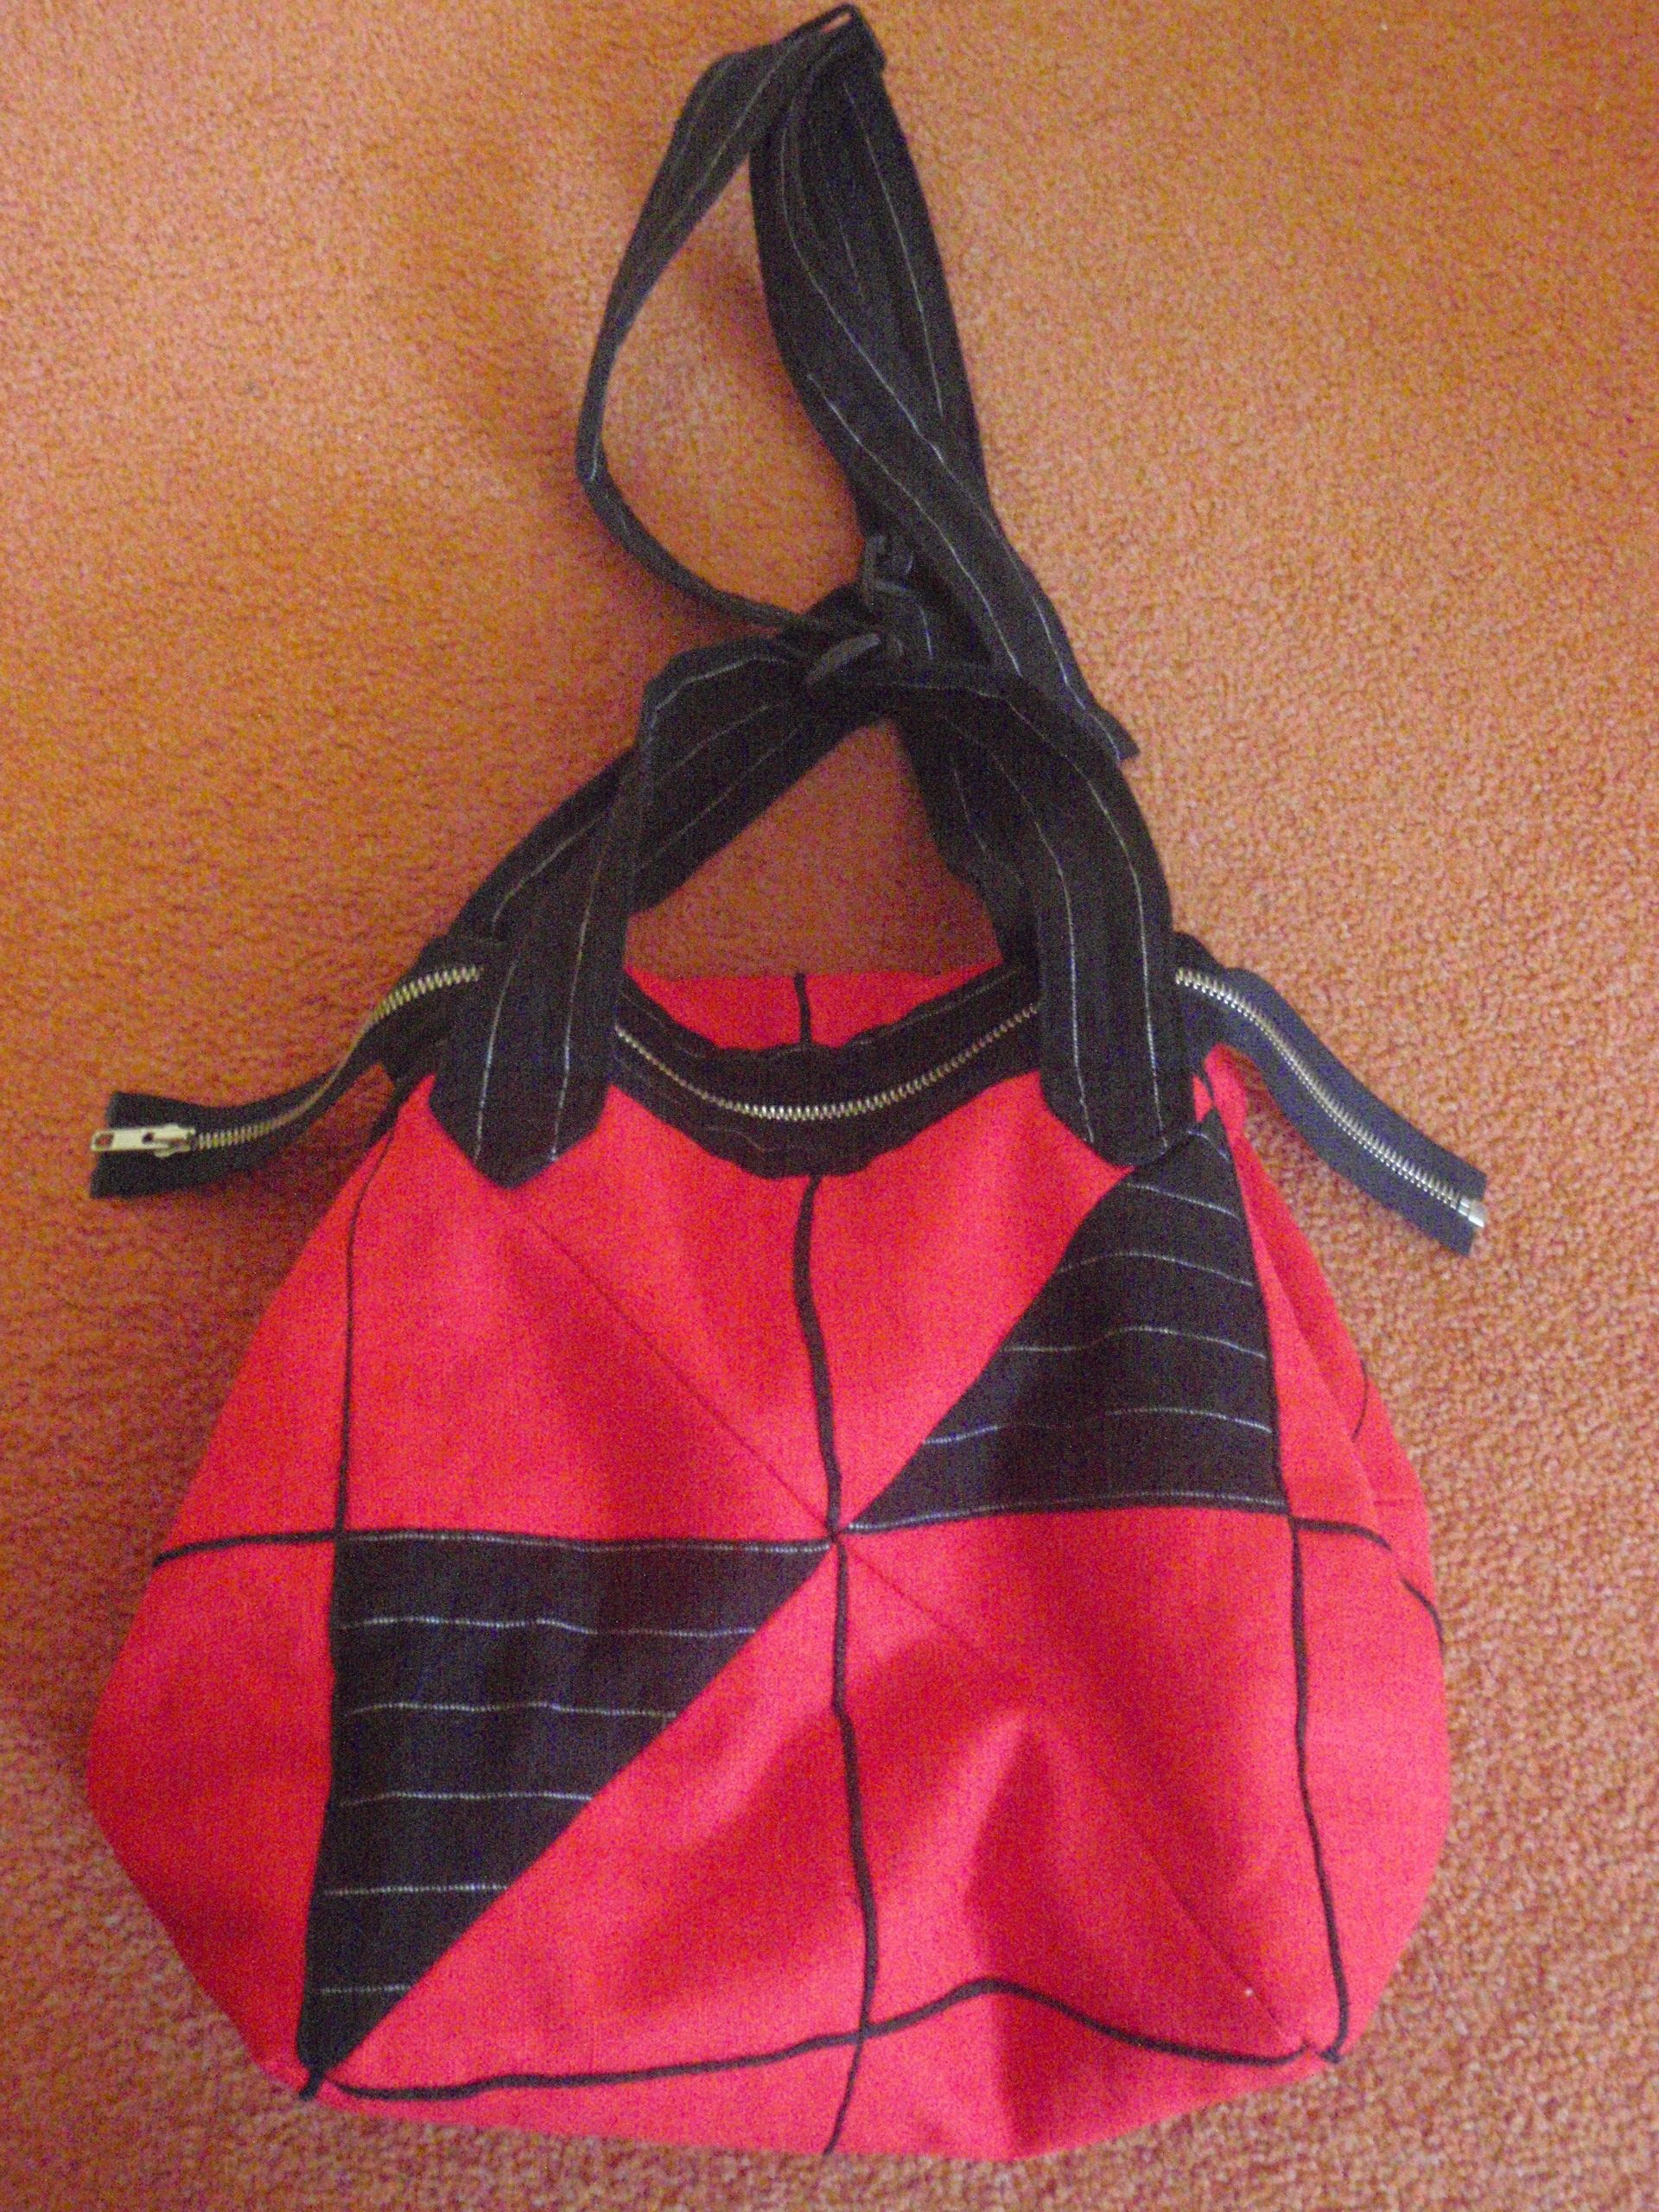
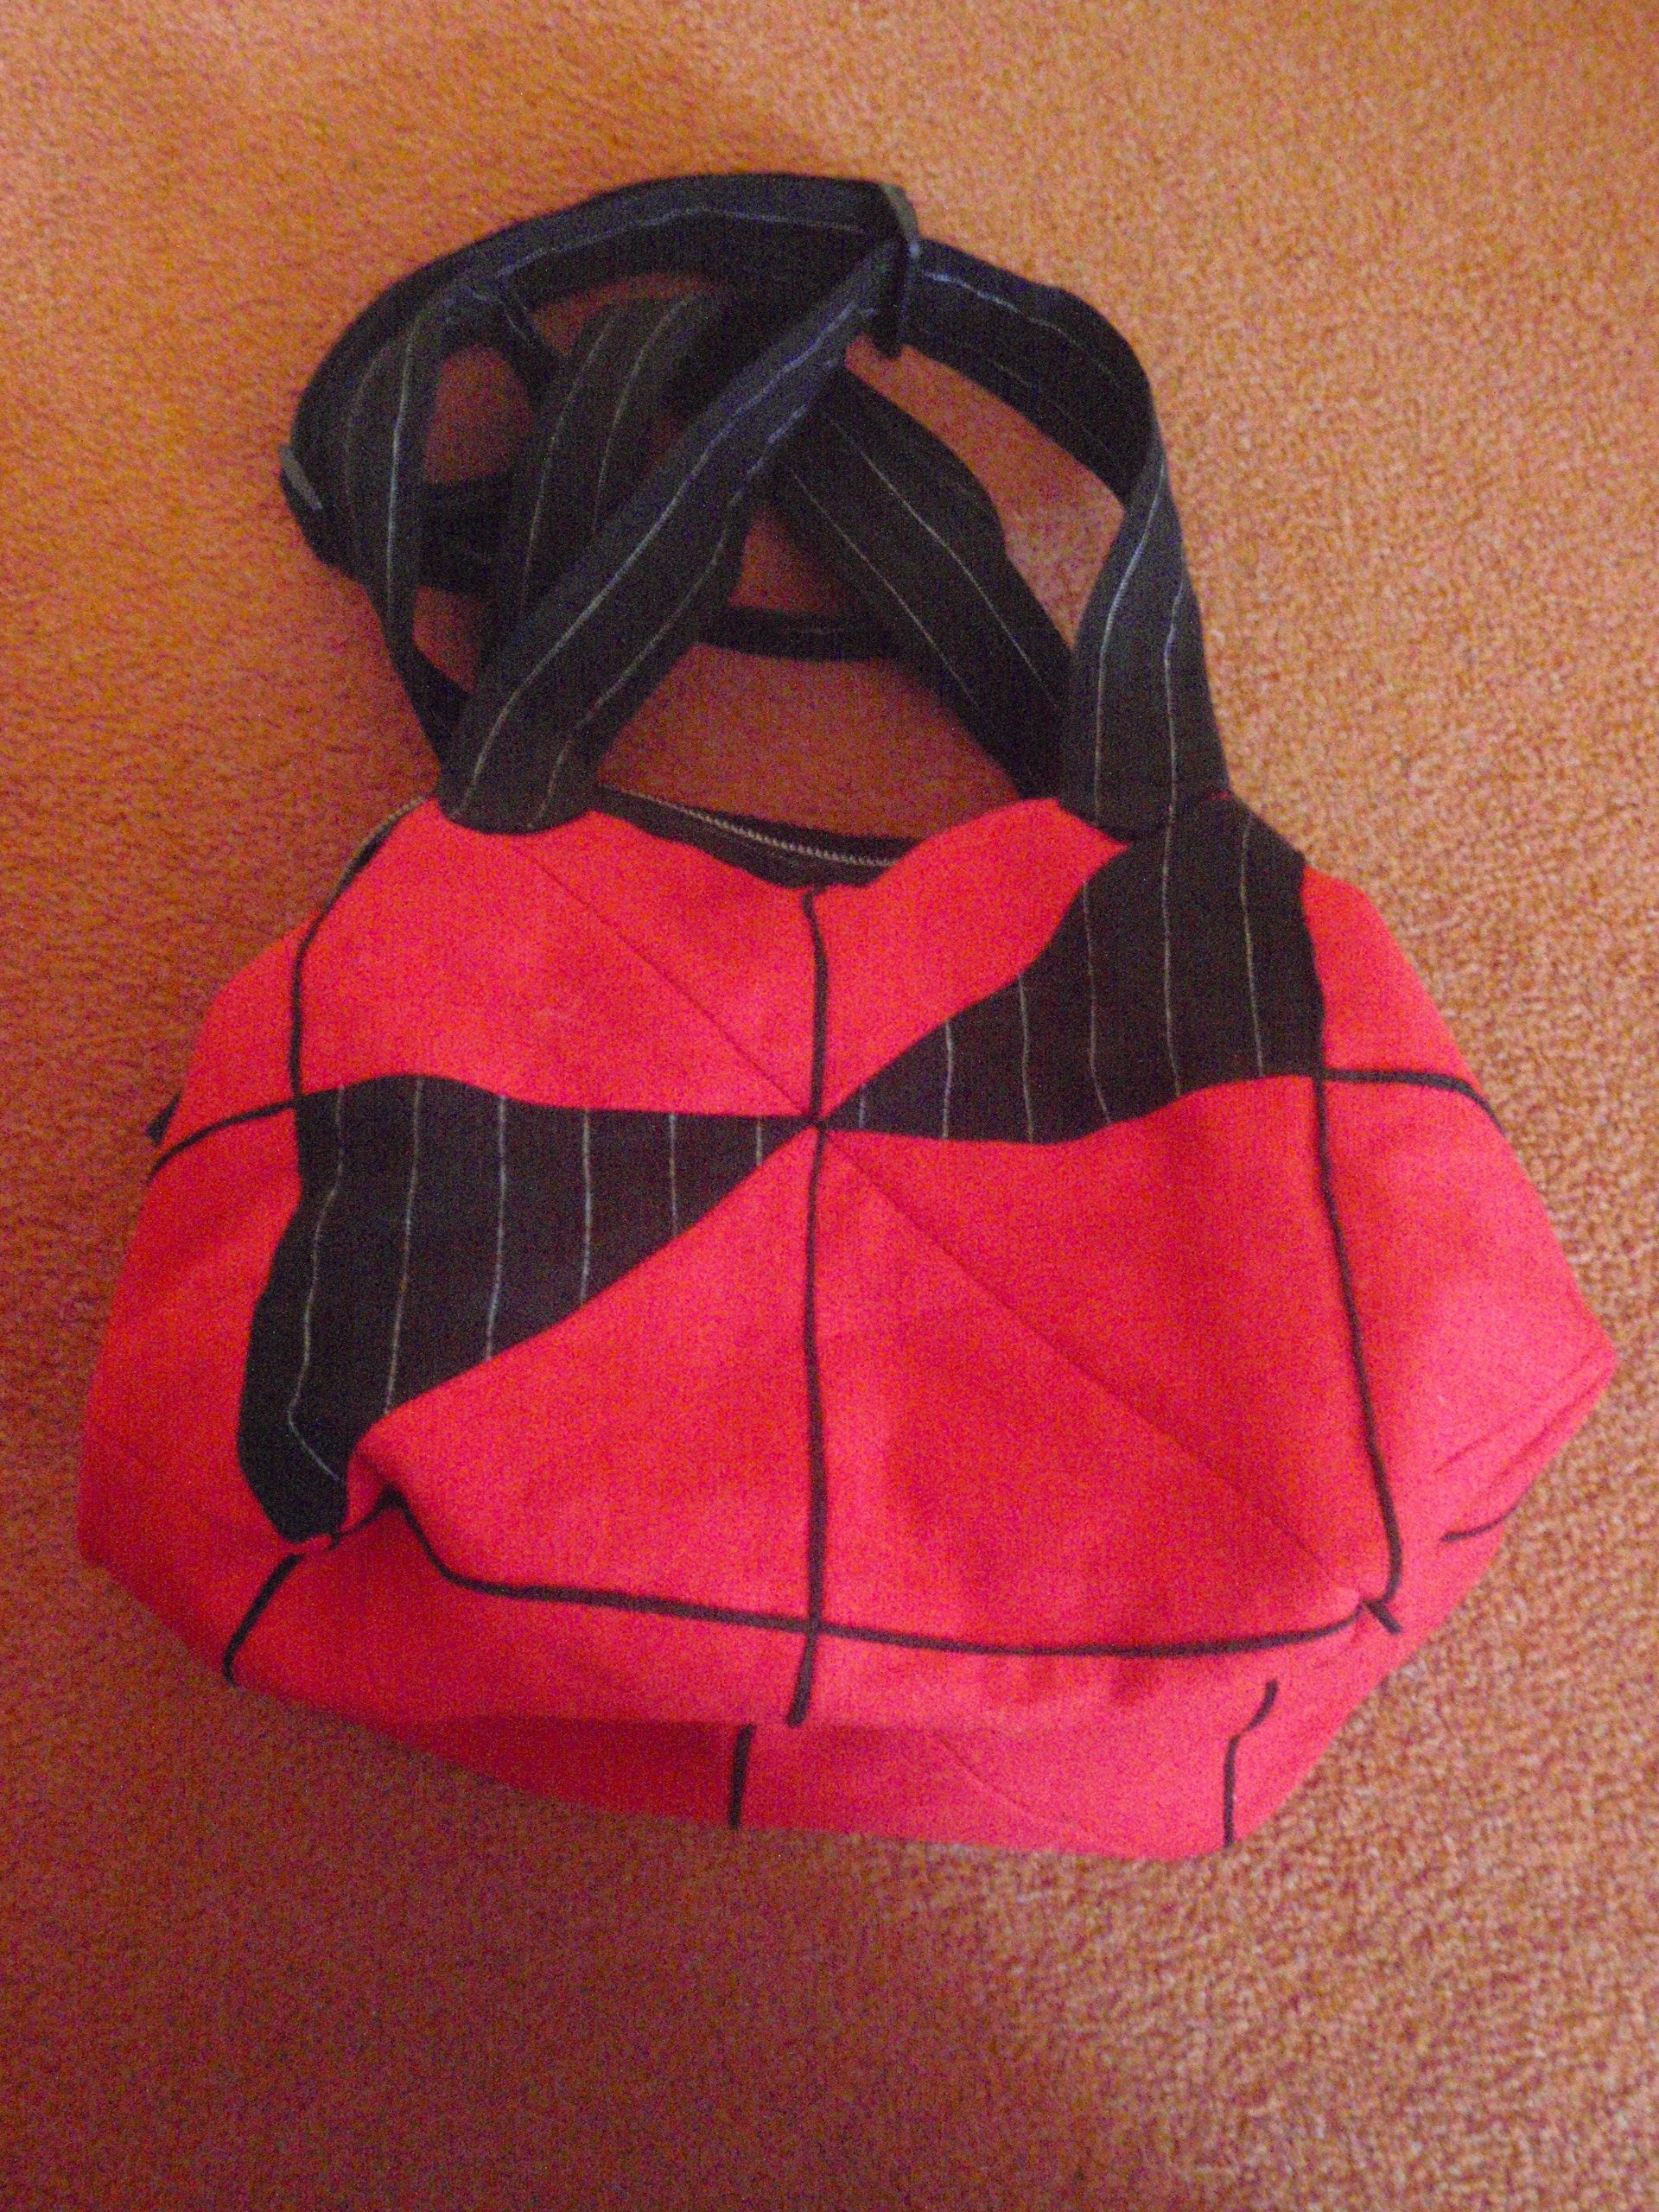
Last time I posted, I hoped I could post about the red bag being finished. I am very proud of myself for actually doing that. Today I finished the red bag. Now, you might wonder what ‘the red bag’ is. When I decided to start quilting I went to the library to get a book. I came home with two, of which one was “Japanse quiltstyle” (or “Easy Japanese quilt style” – by Julia Davis and Anne Muxworthy (here)). I really liked the bag on the front (here) but I couldn’t find enough different fabrics to make a fun multi-coloured patchwork bag. Then, a light bulb turned on in my head. I could do it in one colour I really liked and do with piping!

I searched my stash for a fabric and located a red linen stuff that I really love the colour of. I always think that red and black go very well together so I found a black pinstripe fabric that had 2 cm apart pinstripes. This meant that I could cut on the lines and they would make nice even piping (if I had sewn straight). I cut out 18 squares of red and 2 of black. Only 9 fit the width of the red stuff and  I figured, variety isn’t bad right, so I took two other squares.

I made some paper models to figure out how the bag was put together. They have you make a windmill shape that sort of twists around such that the diagonal of a square forms the top. It was difficult to picture in my head, so I decided to model it. I sewed everything together and added a couple of touches from my own. Here is the finished product.

Front Back

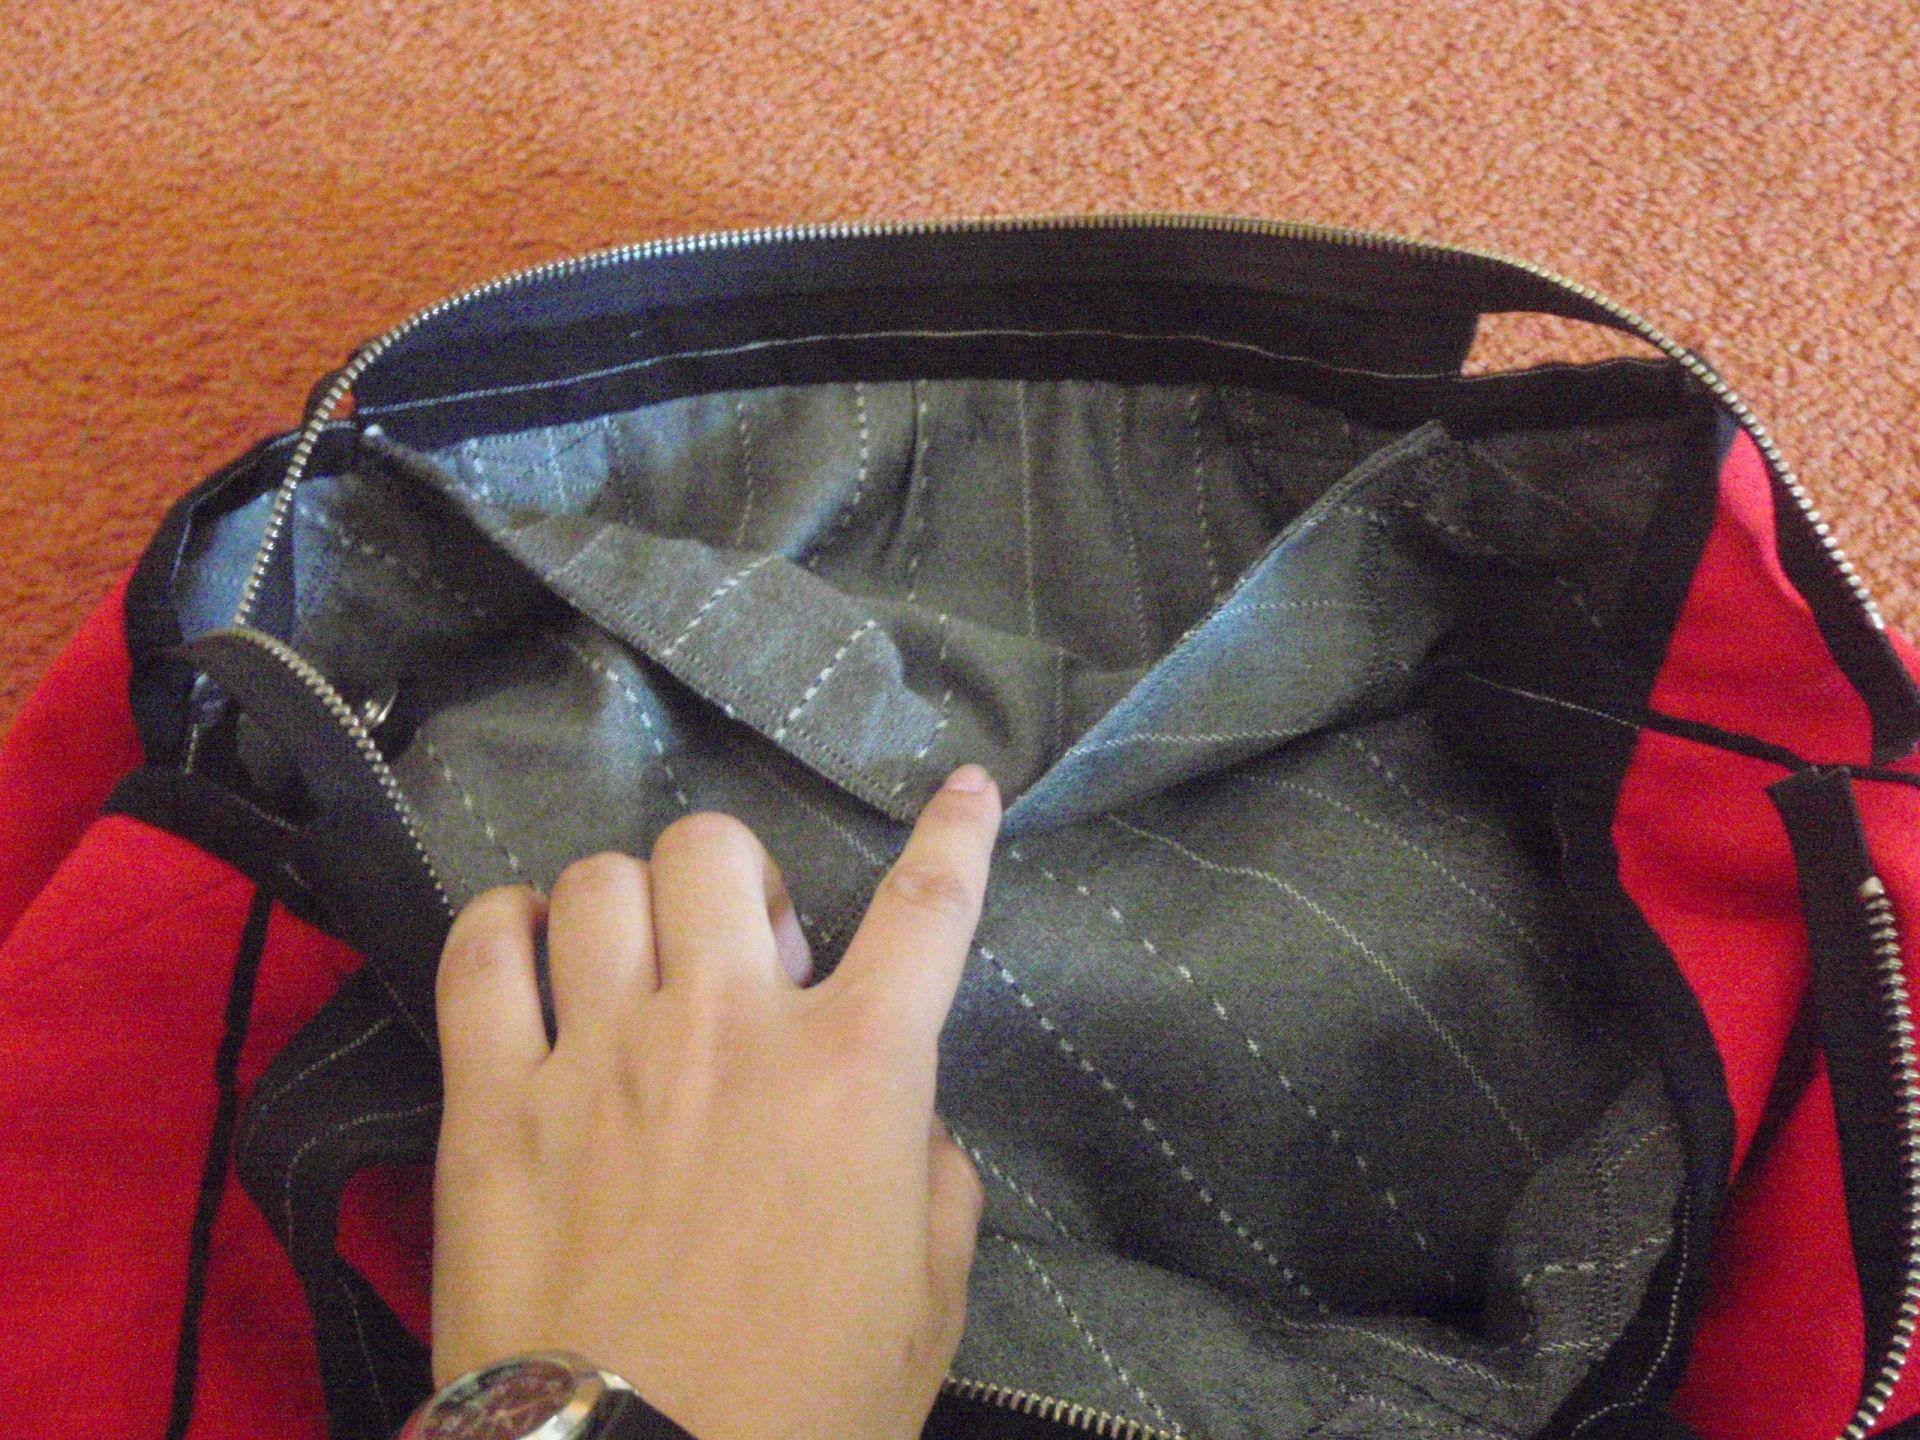
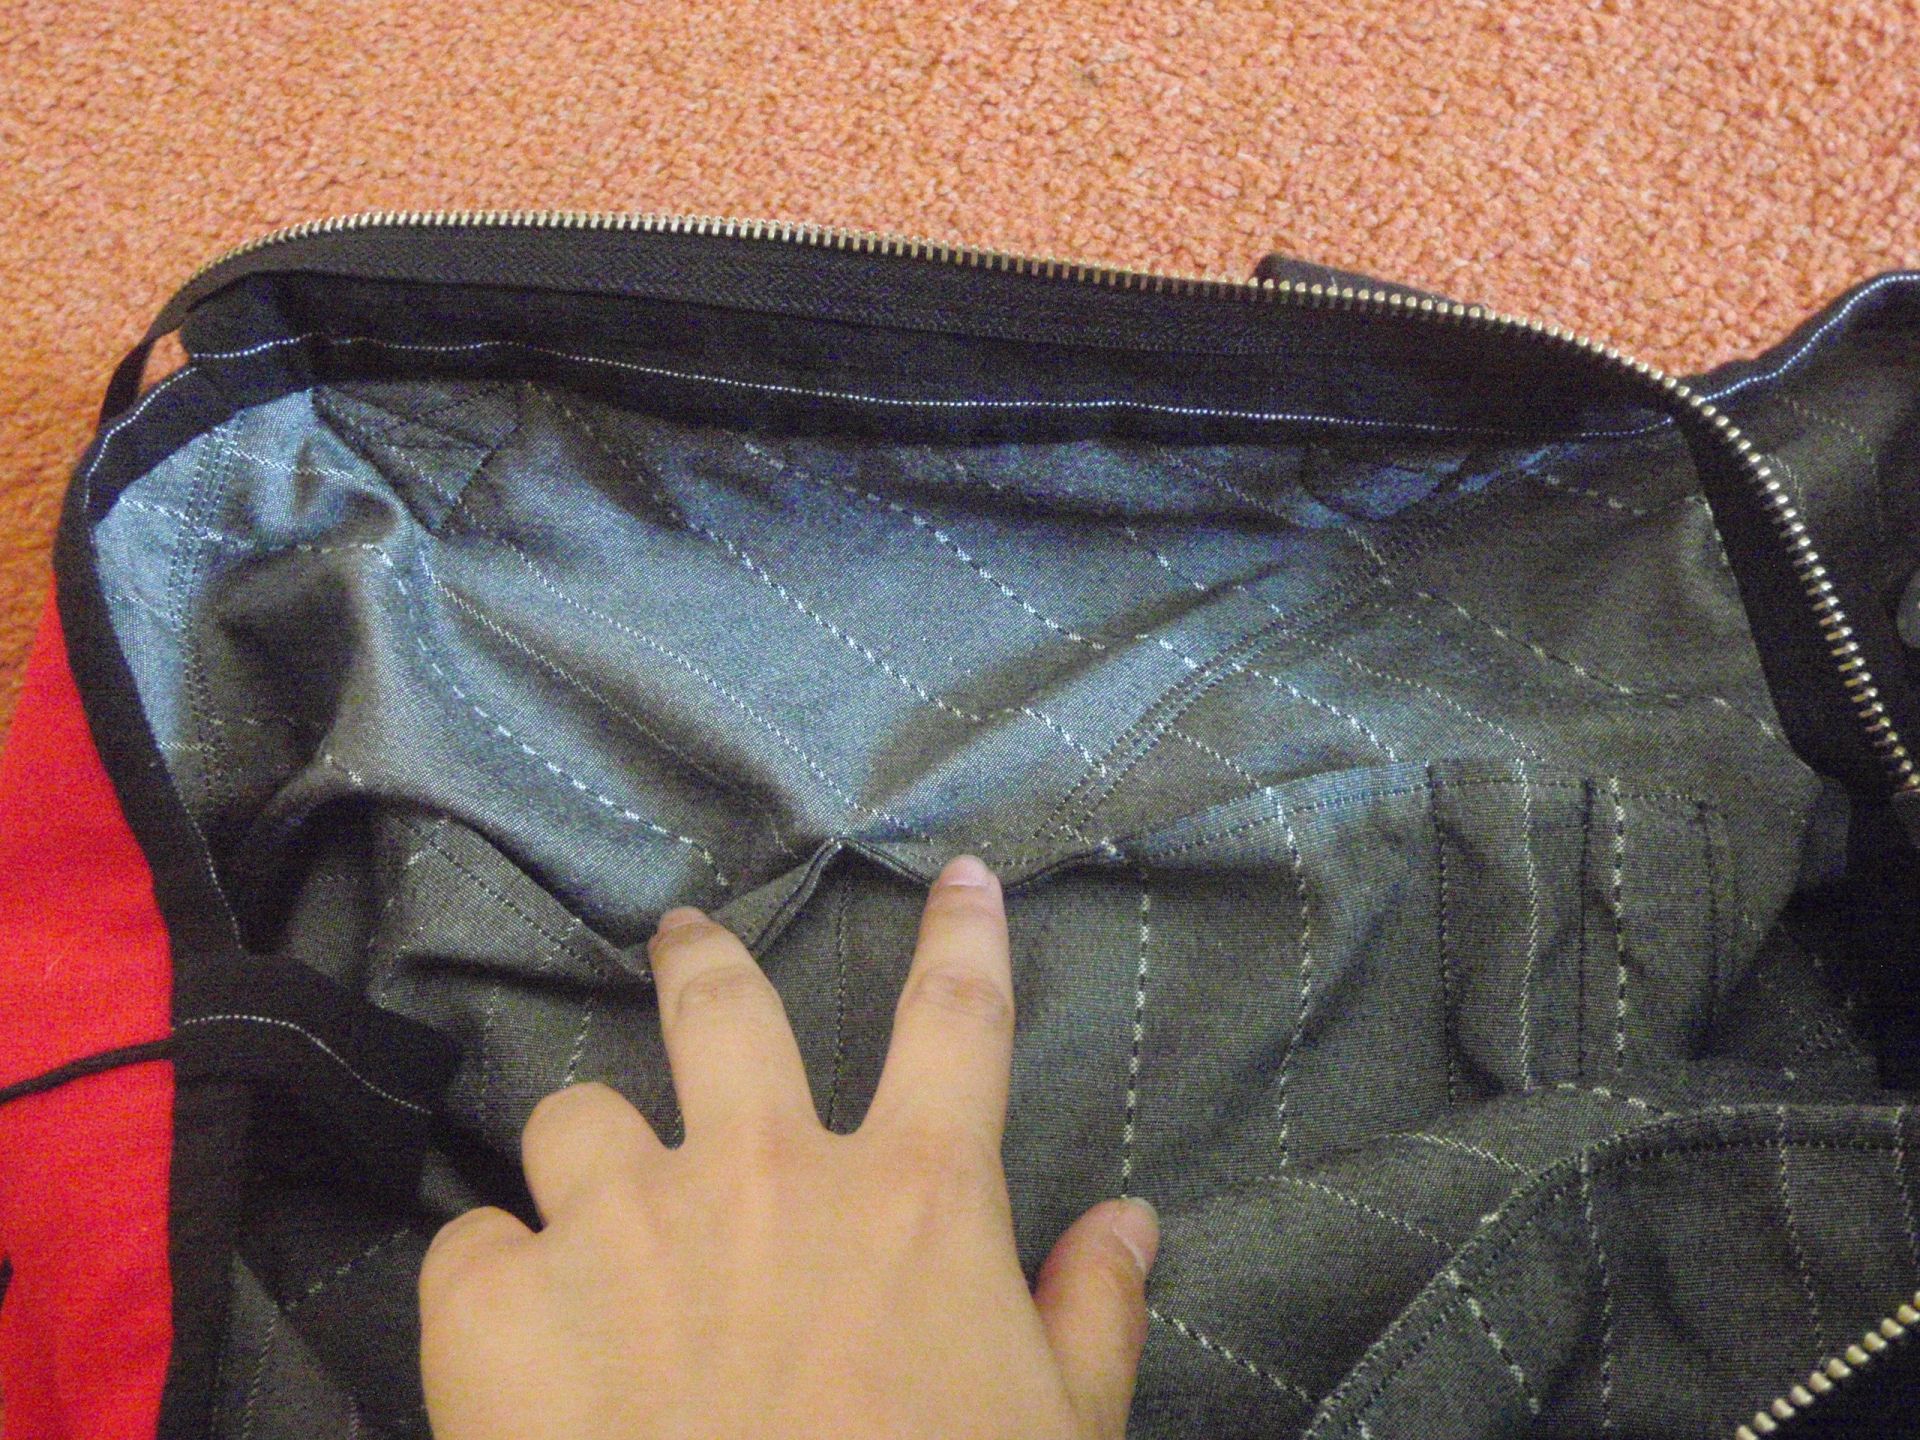
The tie strings on the side were omitted. I did add a half-lining that was waterproof. I also added some pockets on the inside. One big one on the one side, and 2 smaller ones and 2 pen slots on the other side.

Big pocket Small pocket

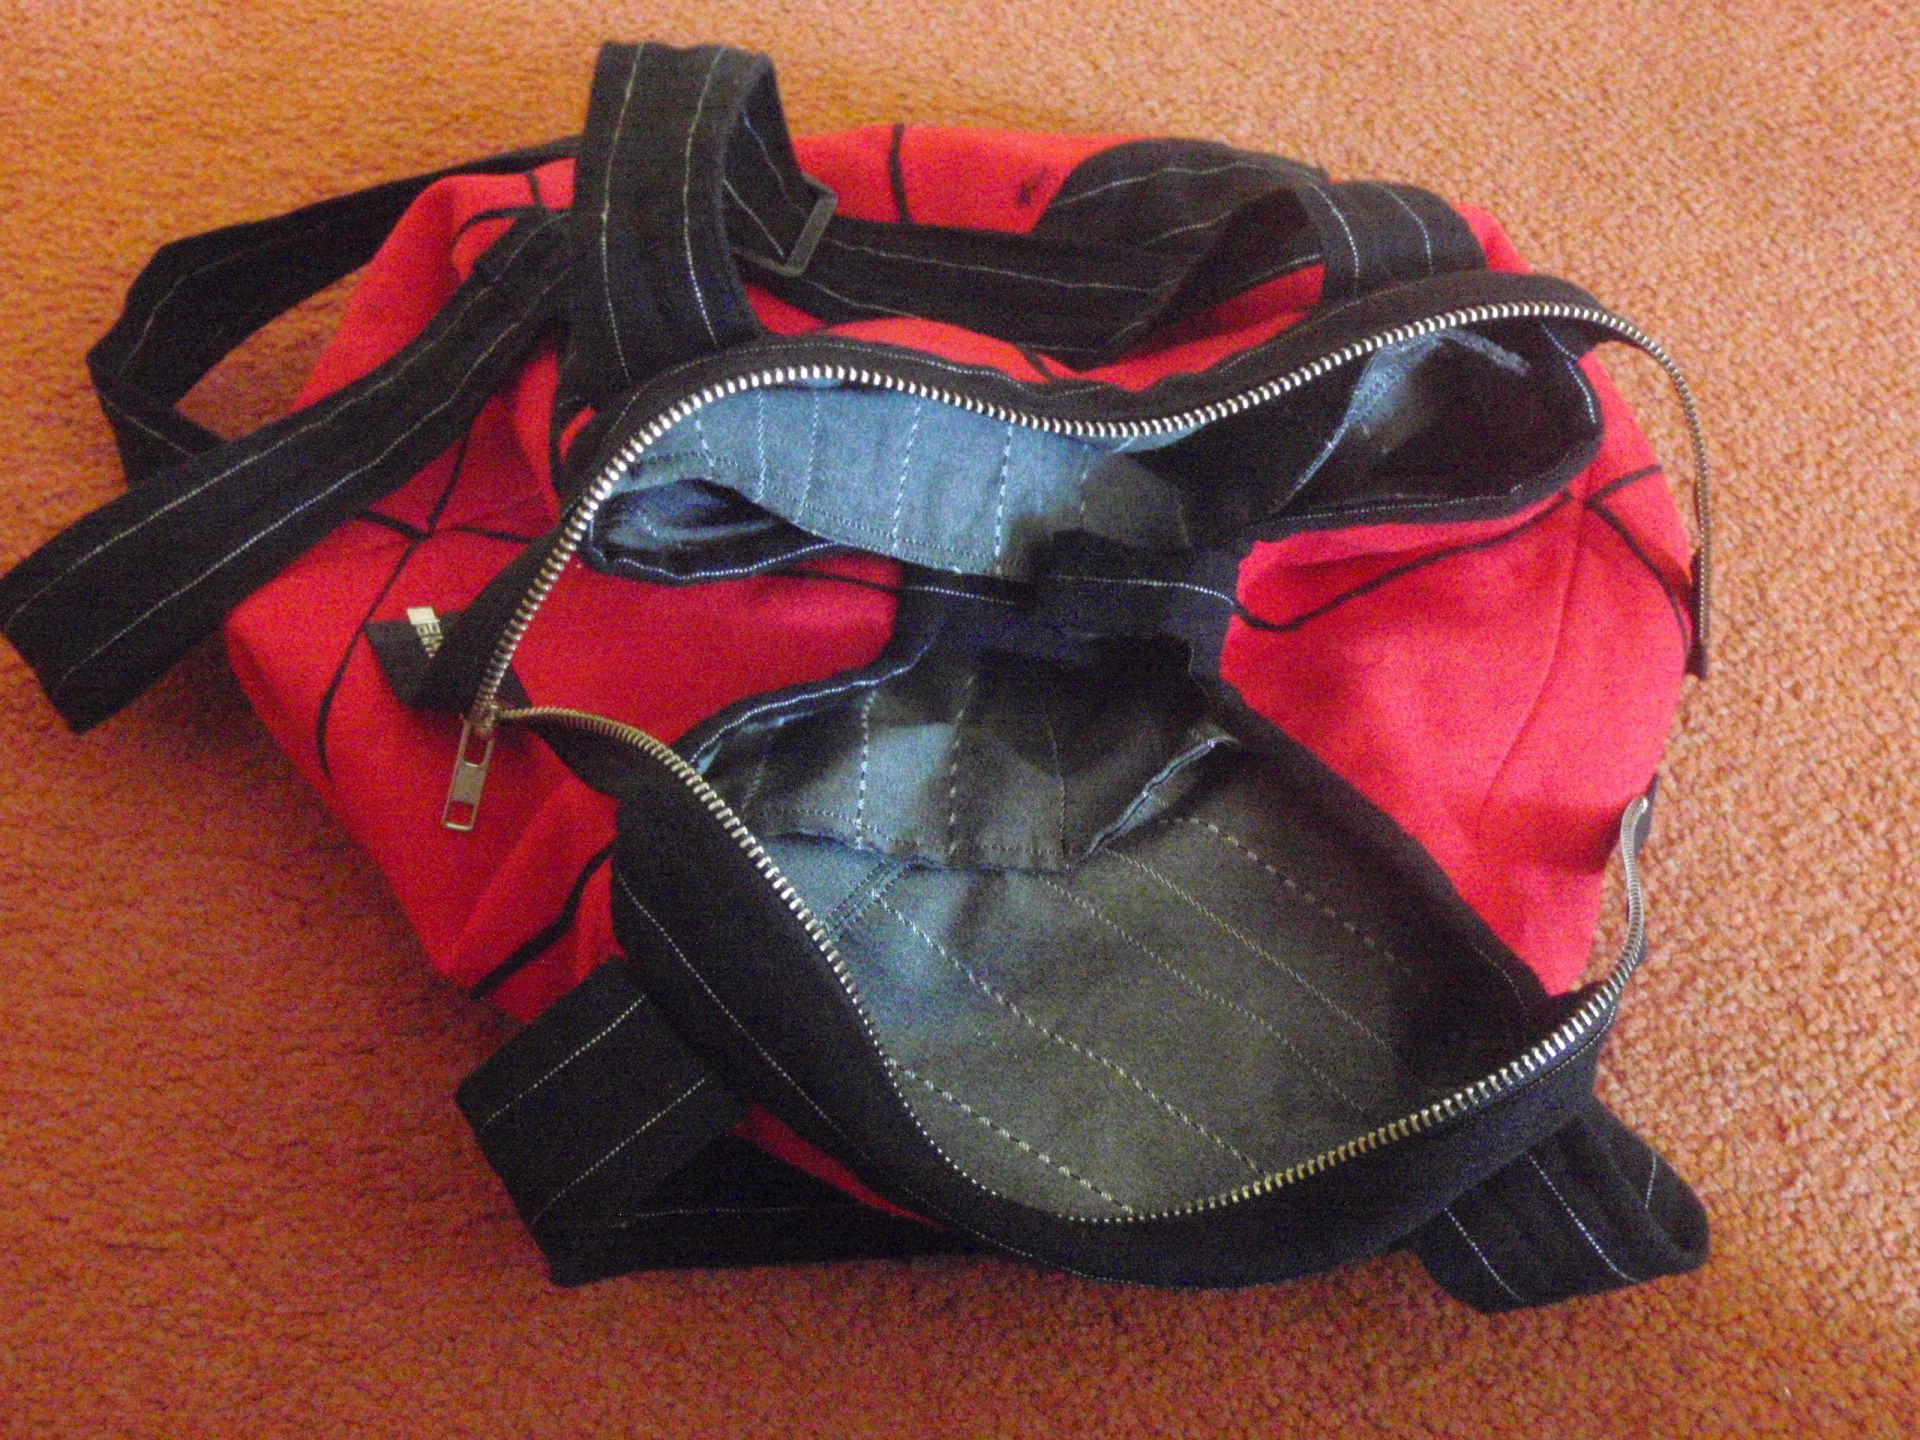
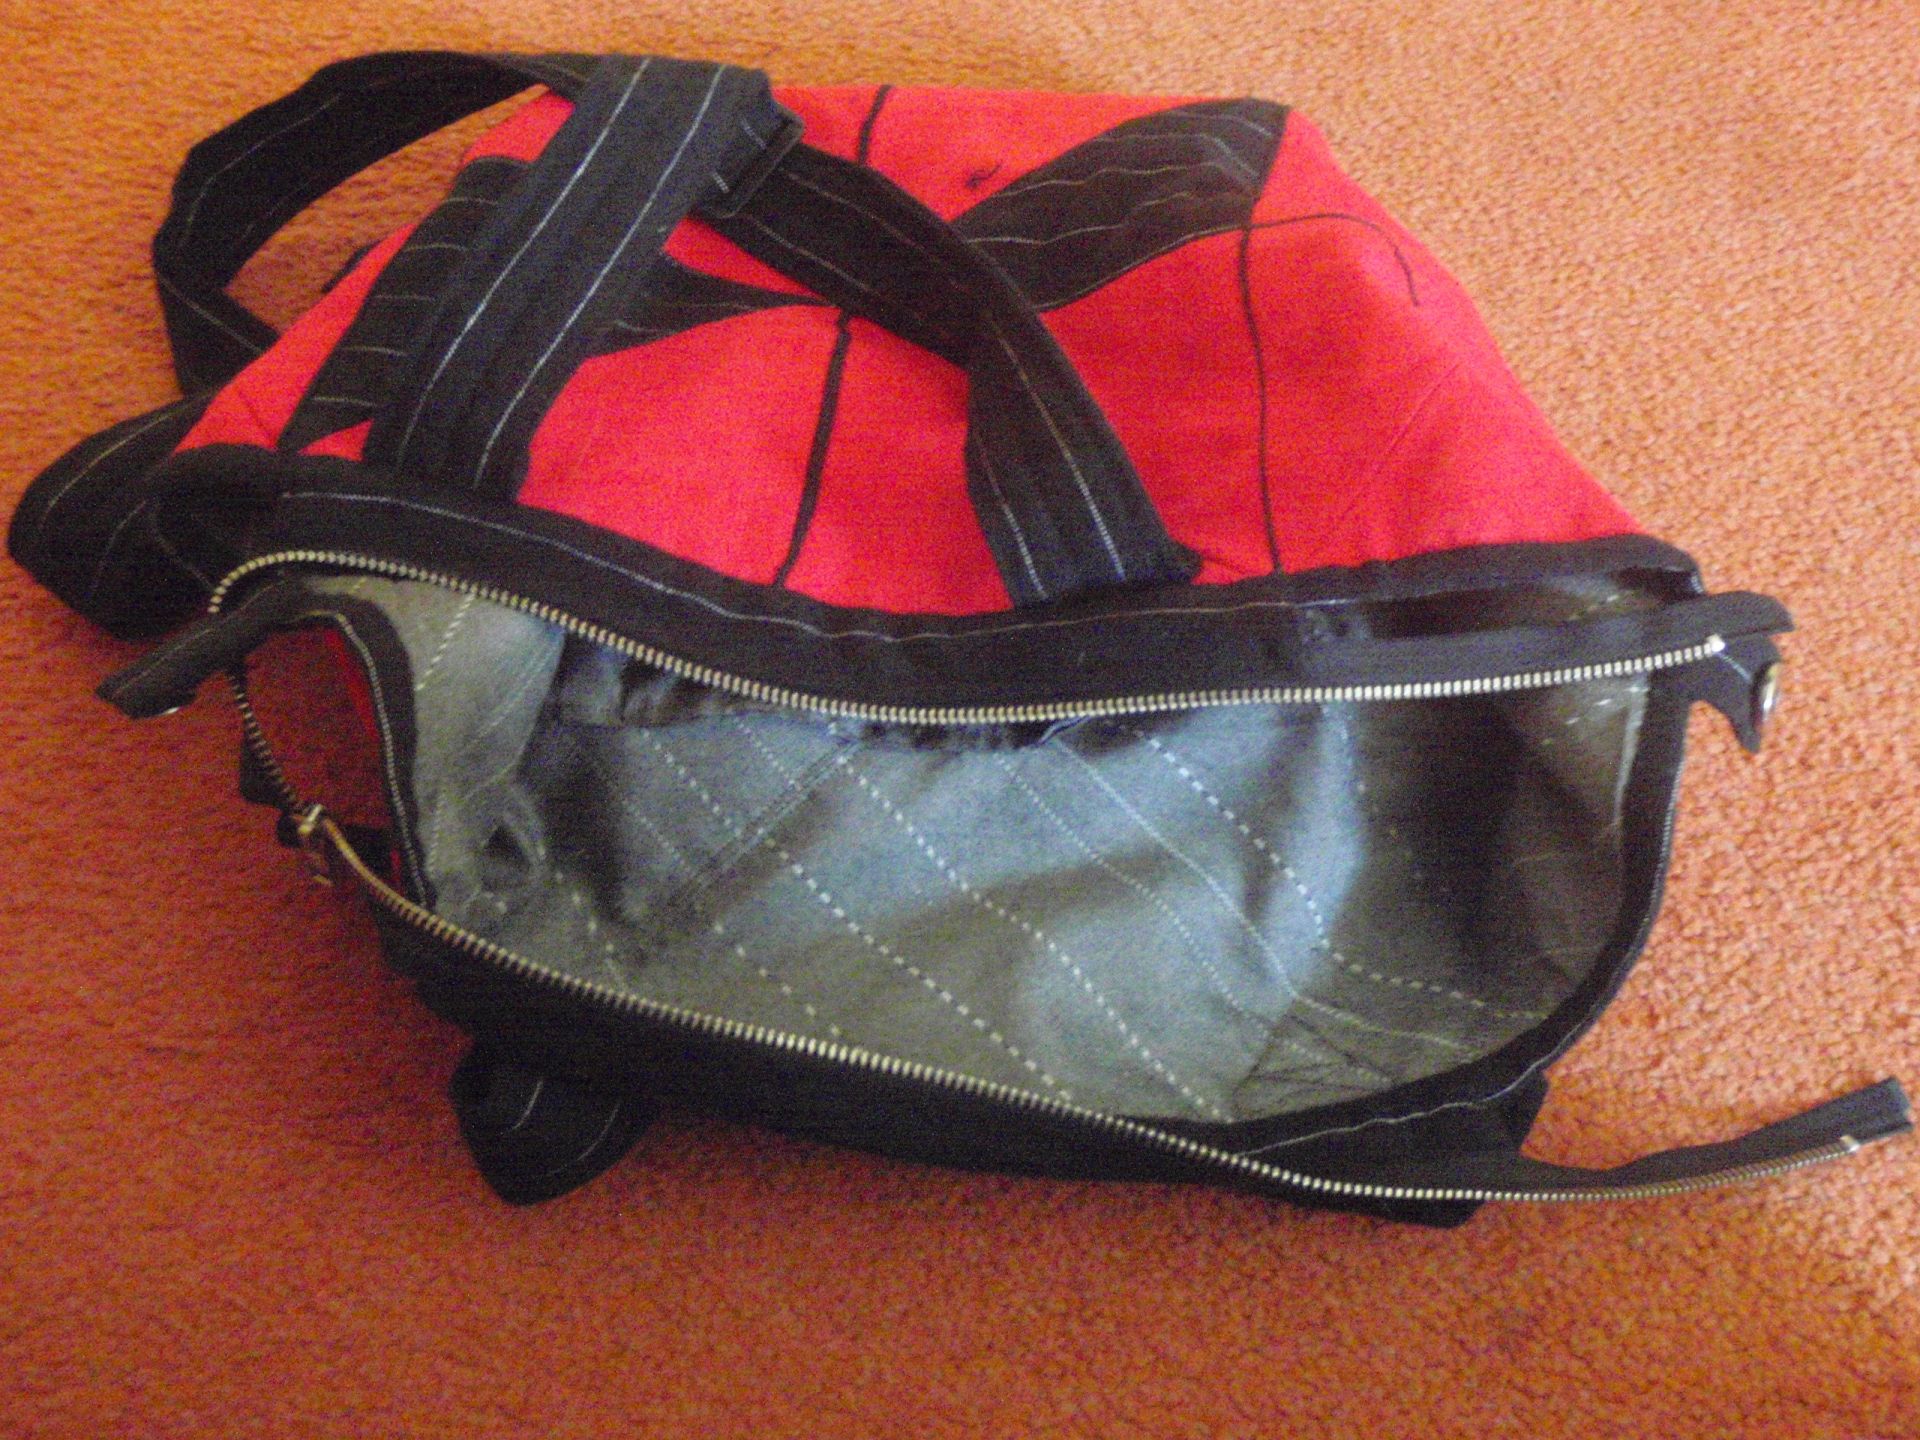
I also added a magnetic button closure to close the bag on the inside, and an overly long (design element) zipper as top closure.

Inner closure Inside

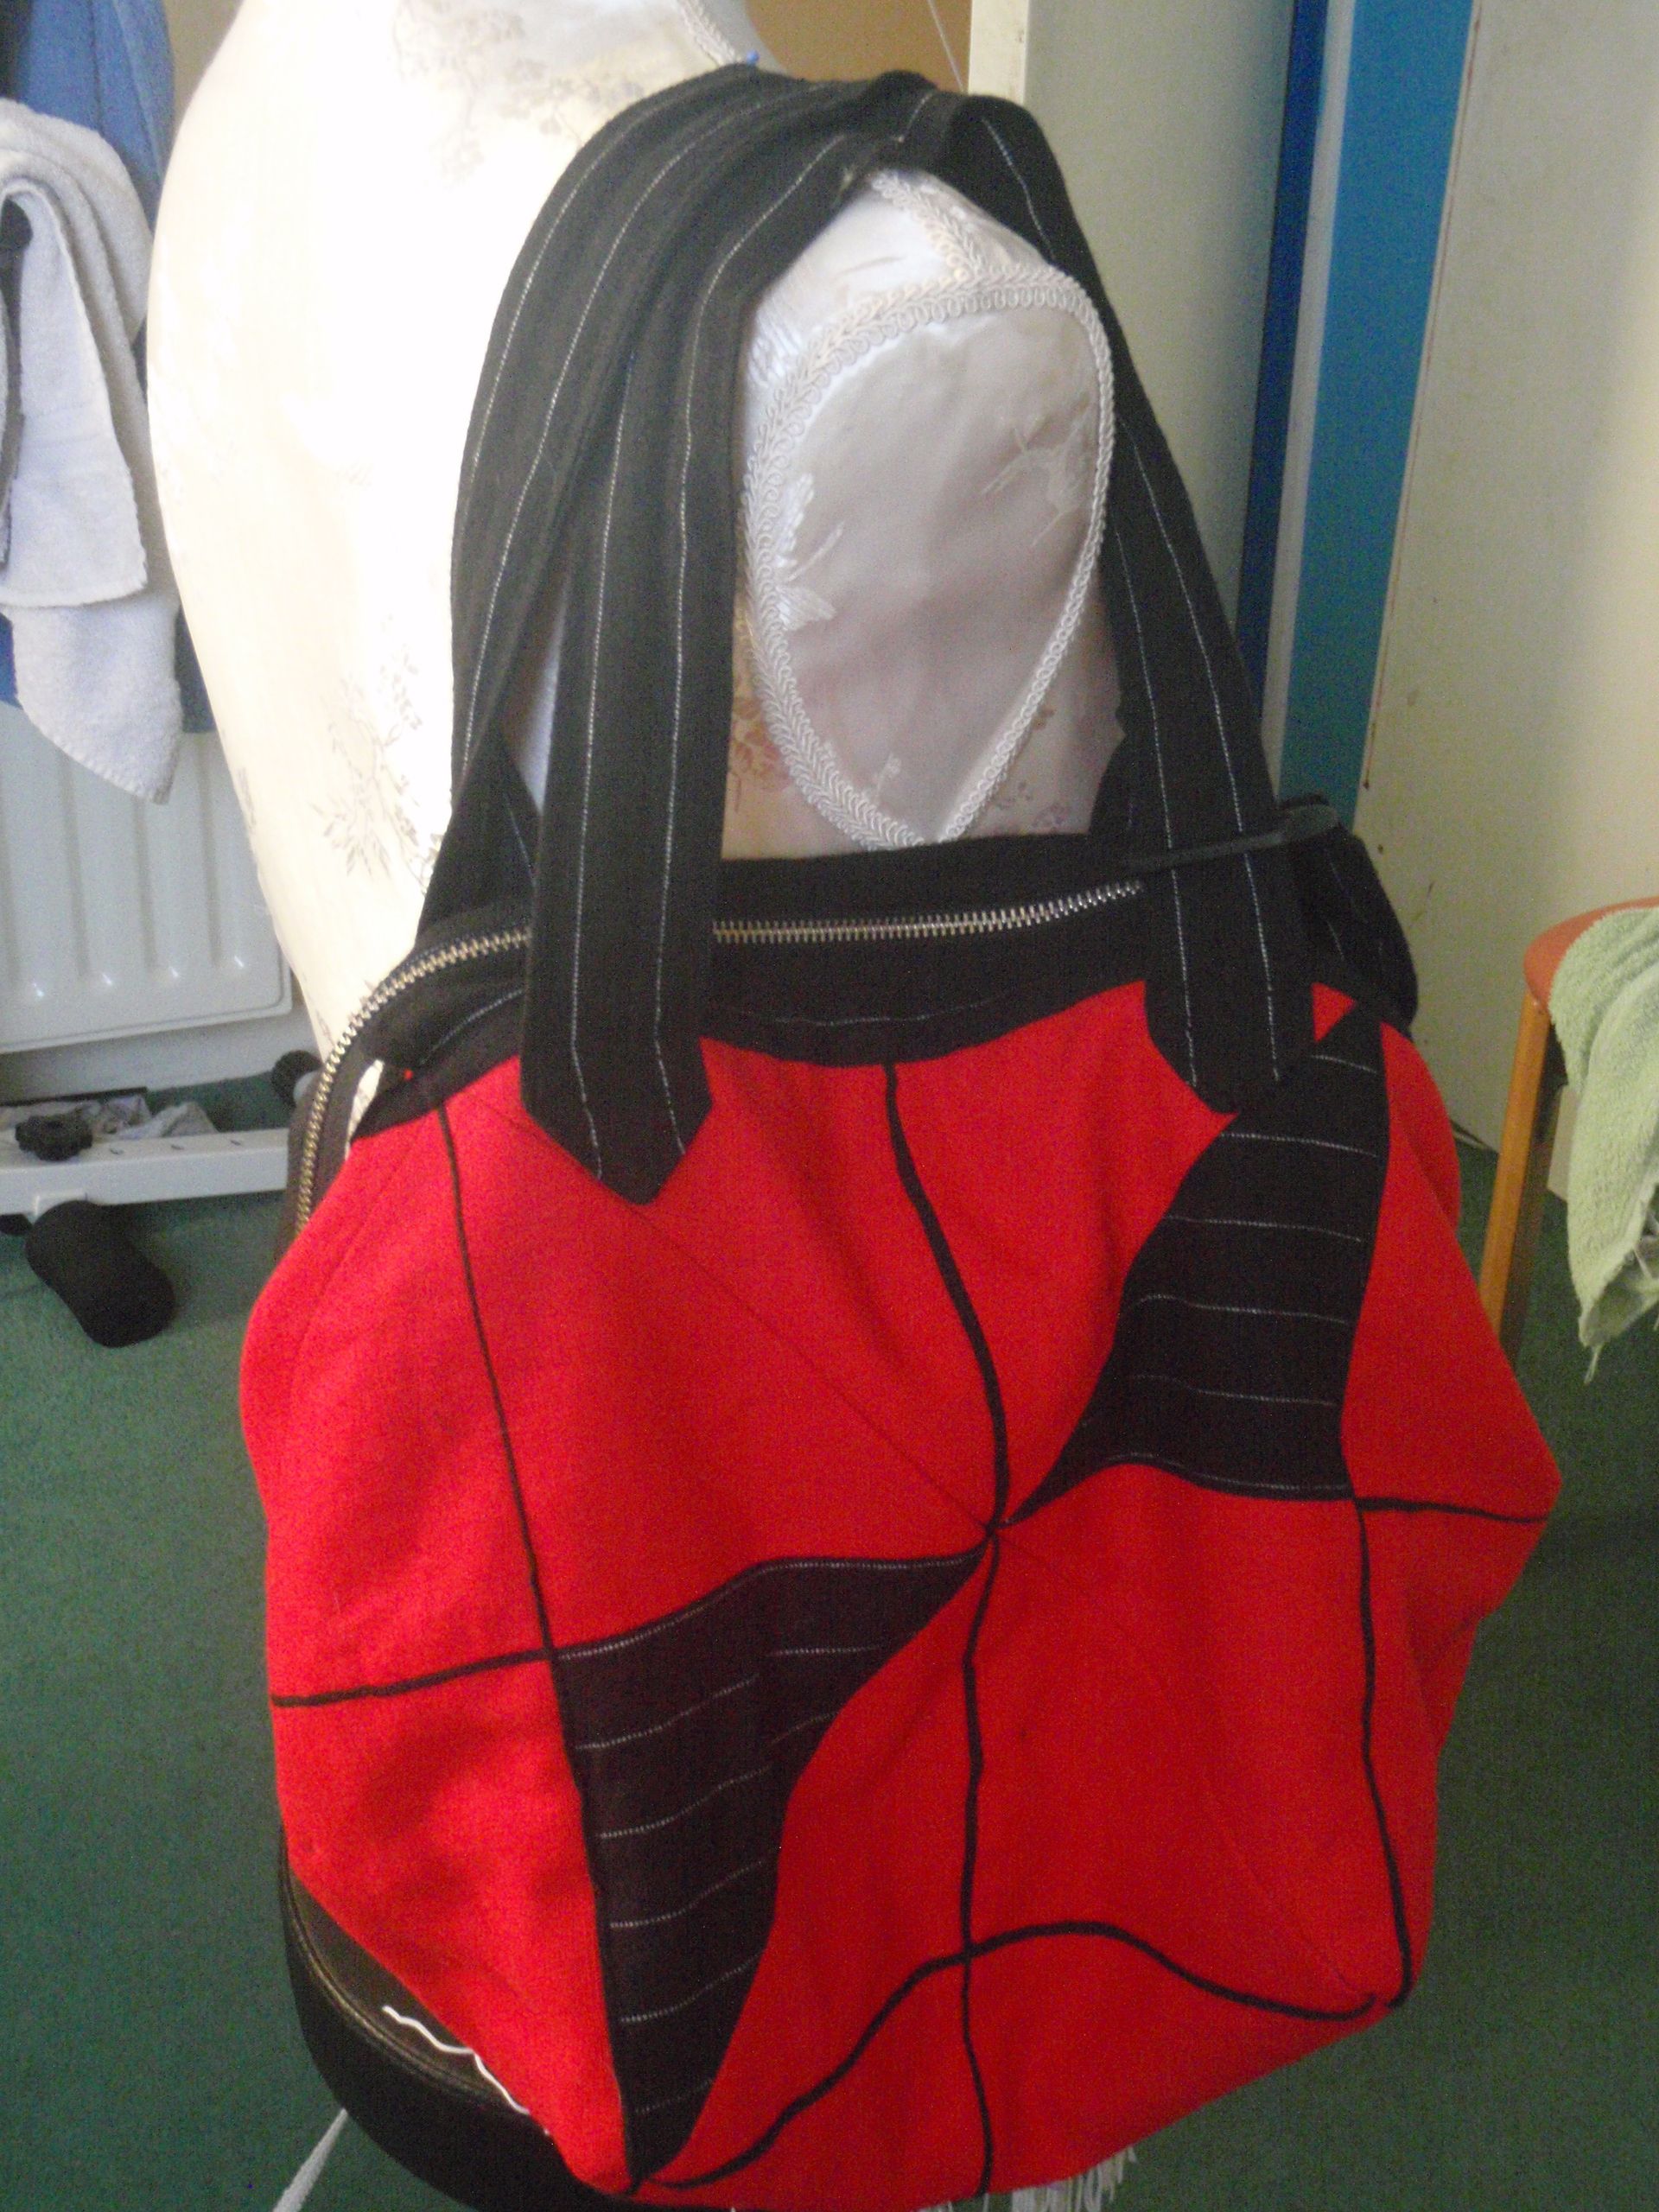
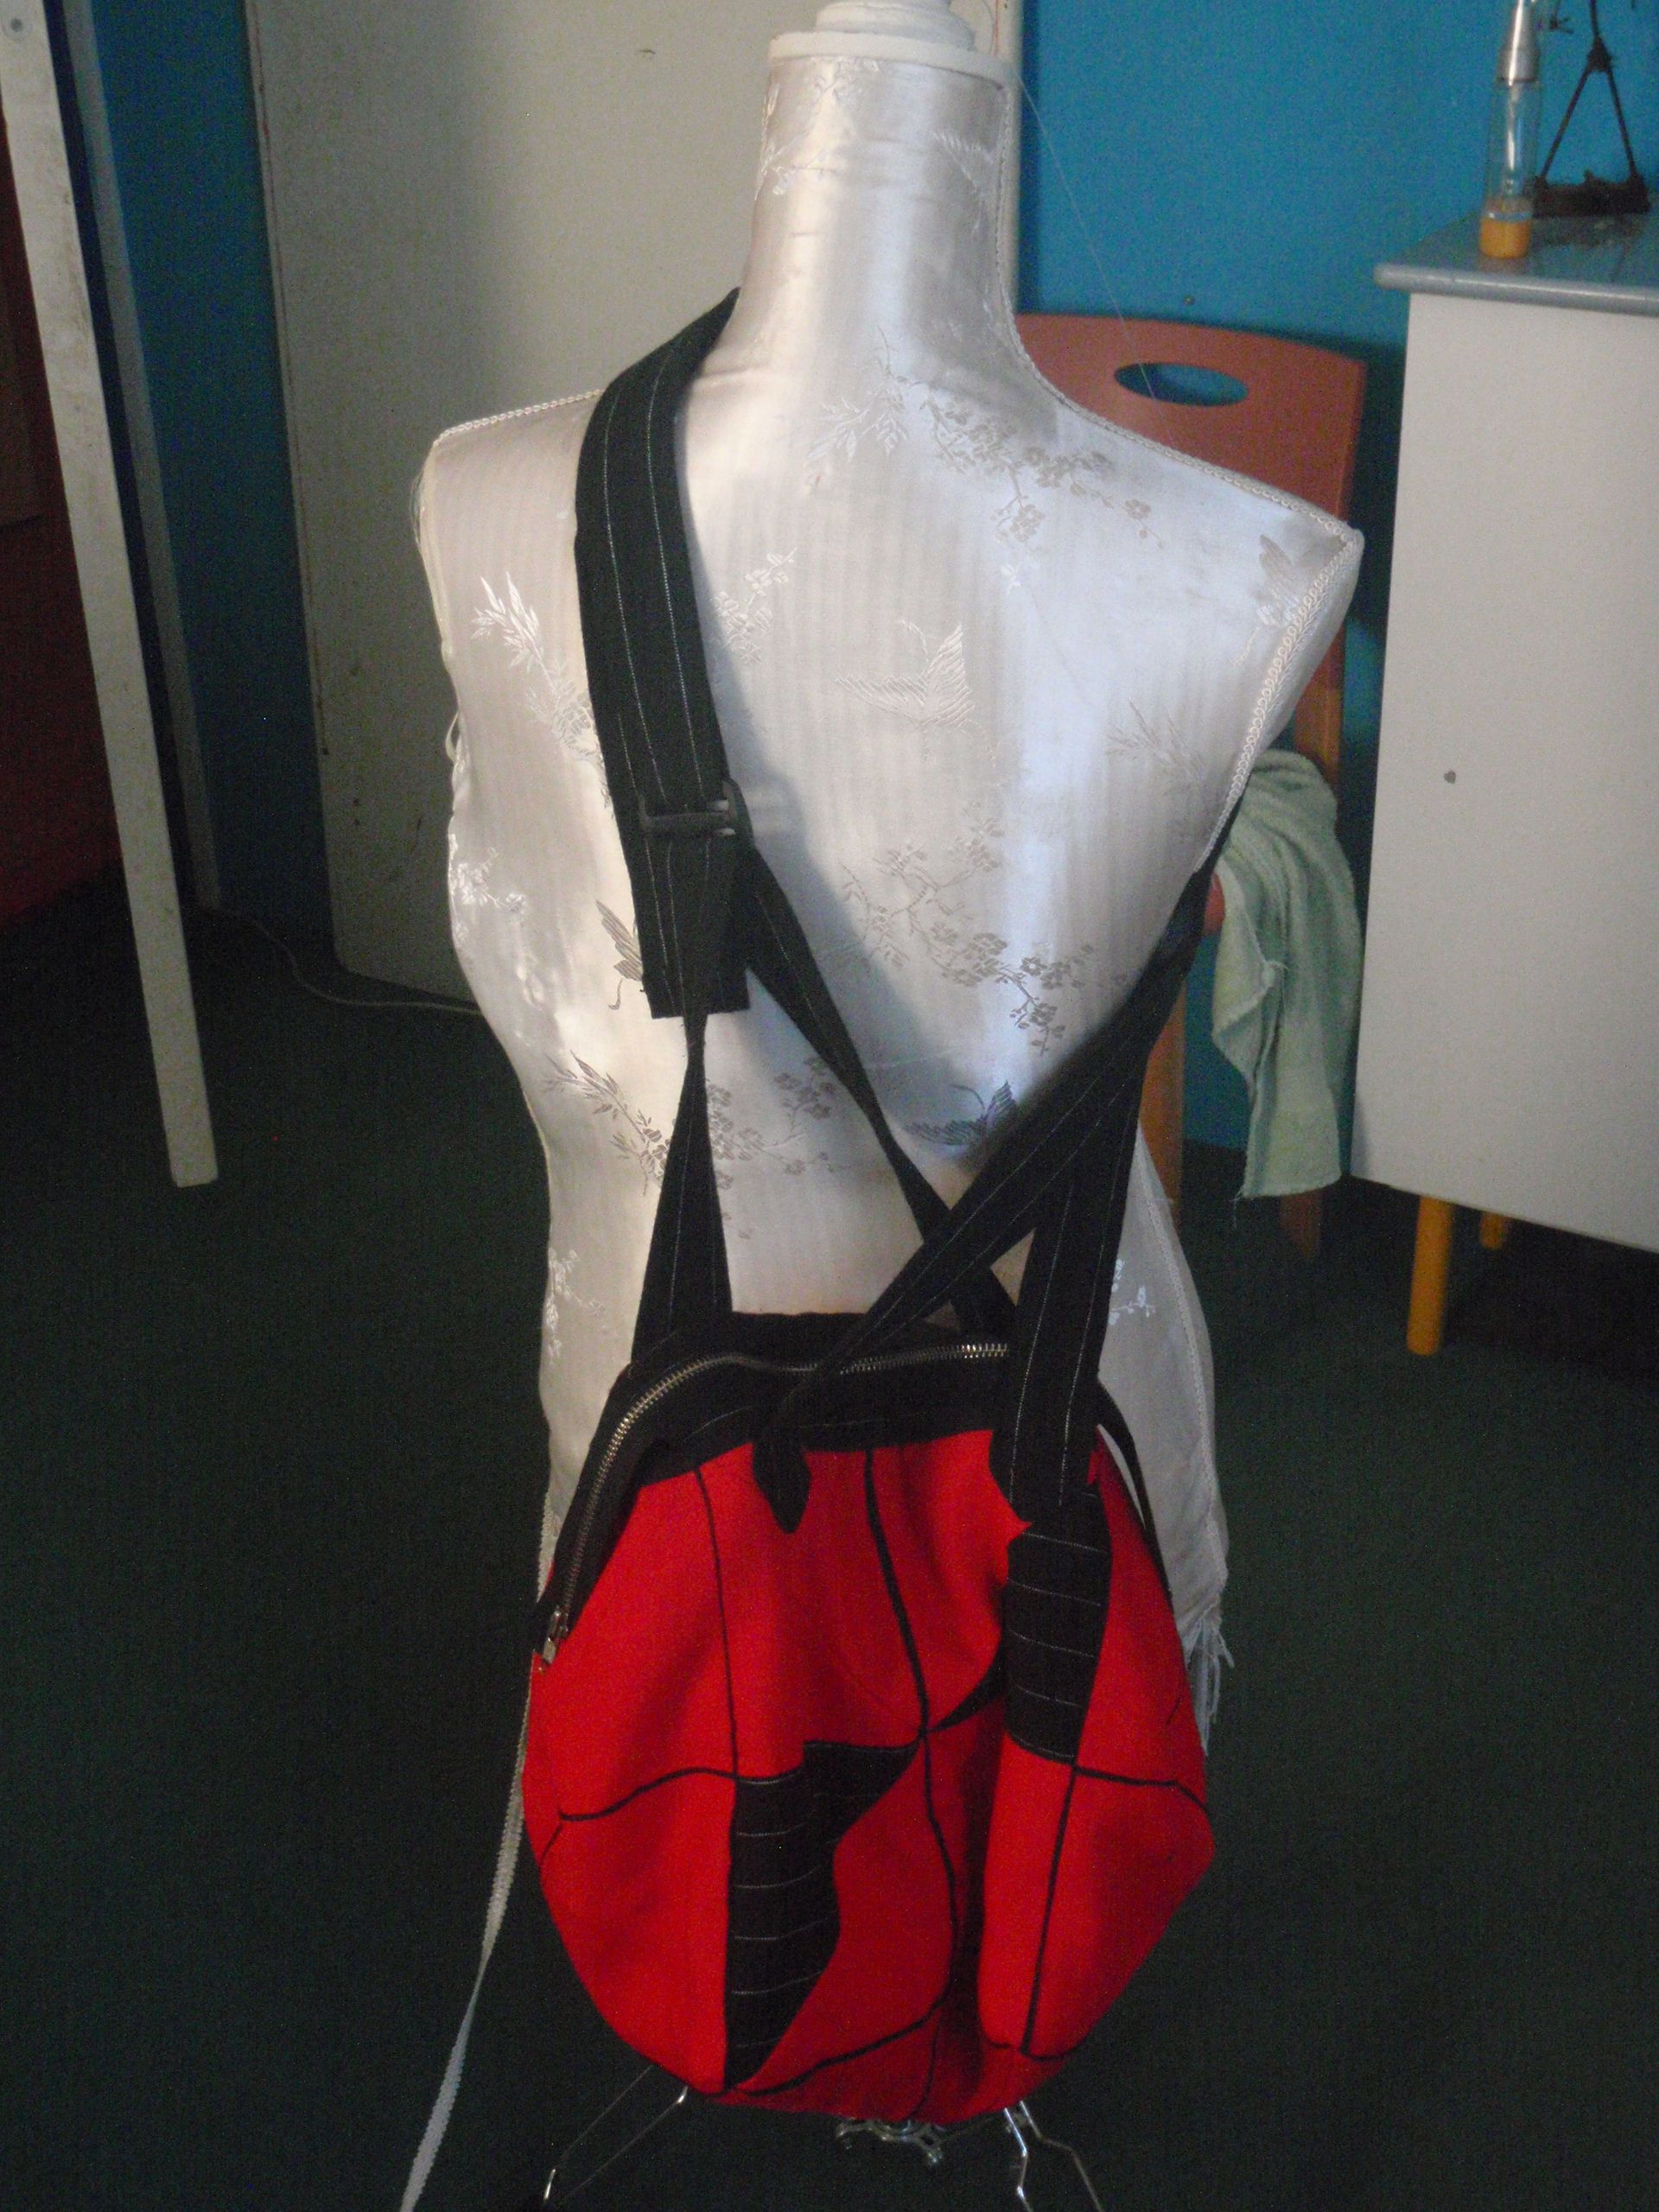
I also added the option of a long strap next to the short straps. If I want to wear the short strap, I can shift the longer strap to the side and then inside. Then I can use the short straps on their own. However, I have found that short straps then to slide from my shoulders, so I like a long strap. This is a (semi-broken) mannequin wearing it.

Wearing Wearing

I hope to actually be able to use it too, to see if it works nicely. I’ll see how that turns out. Now I should continue with the large quilt, since this project is finished!


Gifts – 5

This might not actually count as a gift. However, I did make it in the past two weeks and decided it was still something I made for someone else.

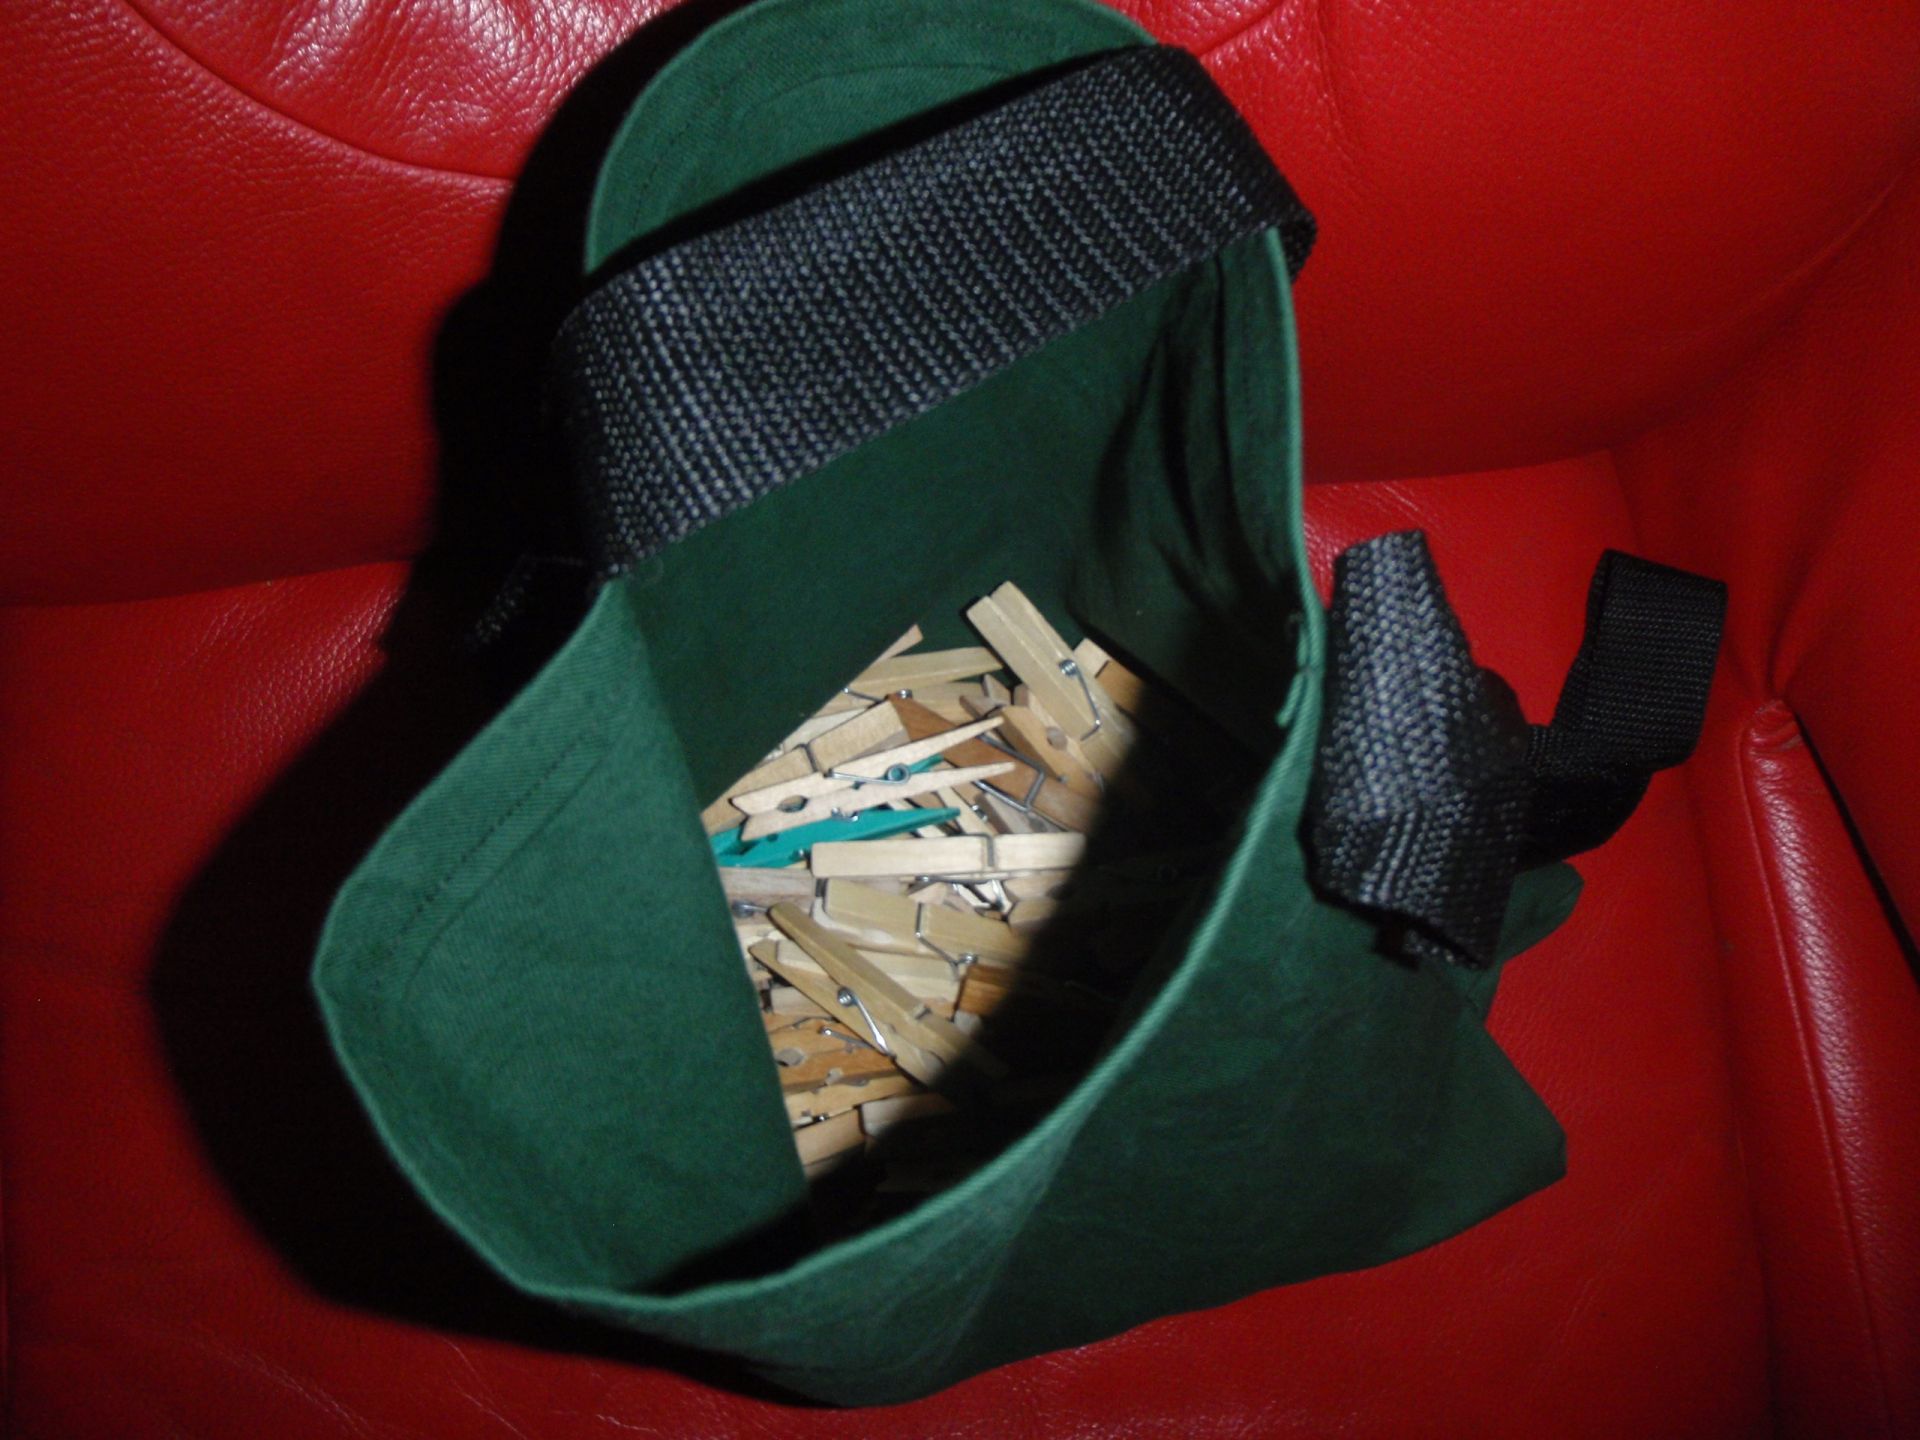
My mother was saying how the laundry pin bag I made last was too deep. You had to reach in quite far to get to the pins. So I decided to make a new one. I still had a scrap of a very sturdy green fabric (cotton, or so the guy said. It feels a bit like cardboard). I didn’t have any strapping on hand, so I decided to murder the old bag and just use that strapping.

This is the fancy new bag.

OLYMPUS DIGITAL CAMERA OLYMPUS DIGITAL CAMERA

Yes, that was sarcasm. This bag is far from fancy, but it’s functional and that’s good enough for me.

This counts as a gift for my mother. There you go mum, have fun with the laundry now!
Hopefully the next post will concern a red patchwork bag that I hope to have finished soon, only the straps need to be attached. I should be able to do that in about 15 minutes..

Gifts – 4 – Frog tutorial

So here I’ll document the process of producing this frog:

Frog open

For this tutorial you need:

– Stuff to draw (pen and paper/computer) or this drawing: Rabbit, Cat, Frog, Whale (these are all the pouches I made, seam allowances are not added)
– Stuff to sew (machine/needles/thread/scissors/pins)
– Embellishments (buttons/ribbon/zipper)

You can click the pictures to enlarge them.

Frog tutorial-01

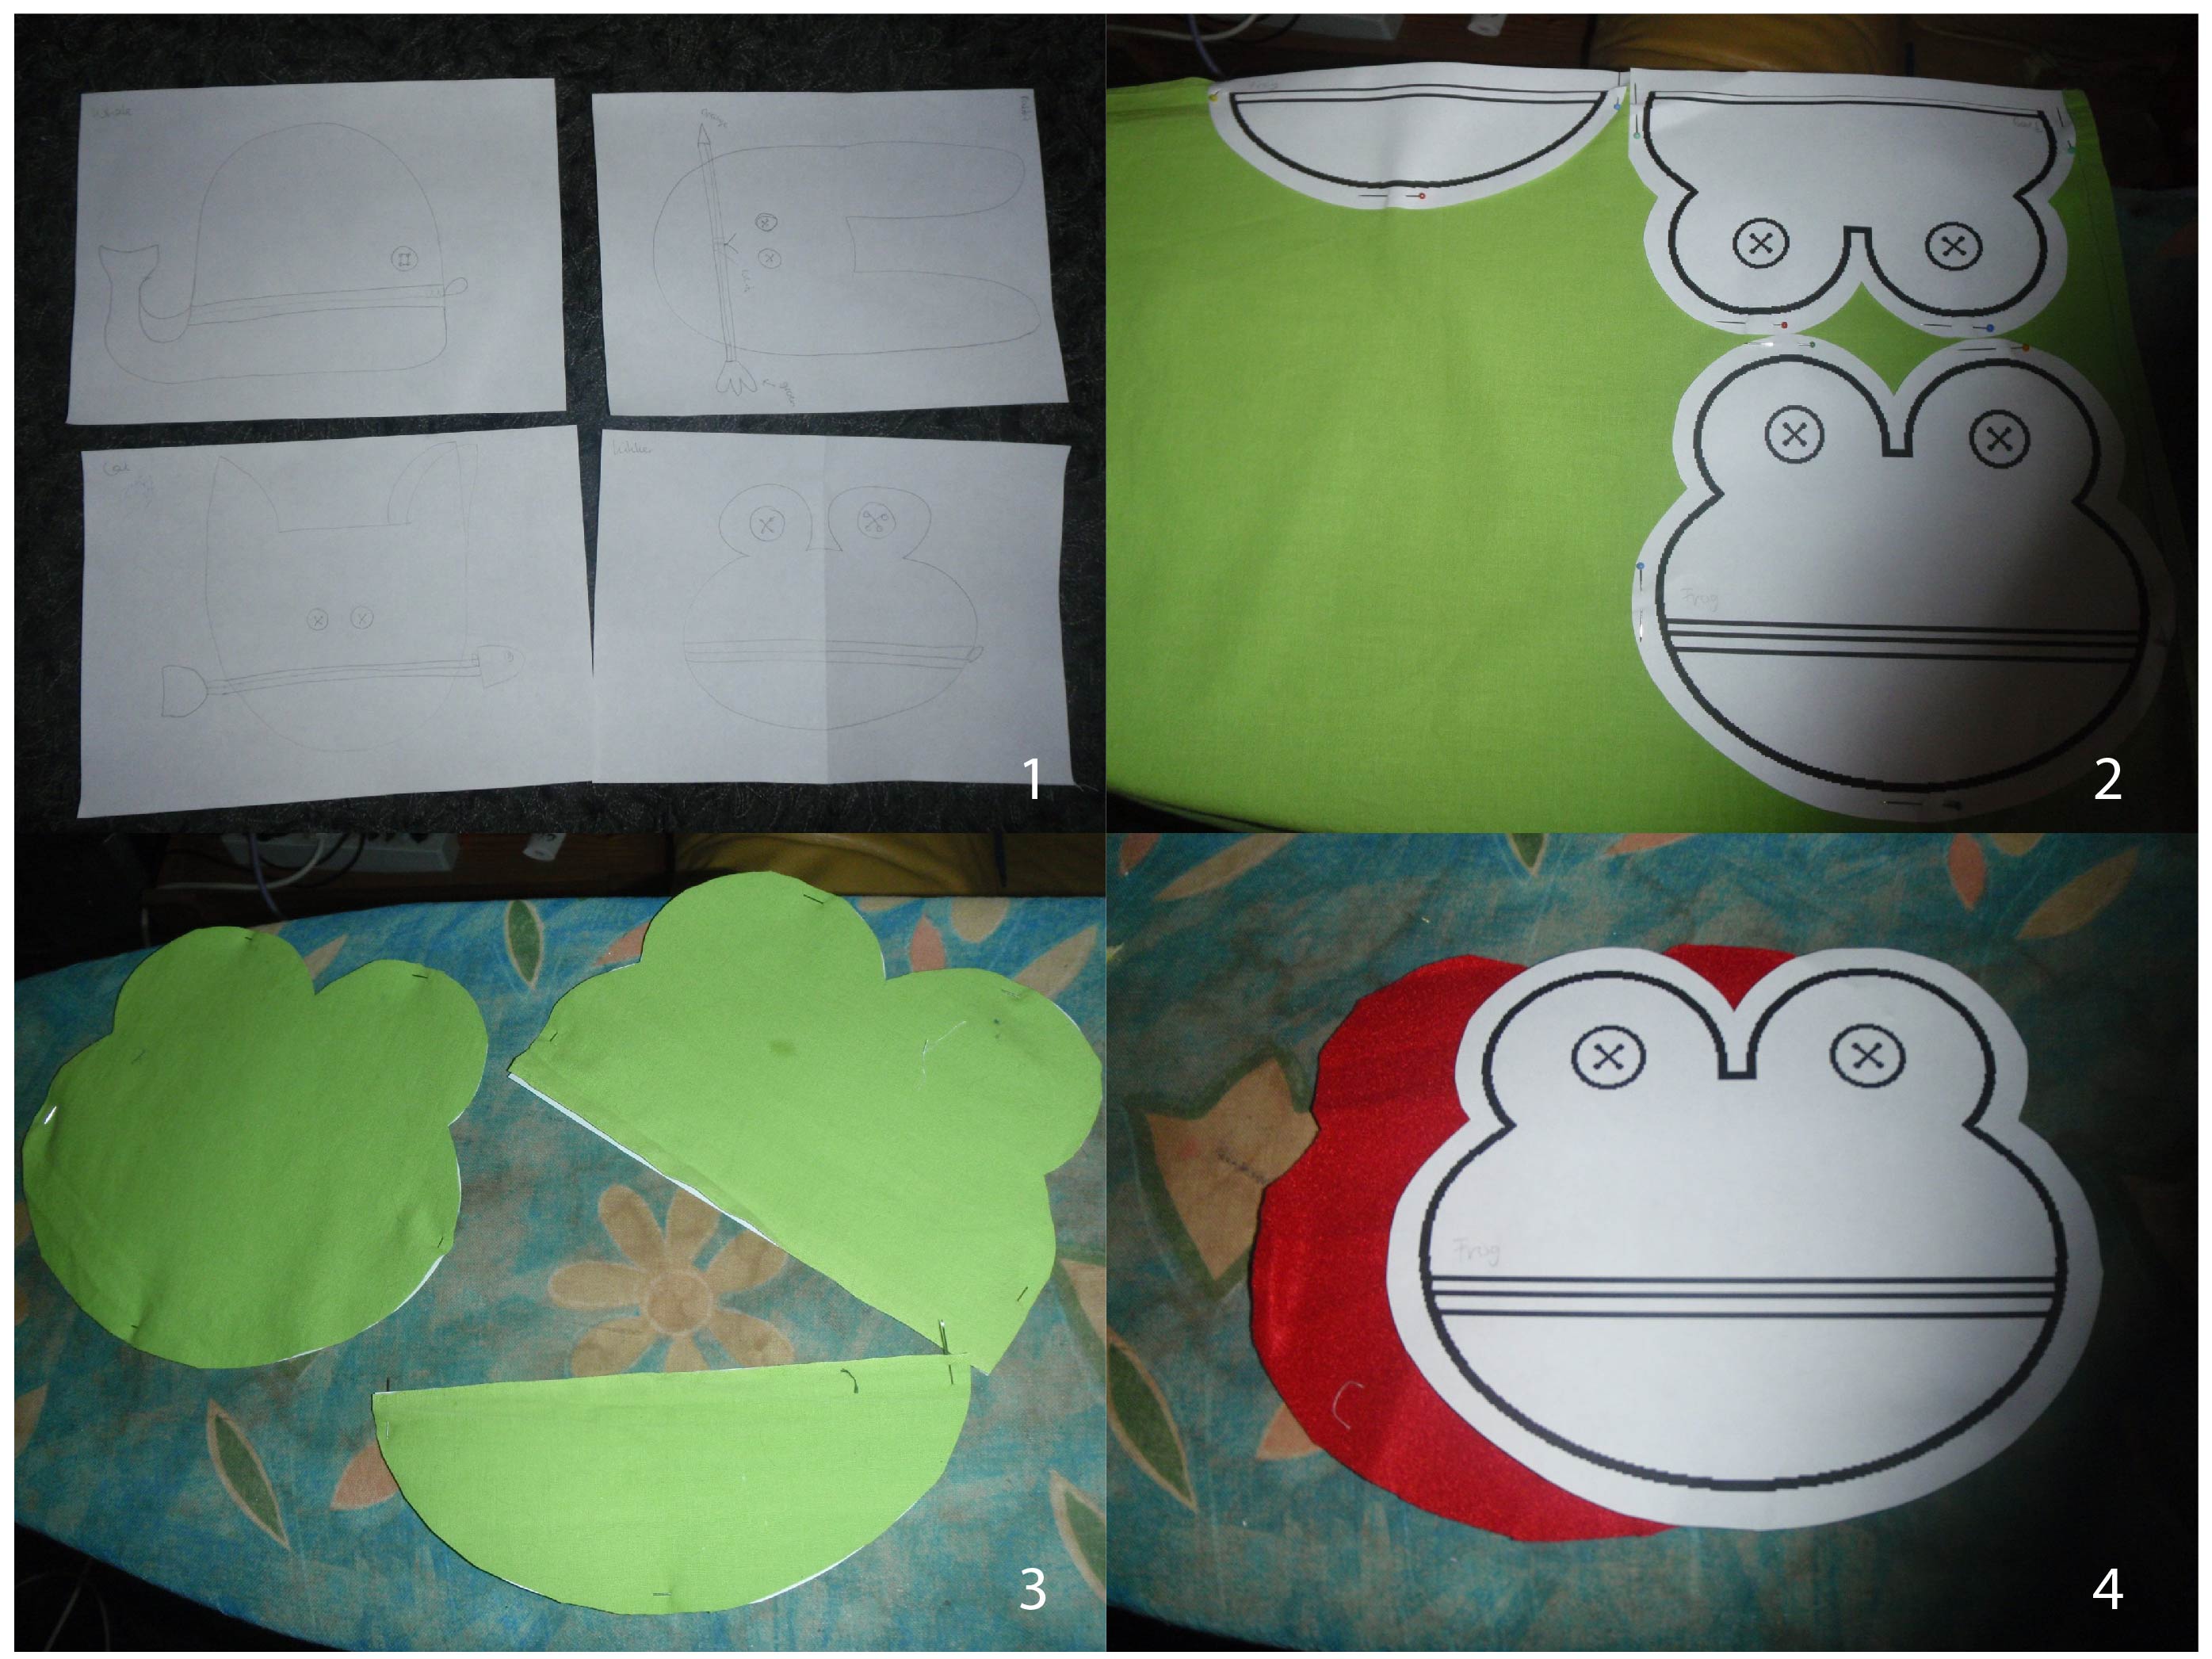
1. Design an animal and print it out/draw it twice. Then draw a line where you want the mouth to be and cut one of the heads open along this line. Add seam allowances.
2. Place the pieces on the fabric such that they fit.
3. Cut out the three pieces (back, front bottom and front top) from the main fabric.
4. Cut out the back piece from the lining.

Frog tutorial-02


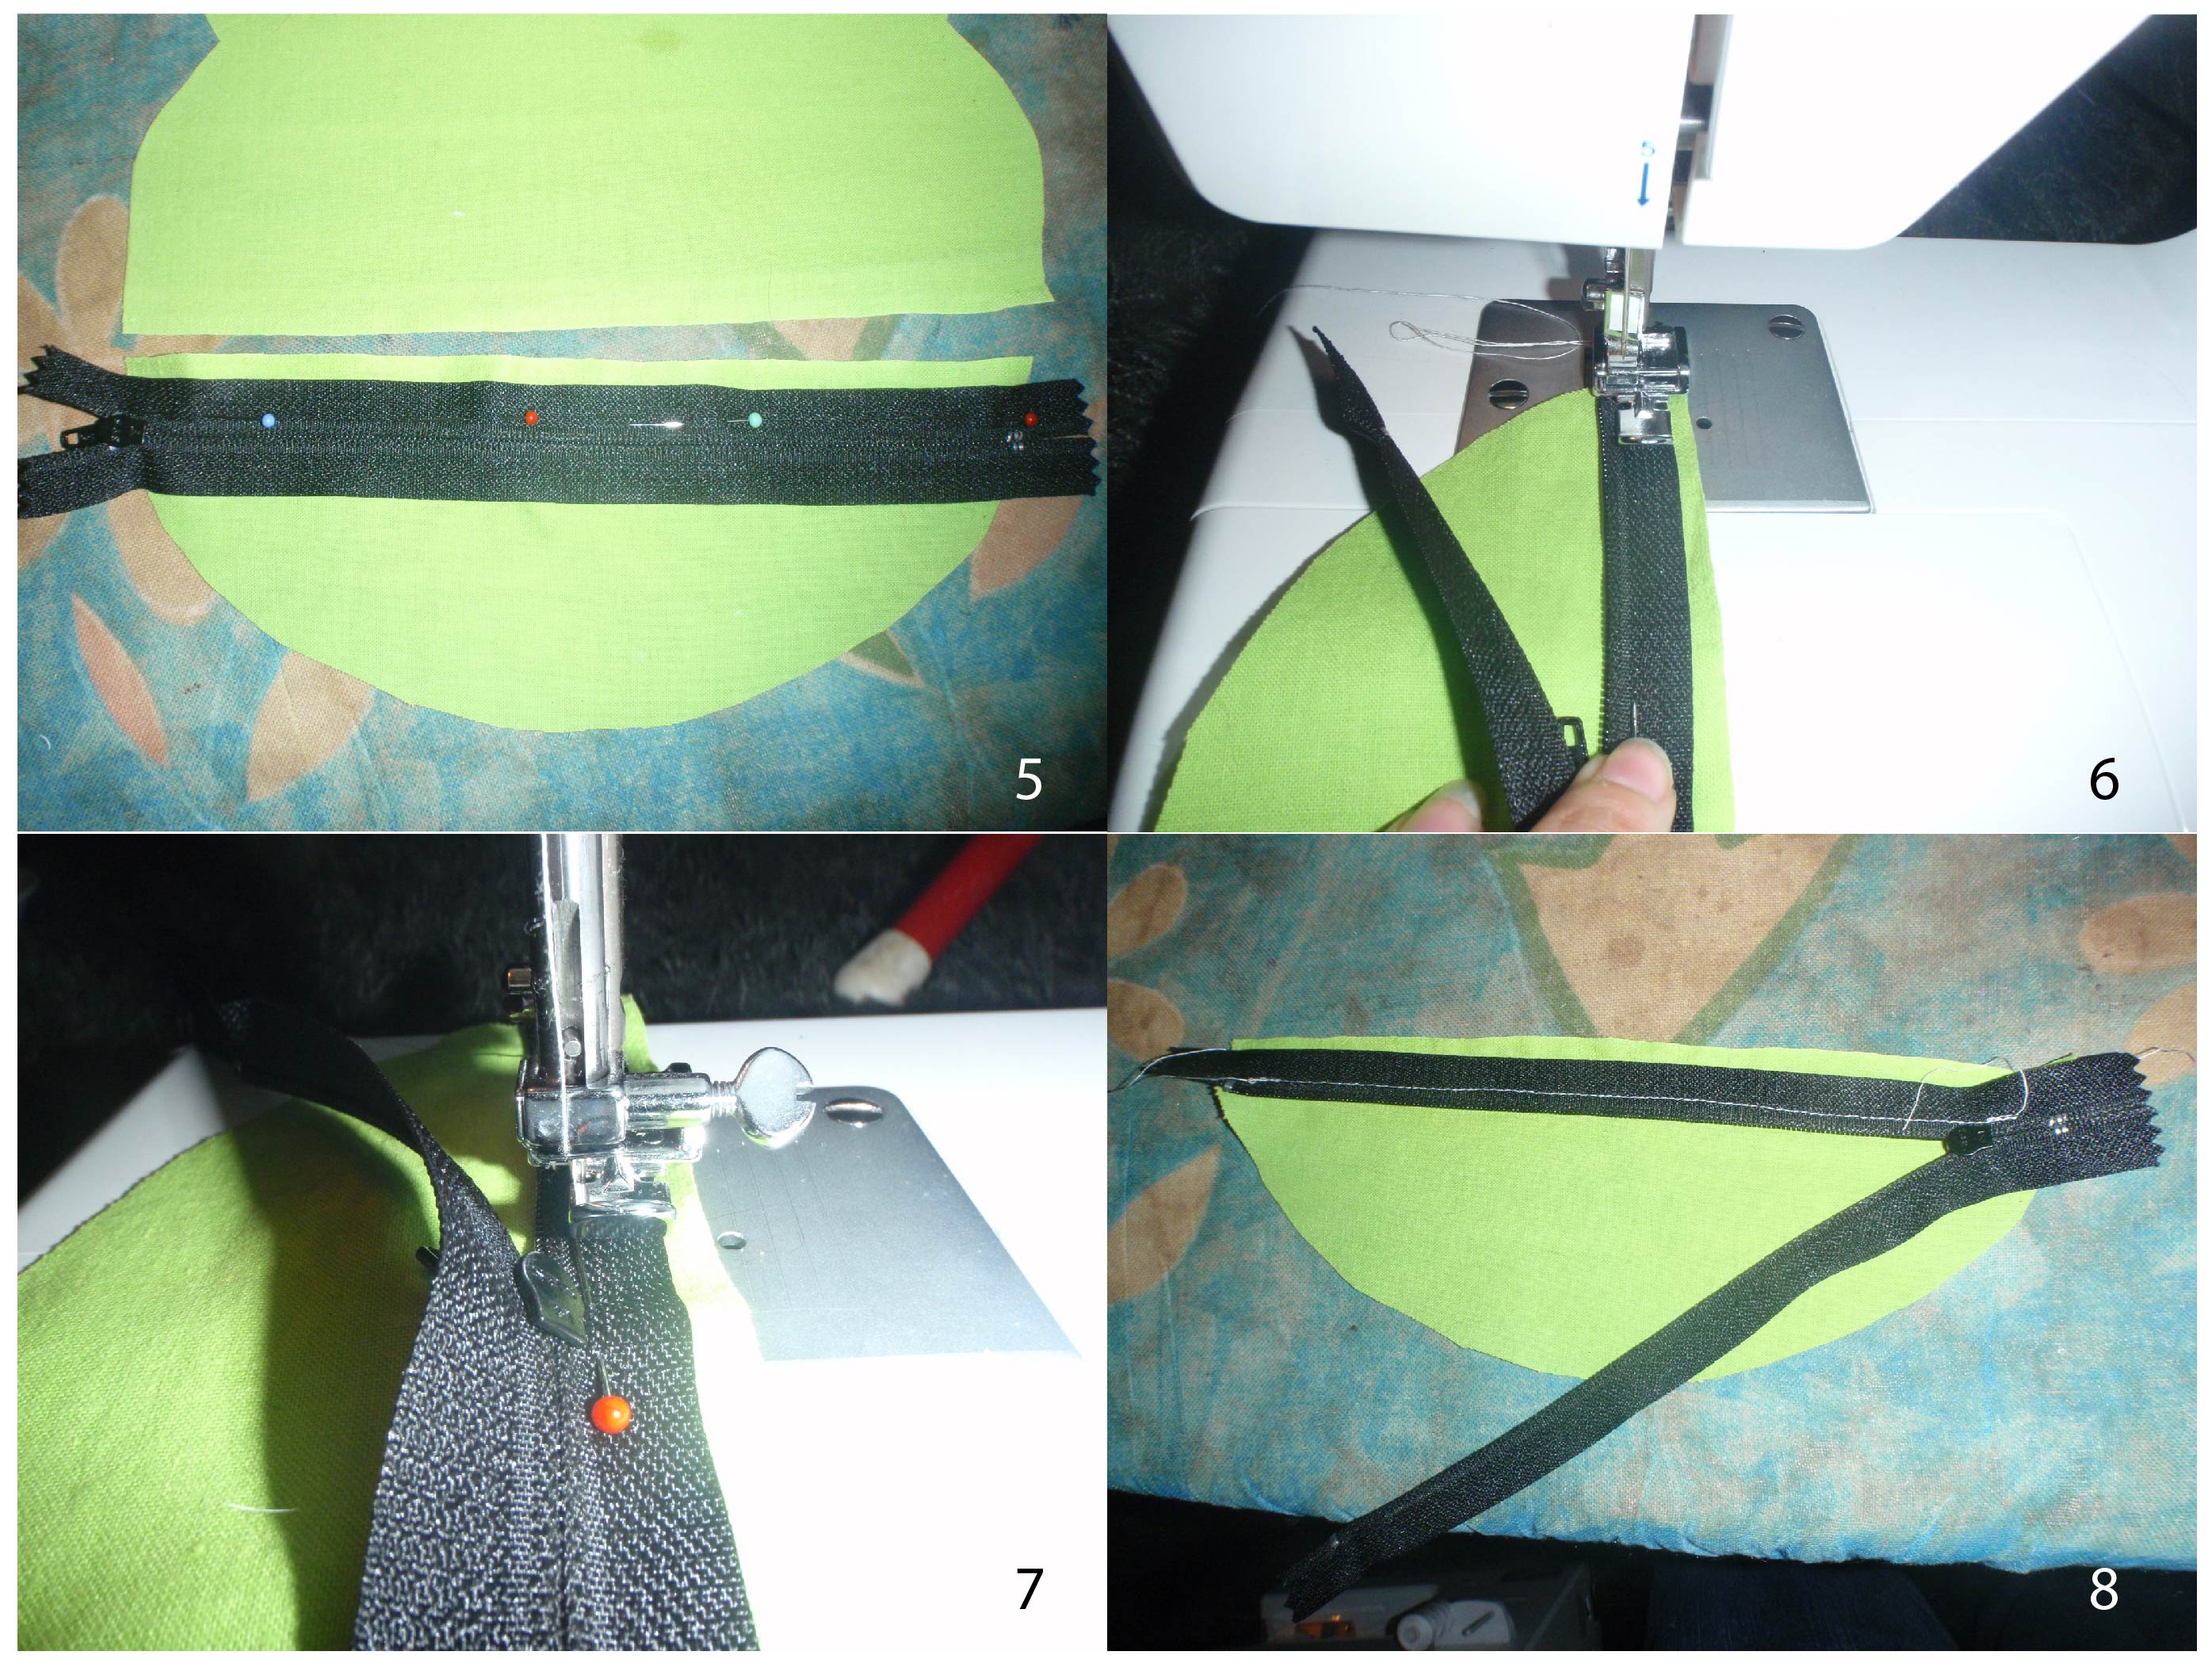
5. Take the front bottom and align the zipper as in the picture. Upside down on the right side of the fabric.
6. Sew it in place using a zipper foot.
7. Put the needle down when you reach the zipper pull and raise the foot. You can then wiggle the pull past the foot and needle and continue sewing the seam.
8. Press the zipper seam. You can now also finish the seam with pinking or serging. 

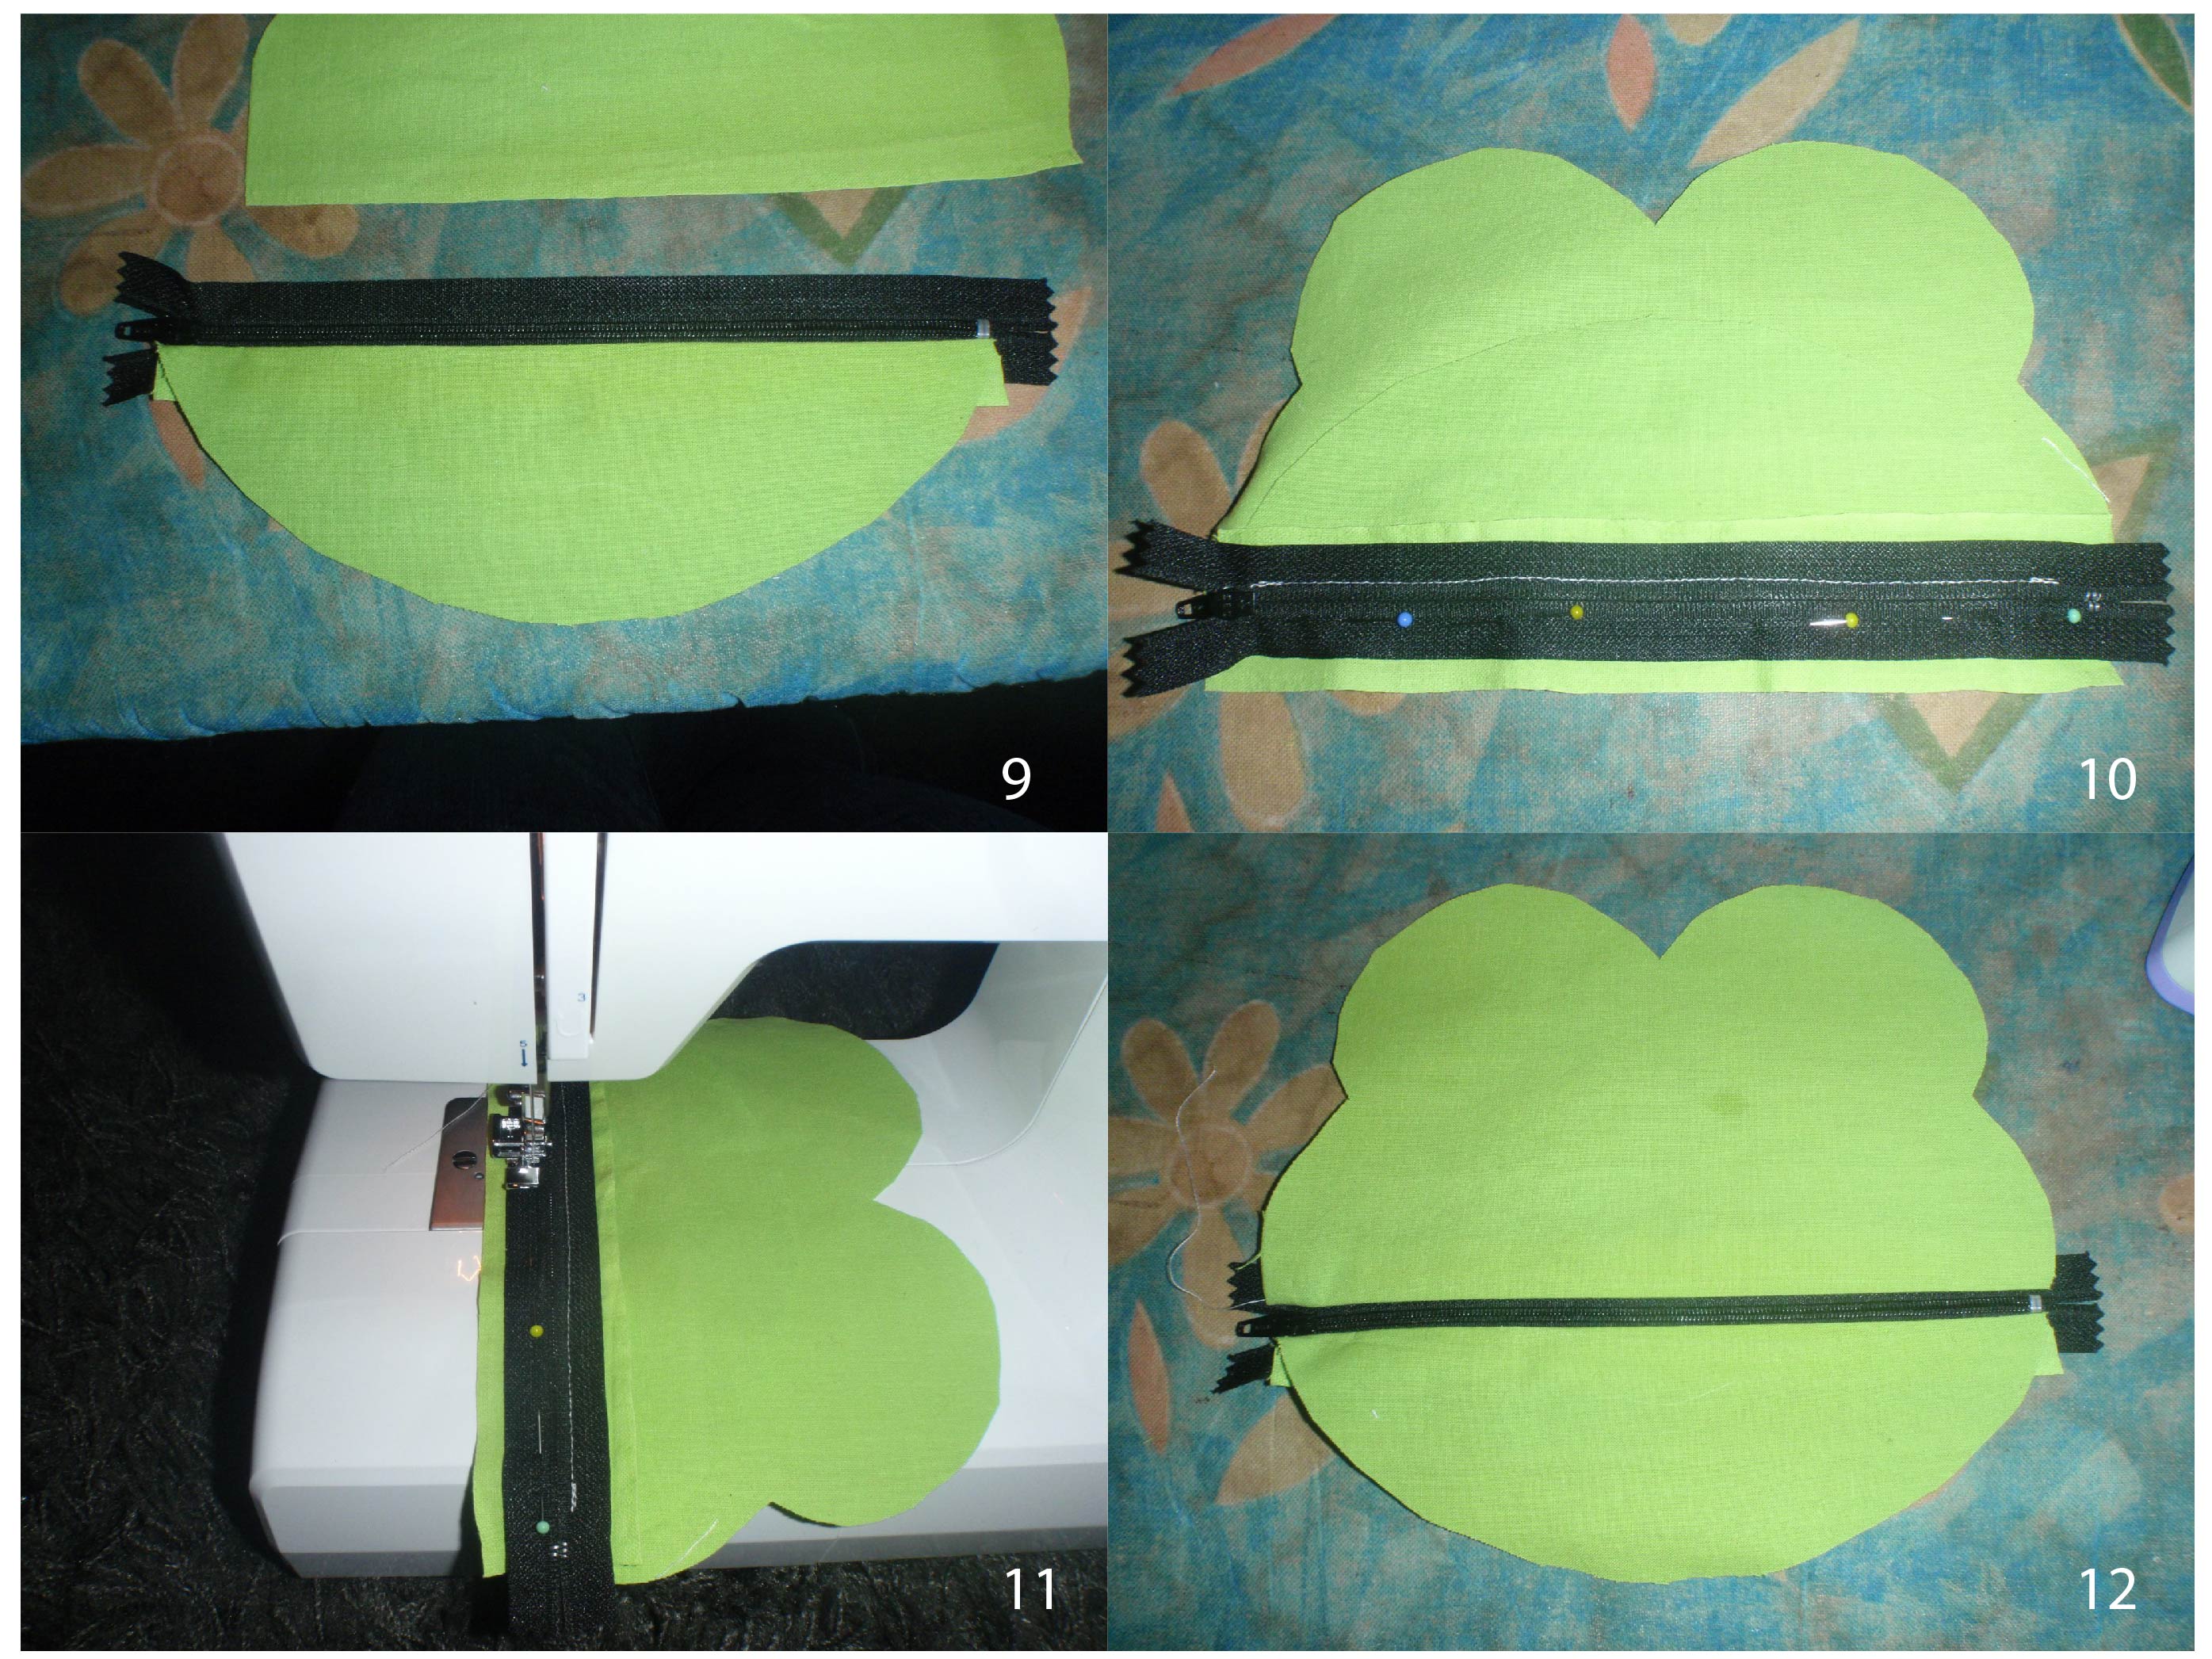
Frog tutorial-03


9. Press the fabric to the bottom.
10. Align the zipper on the right side of the front top. Such that the front top and bottom line up. The zipper is again upside down.
11. Sew the zipper in place.
12. Press the seam front and back, finish the seam and press them to the top. The front is now sewn. 

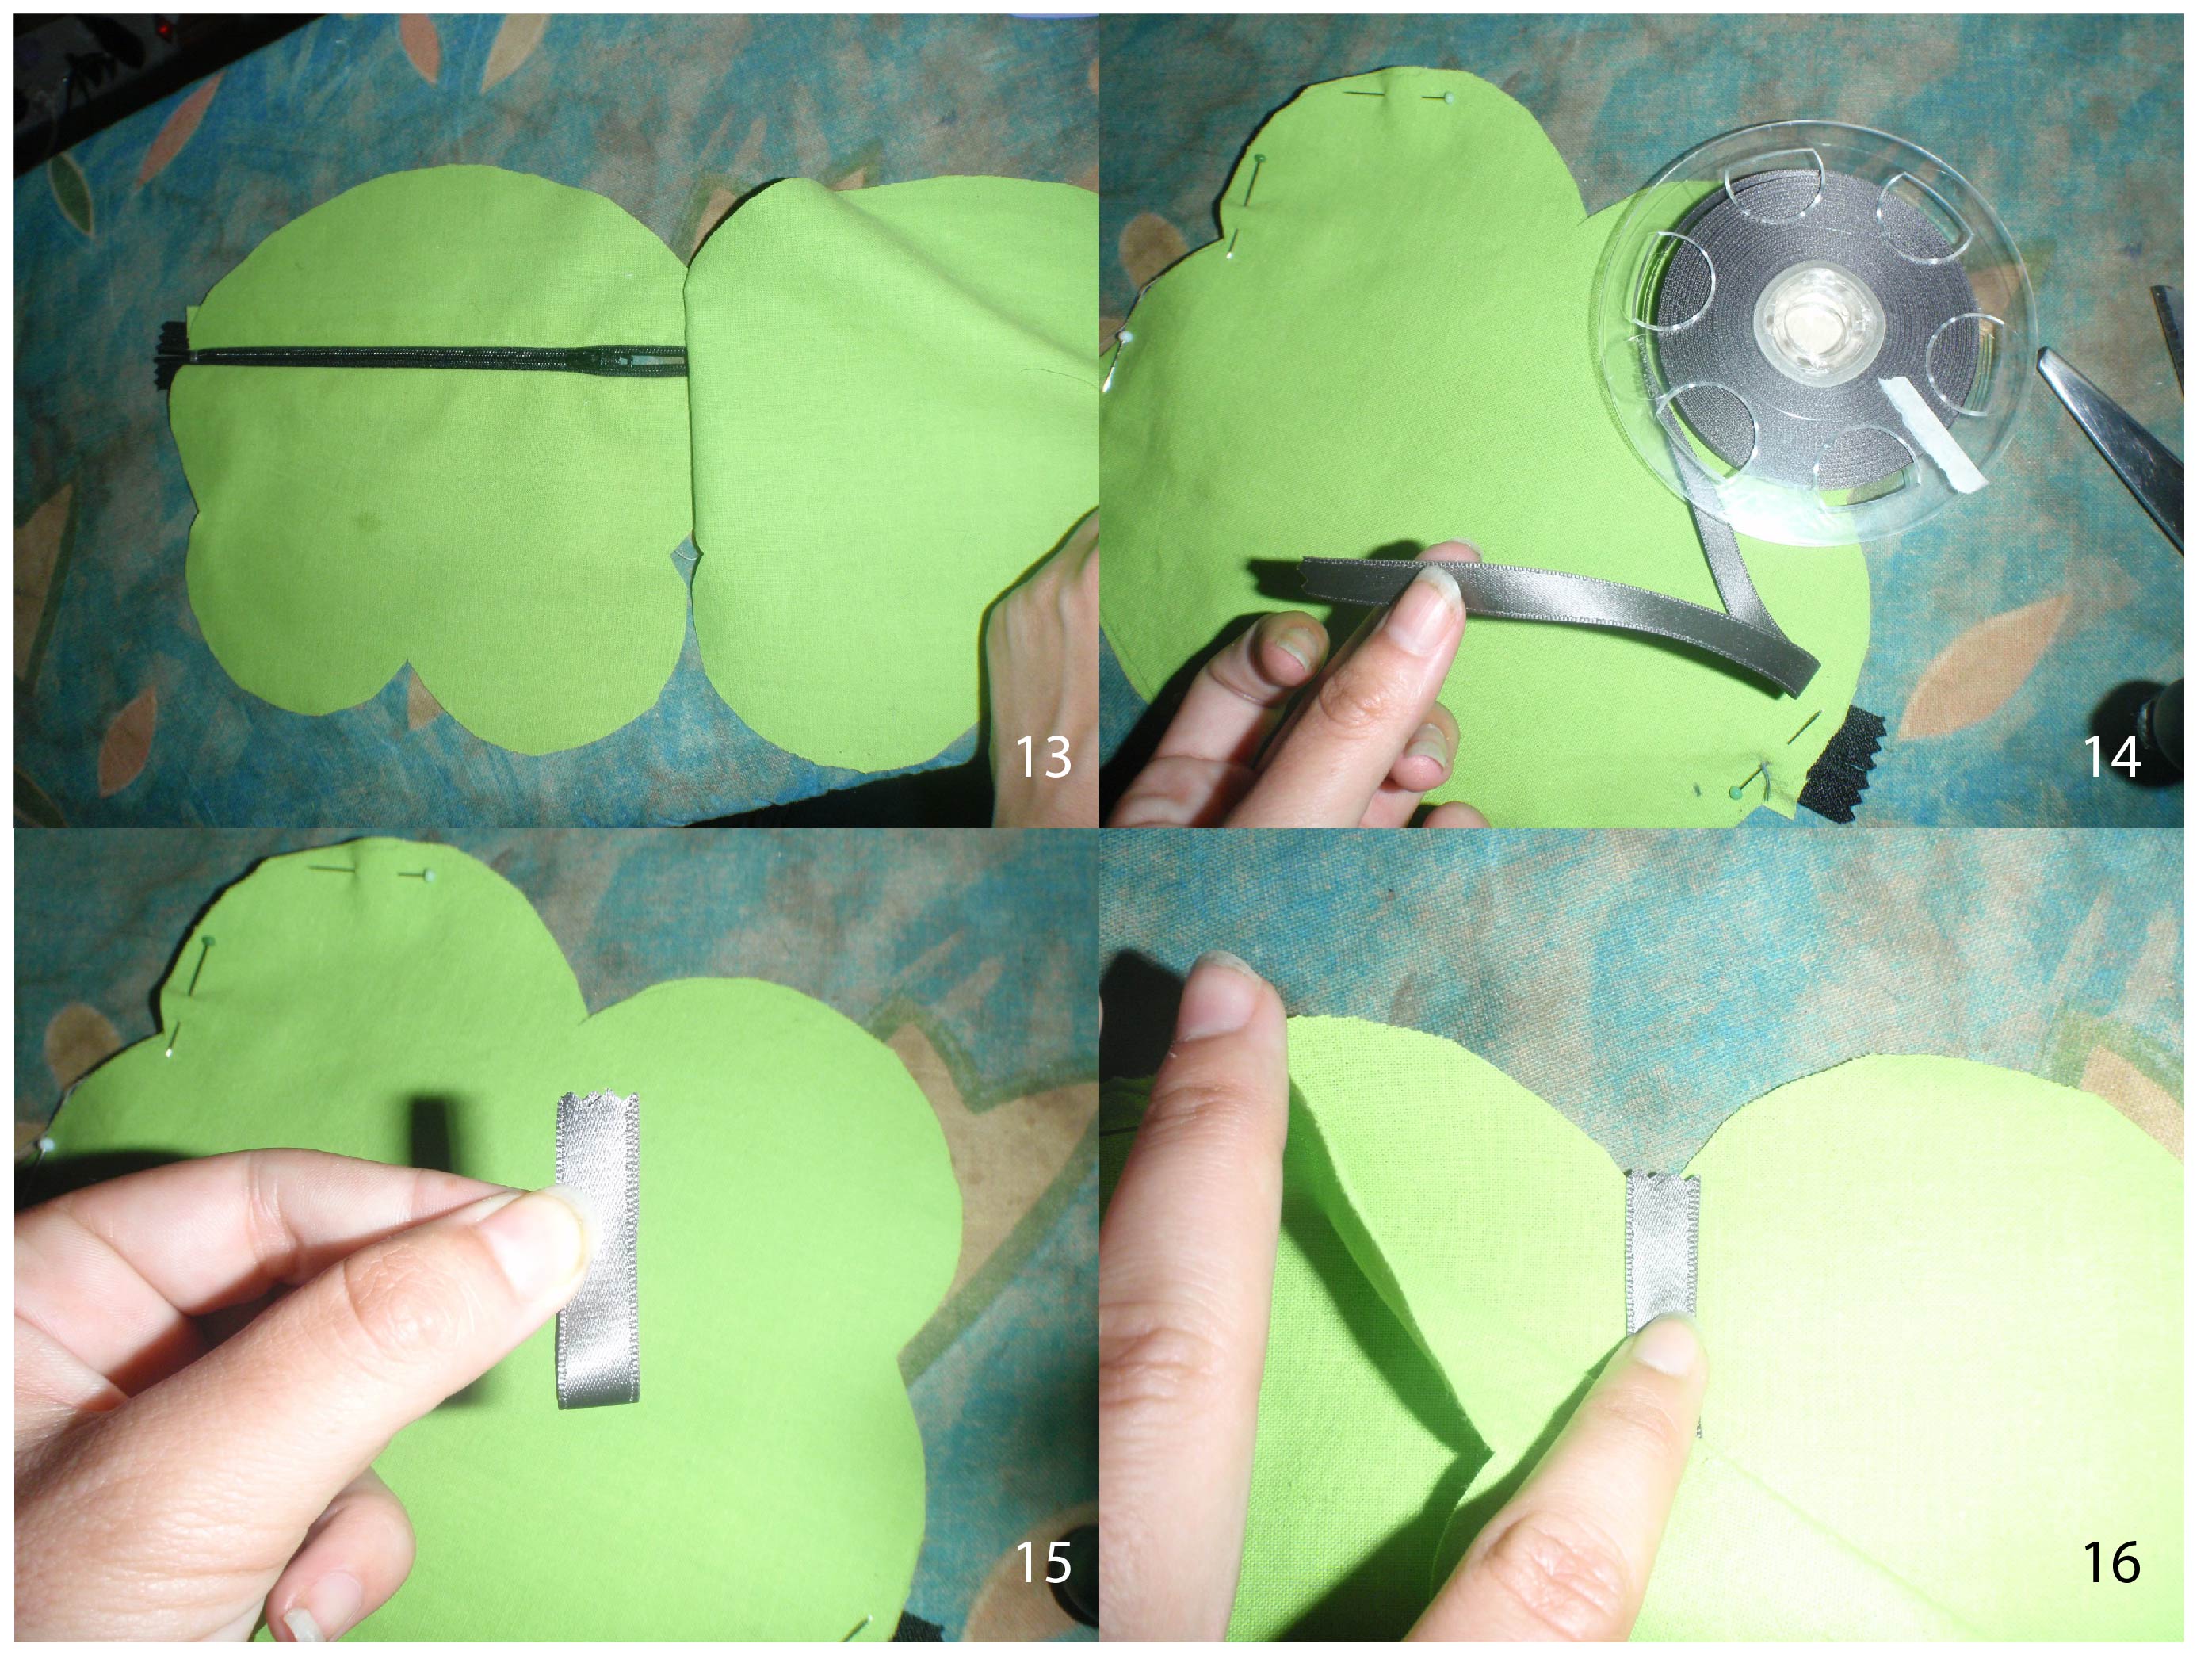
Frog tutorial-04


13. Place the right side of the back on the right side of the front and pin them together apart from the area between the eyes.
14. Take ribbon and cut twice as much as the loop you want.
15. Make a loop of the ribbon.
16. Place the ribbon between the eyes of the frog. The loop should be pointing downwards, while the cut ends are at the seam. 

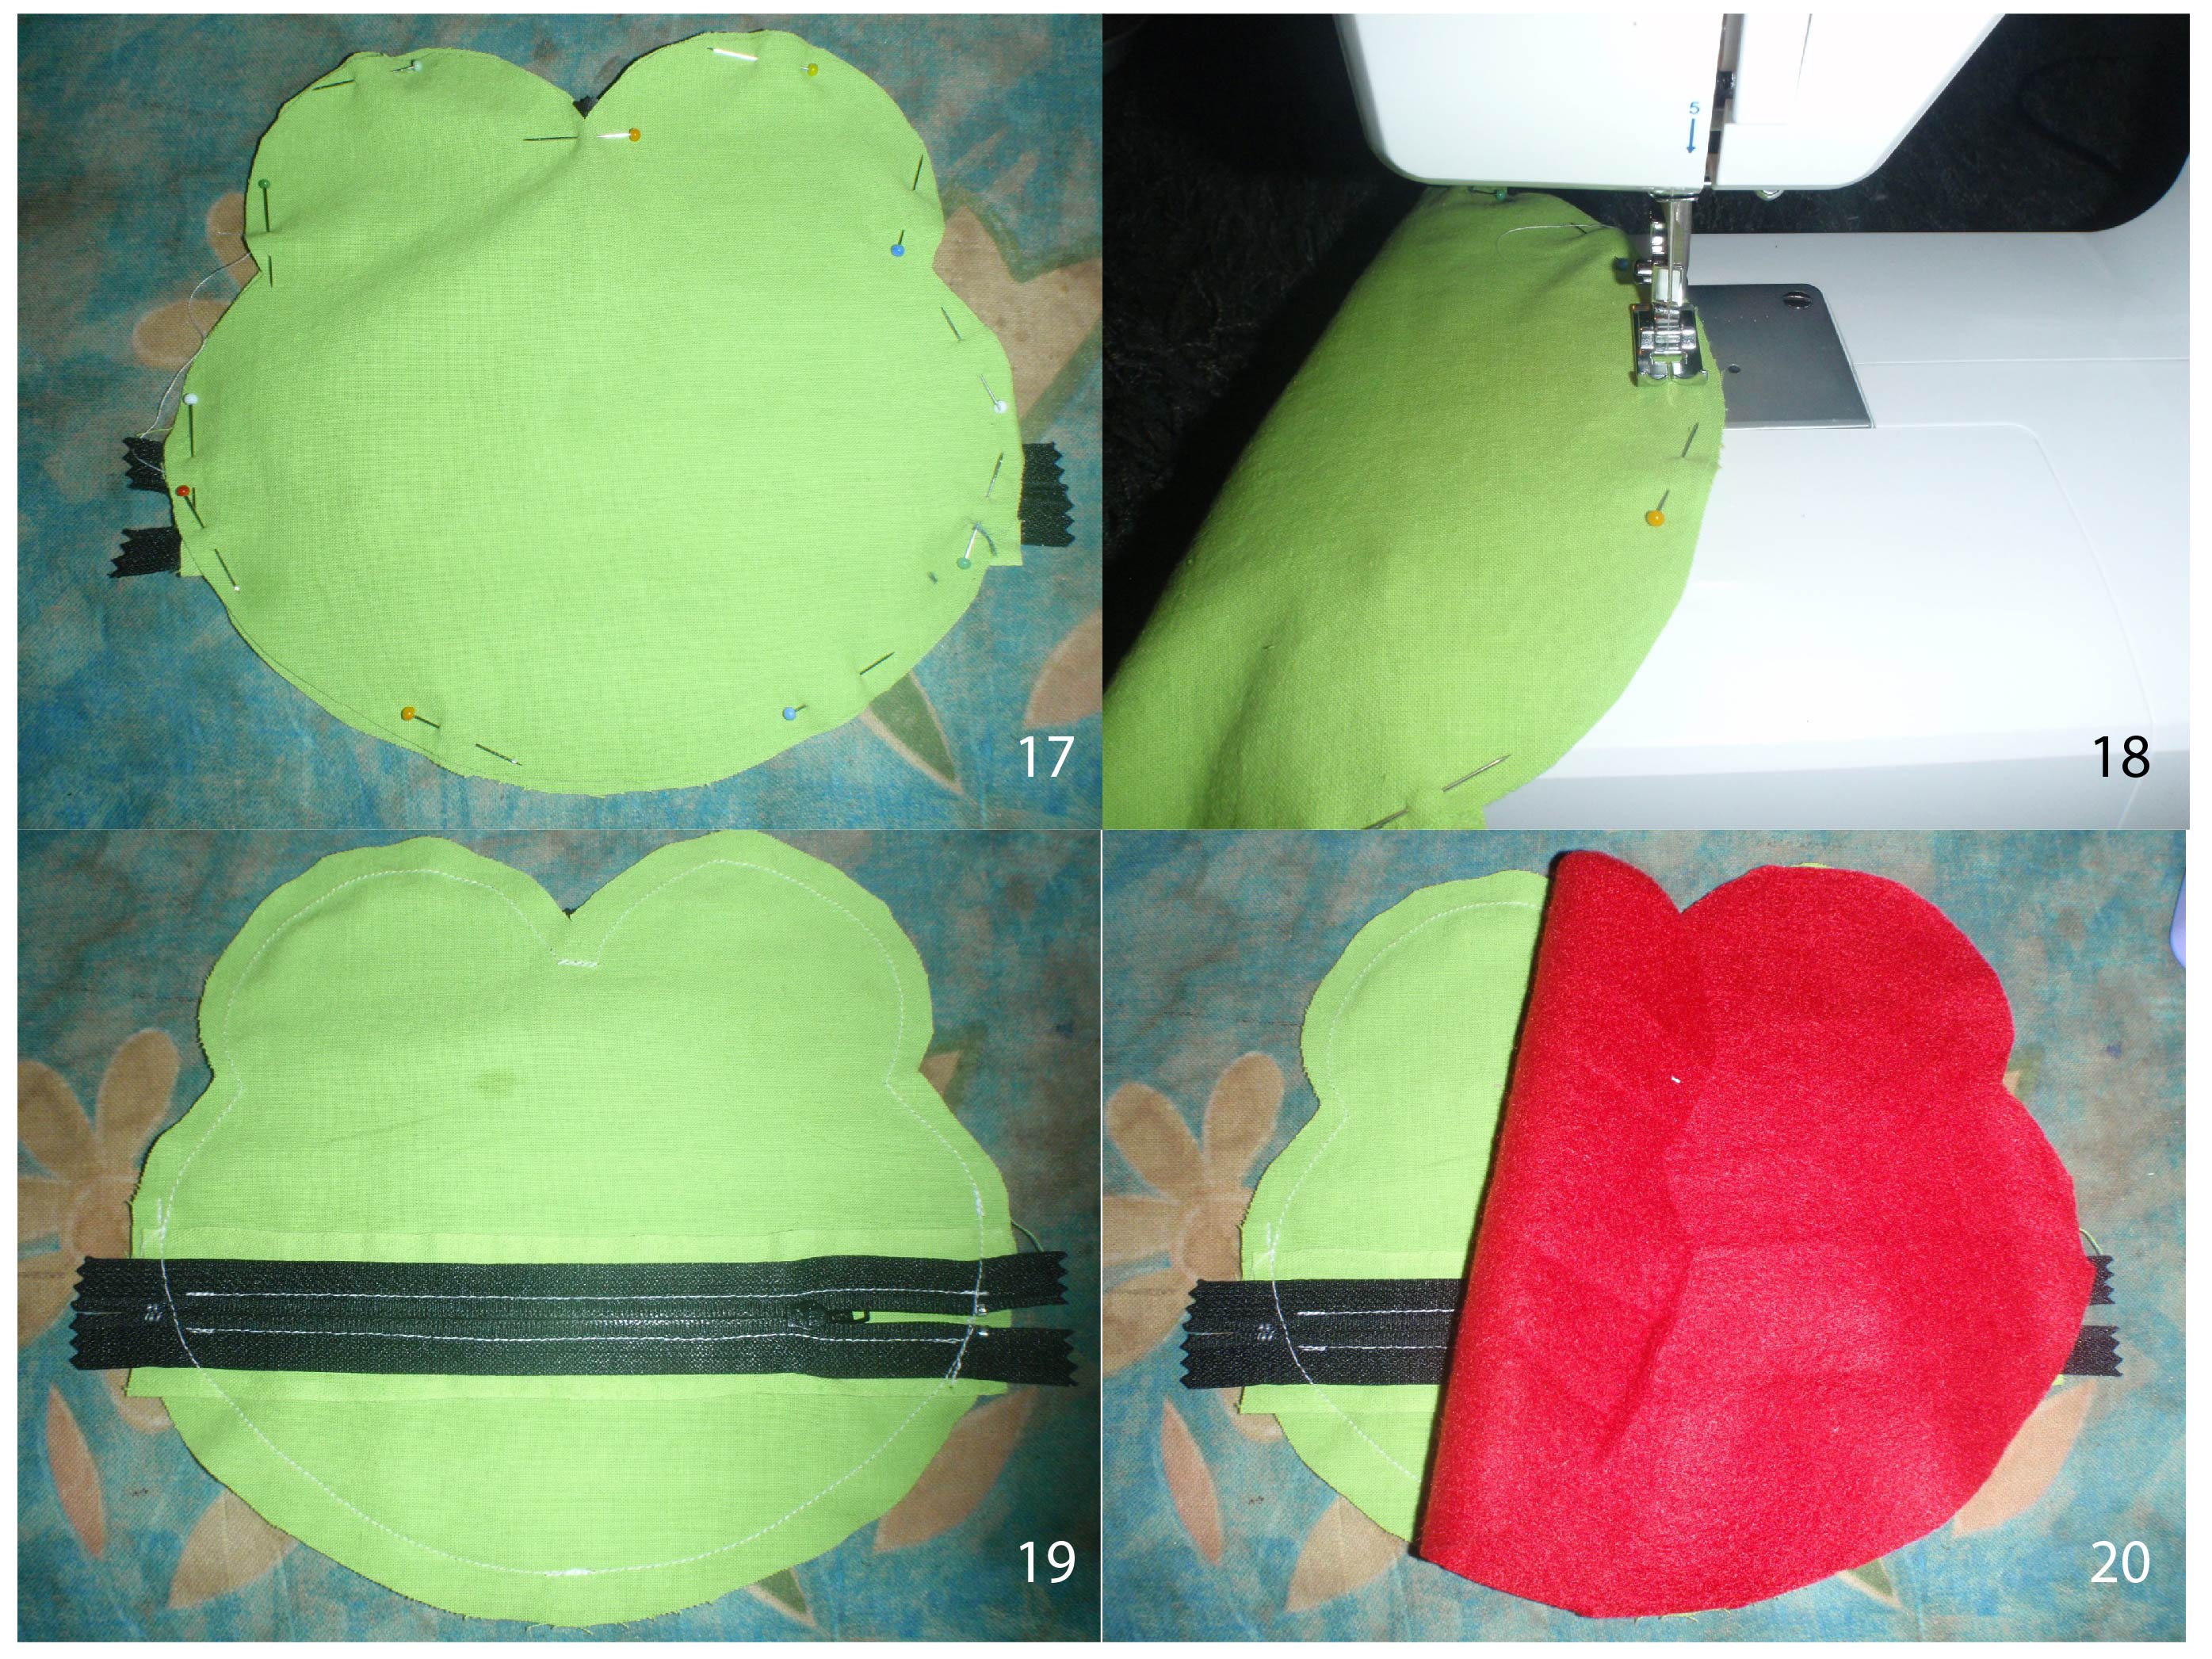
Frog tutorial-05

17. Pin the ribbon between the eyes.
18. Make sure the zipper pull is ‘inside the frog (see 19). Sew around the frog. Enforce the area of the ribbon. Watch out at the zipper. You do not want to sew through the metal parts of the zipper.
19. Press the seams
20. Place the lining over the front of the frog and pin in place.
 

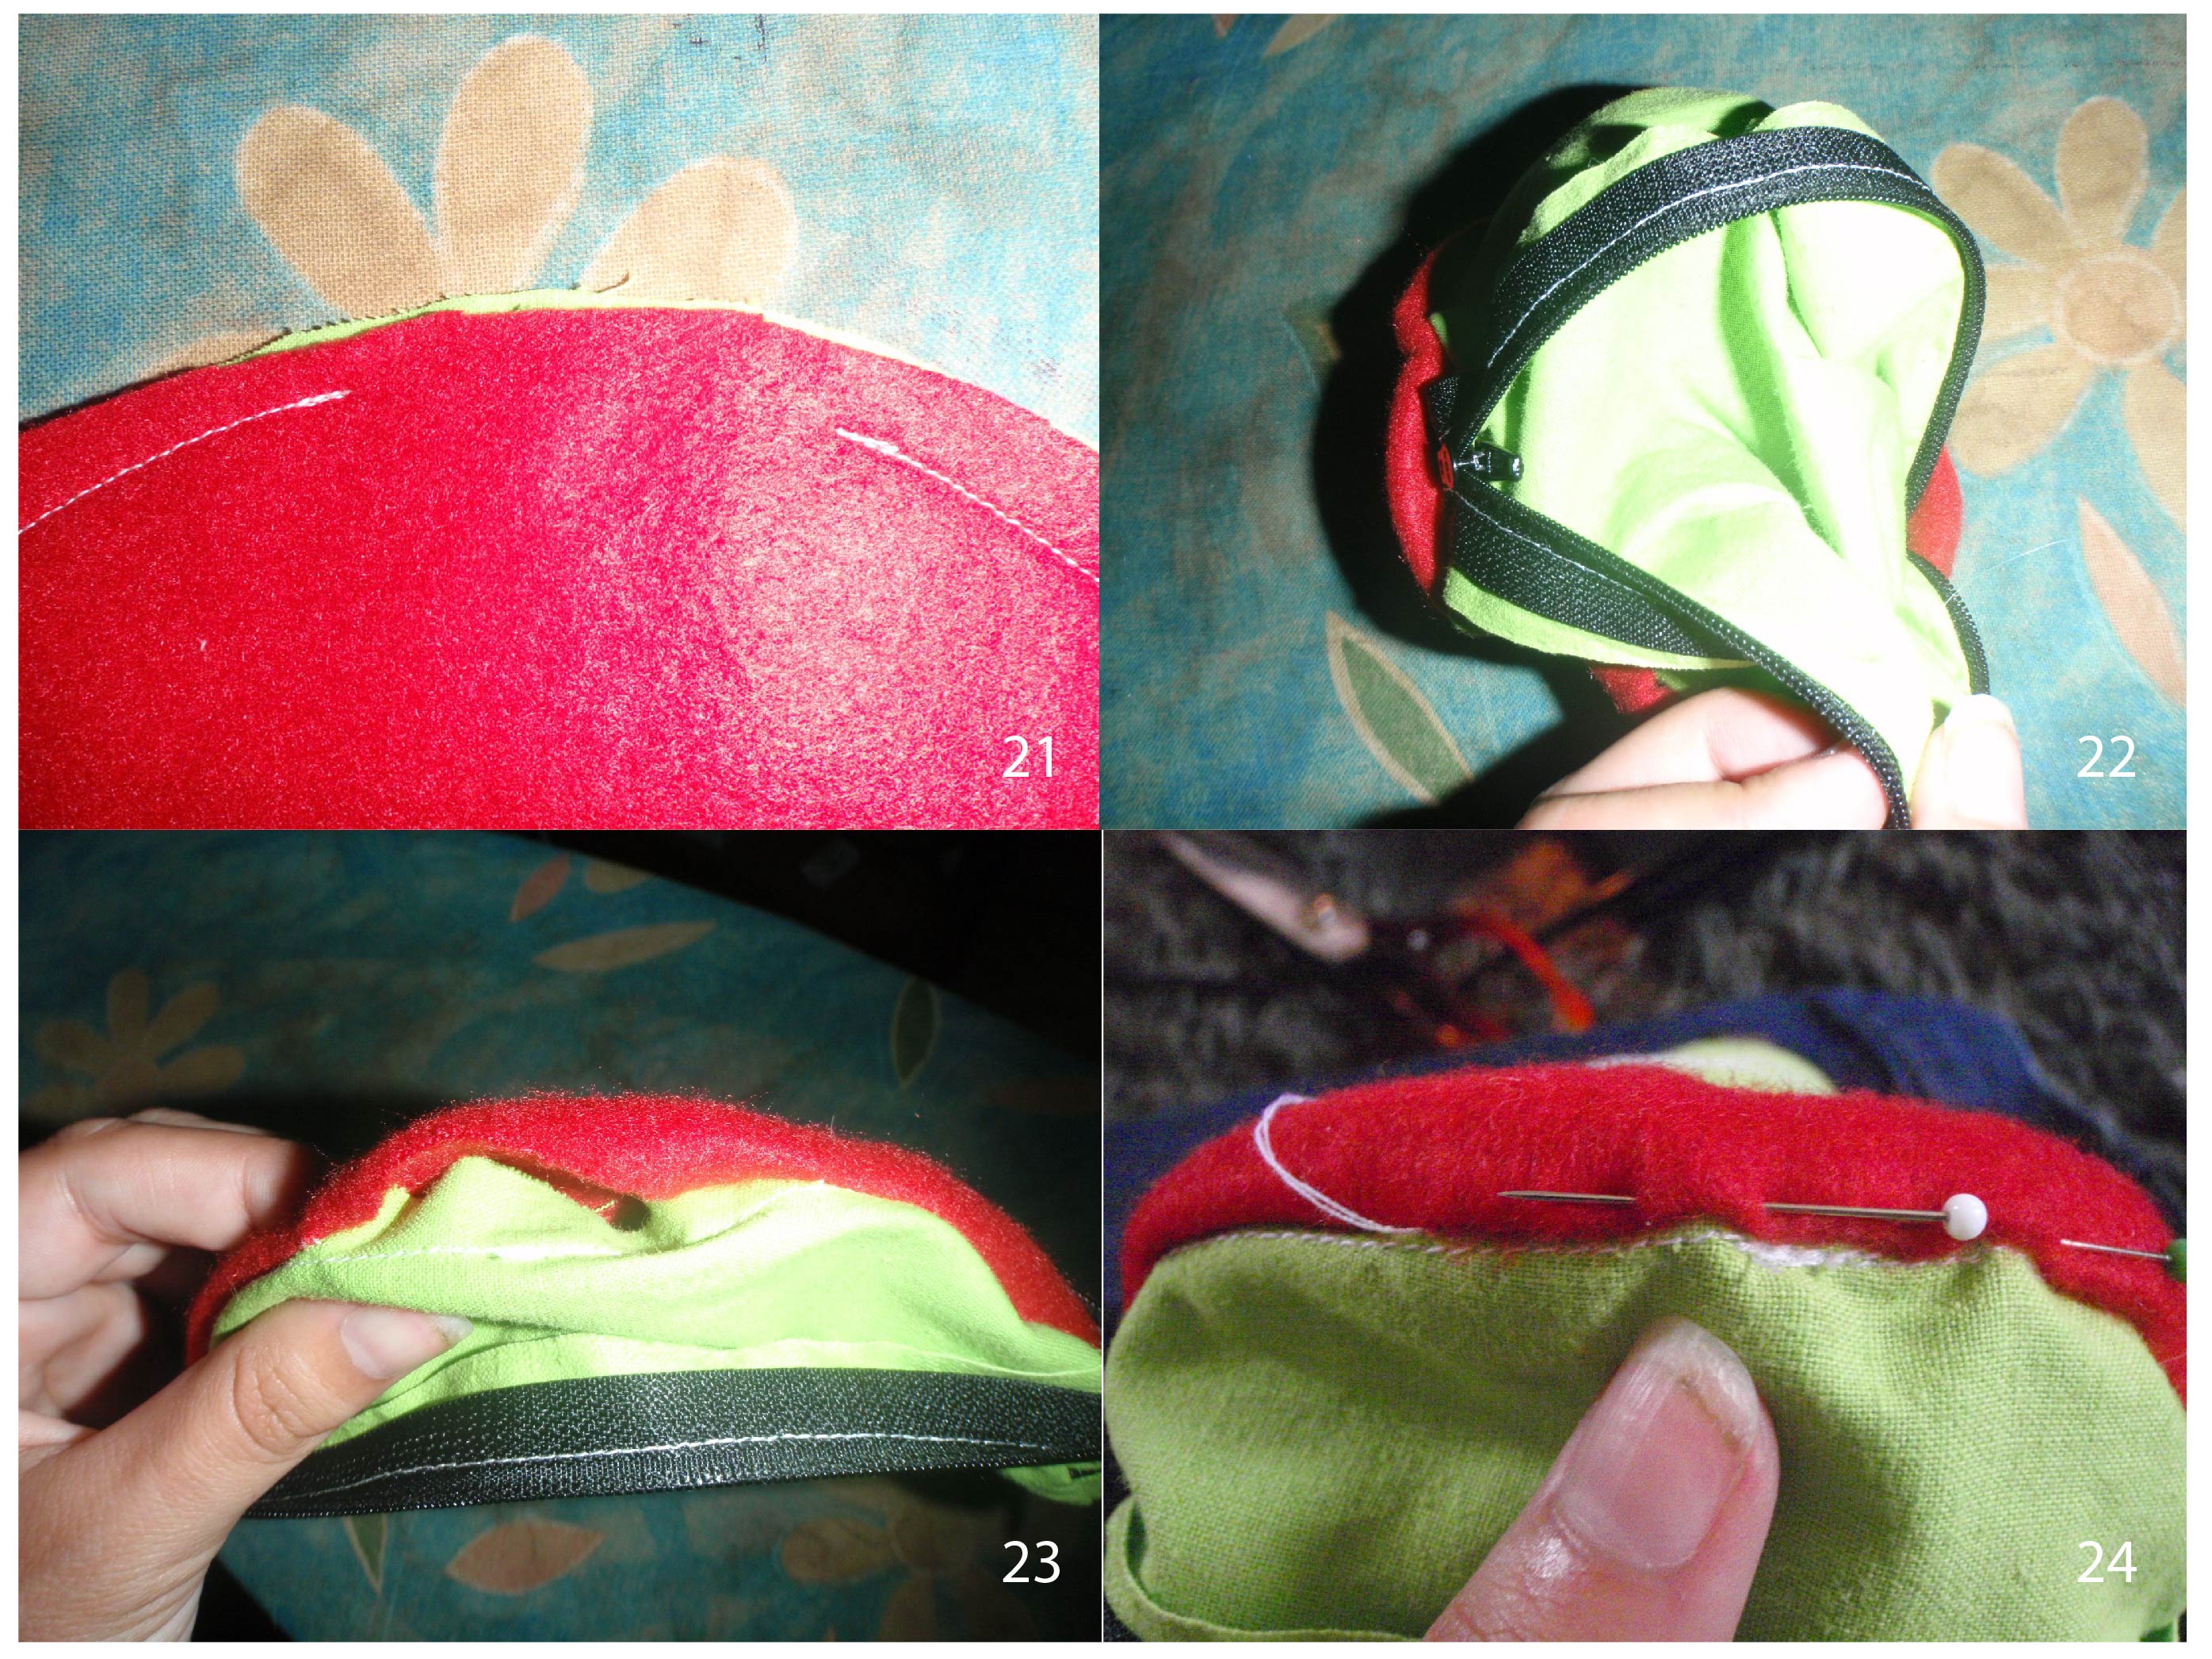
Frog tutorial-06

21. Sew the lining a little outside the original seam line. Be sure to leave an opening somewhere (in this case I chose the bottom) to be able to turn it. Clip the curves (especially near the eyes).
22. Turn the frog outside out and back so it’s inside out. (This is fiddly, just try).
23. You now have a bit of lining left that is not attached.
24. Once you’ve found the lining opening, pin it. 

Frog tutorial-07

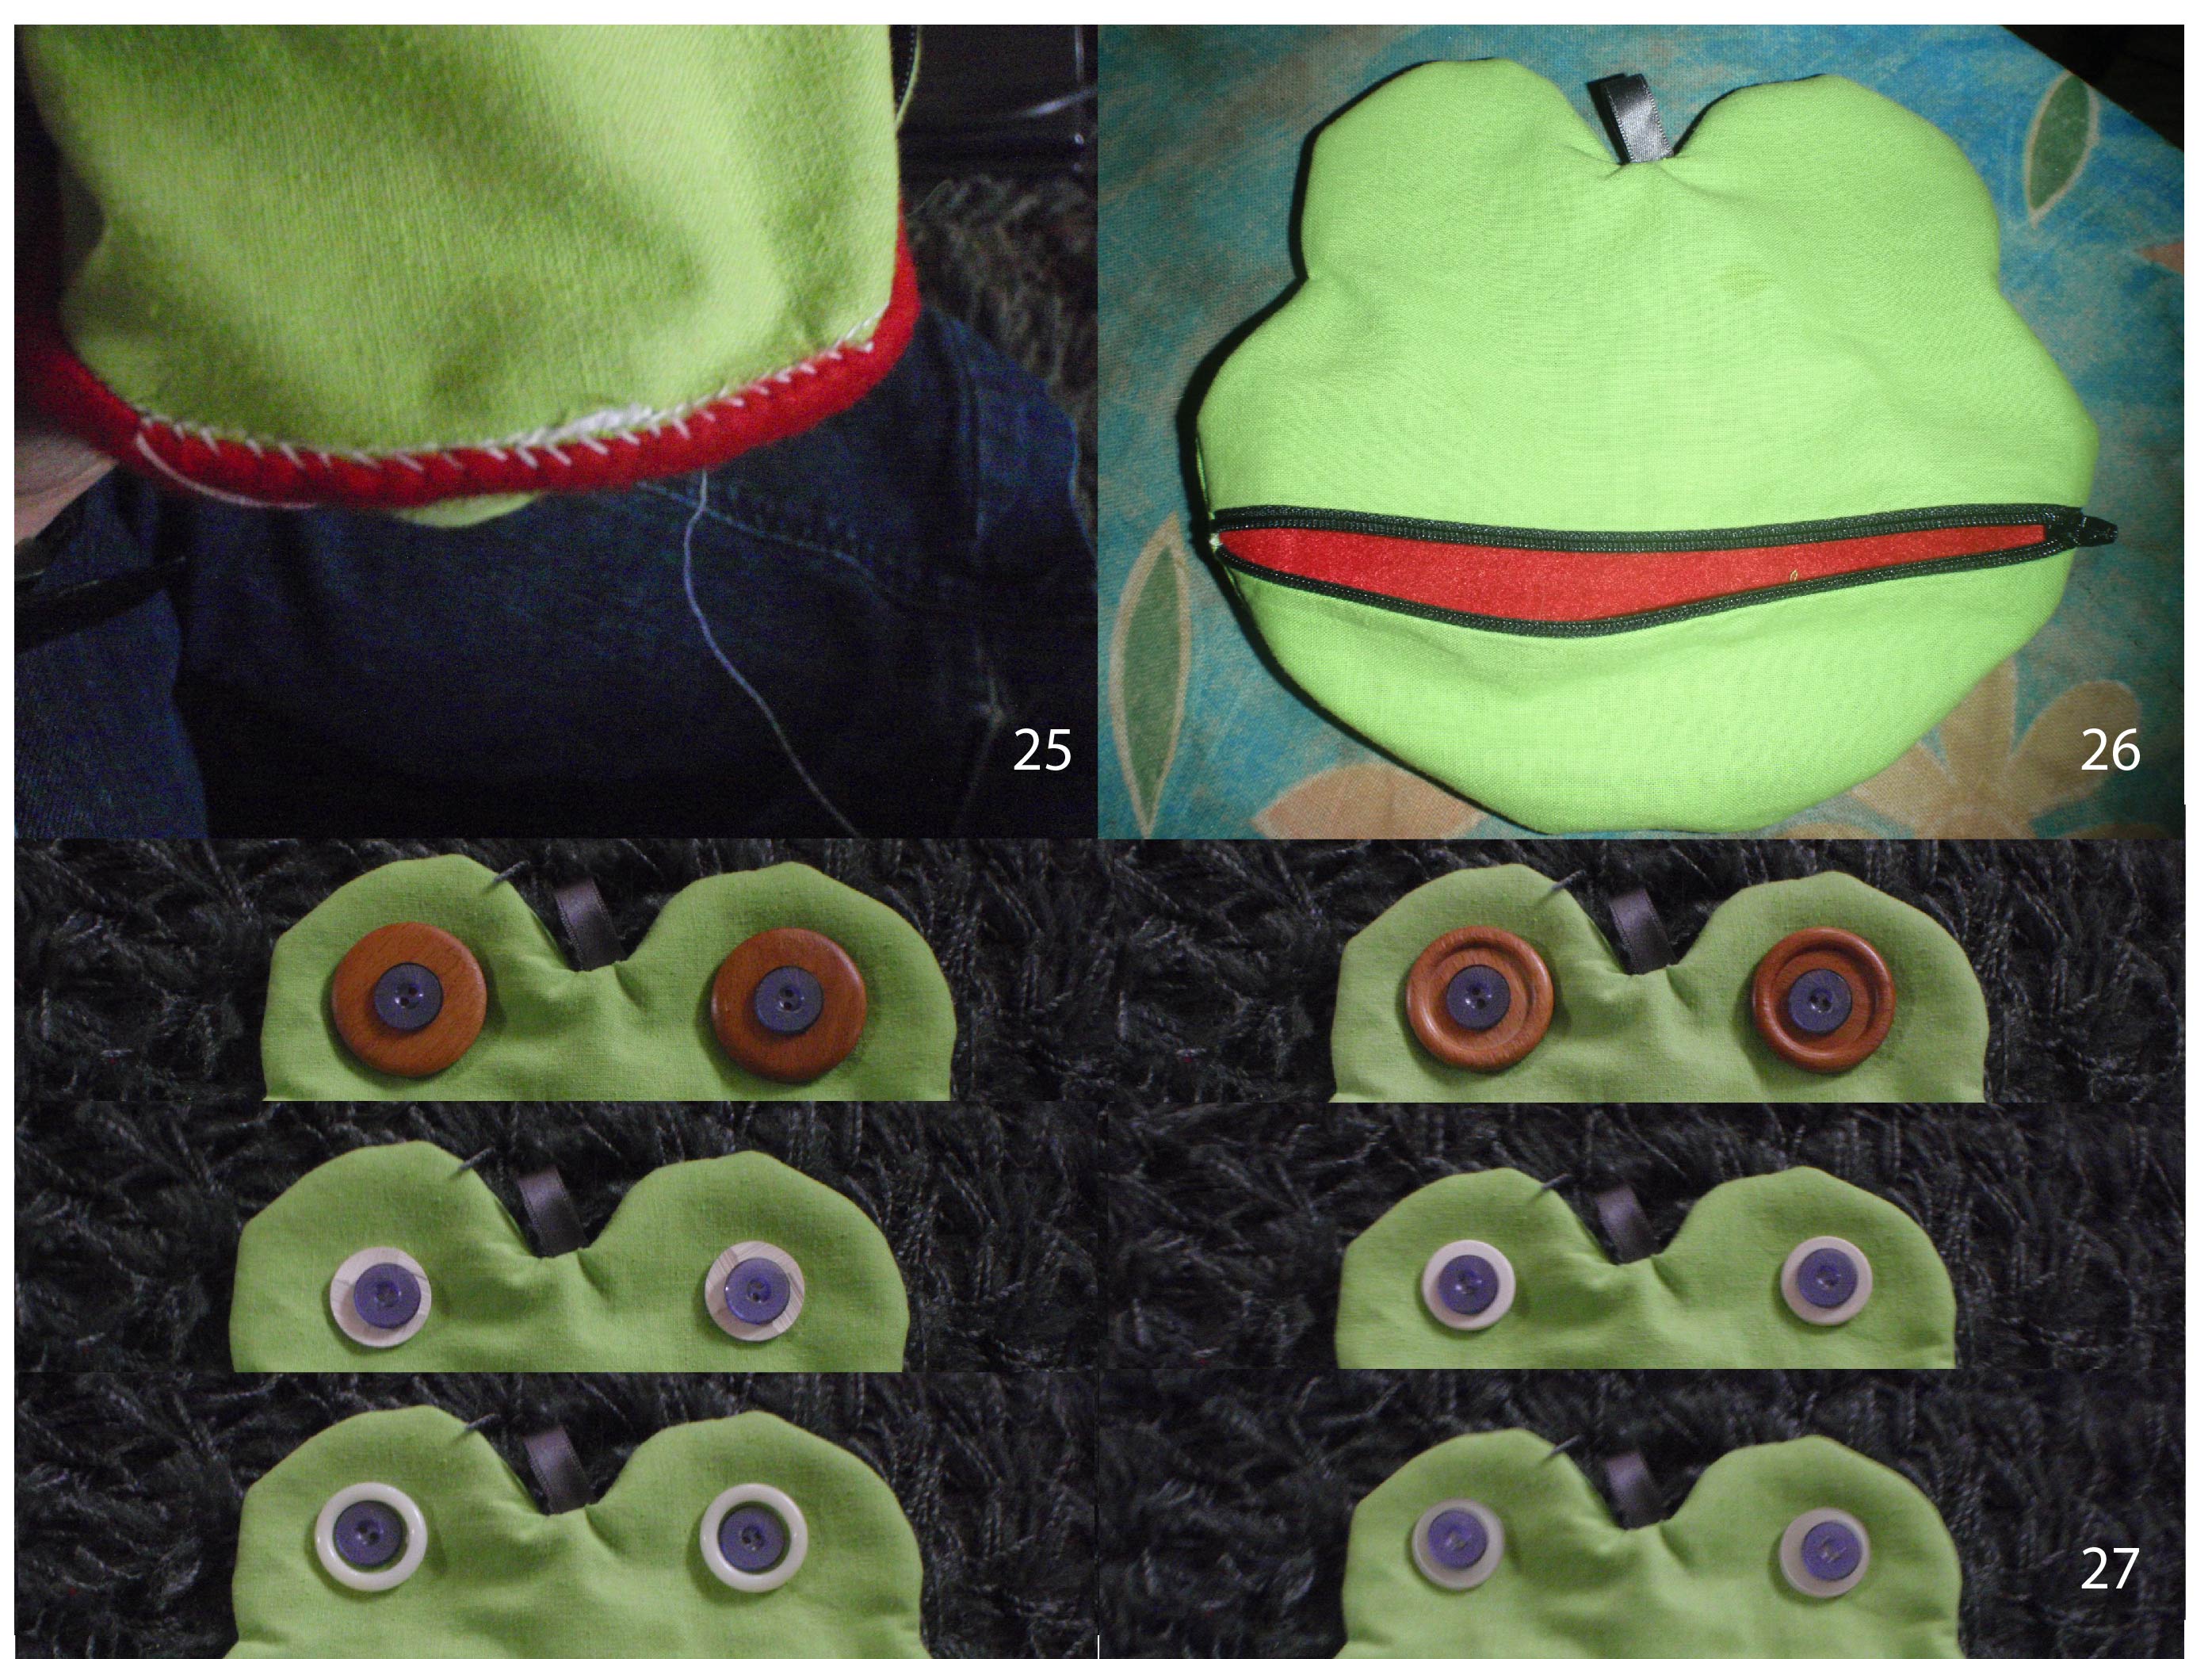
25. Sew the lining to the frog. I did this by hand.
26. Turn the frog outside out again.
27. Choose your eyes. These were the ones I considered. In the end I chose the bottom left. And sew them on. These are actually buttons surrounded by white curtain rings.

28. Appreciate your handiwork!

I had fun making this tutorial. If there are any questions, don’t hesitate to ask. I haven’t a clue if it makes any sense what so ever. I did enjoy playing with illustrator and writing this up. Tomorrow the last instalment of Gifts.

Gifts – 3

The last series of gifts was for four friends who celebrated their birthdays and moving house. I only knew two of the four, but I thought it was not very nice not to fix presents for all four. So I decided to make a series of zippered animal pouches. I’d seen this blogpost when it first came out, and was immediately in love. I decided to do a cat face pouch. That left me with 3 more animals (since I wanted different ones). I pinterested and found this one. Two down, two to go. I thought some more, googled a bit and thought ‘I want a rabbit’! So that was number three. Lastly I figured I wanted a frog, since frogs are awesome and I still had a green bedsheet that could be used.

I first sketched what I wanted and then used paint to draw all my designs. Yes, I know that paint isn’t the fancy tool to use for this sort of thing, but I happen to love paint and know how to work with it, so that’s what I did.

Drawings Click this image for a bigger version

After I drew all of them, I went upstairs to find all the scraps I could. I managed to eke out all my design in those scraps (and the green sheet I’d already allocated to the frog). I’m going to post a tutorial of how I made the frog tomorrow. Even if you guys don’t find it interesting at all, I want to practice with tutorials and it’s my blog so I can do what I want, right?

Anyway, I proceeded to put together a frog, a cat with fish, a whale and a rabbit with carrot in one evening and one morning. It didn’t take me as much time as I thought it would, so that was nice. Here they are:

Whale open Whale back

This is the whale, made of a couple of scraps of Mondriaan-esque fabric. The scraps were not large enough to accommodate the whole whale, so his back is pieced. His tail is stuffed, because it fell down and just looked sad. All the pouches have a red back lining (only back) to hide most of the seams and to give an impression of an open mouth when they are opened. I also added loops so they can hang somewhere.

Rabbit open Rabbit back

Second was the rabbit. Since it is a rabbit, it required a carrot of course, and big front teeth. I also added a nose to this one. The orange and green was scraps from the scraps of the cat.

Cat open Cat back

This is the cat. The cat has a fish and is made from scraps of my frog dress. Which is why there is a frog and and leg on the front and back respectively. I actually really like this one, it’s my favourite.

Frog open OLYMPUS DIGITAL CAMERA

This is the frog (I forgot to take a picture of the back, but it’s identical to the front but without the zipper and eyes). The frog you’ll see more of in the next post. His birth was fully documented. The closed fronts of all the pouches are seen to the right.

They are a fairly colourful bunch together, and I like them all. Tomorrow the frogorial.

Gifts – 2

The second gift was a ‘change door hanger’. What is a change door hanger, you might wonder. Well, it’s something I made up myself while I was packing to get on a 1.5 hour train trip. I knew I didn’t want to read in the train that day, so I figured that I should bring something to do. So I brought fabric, scissors, thread, a zipper, paper, pens, needles etc.

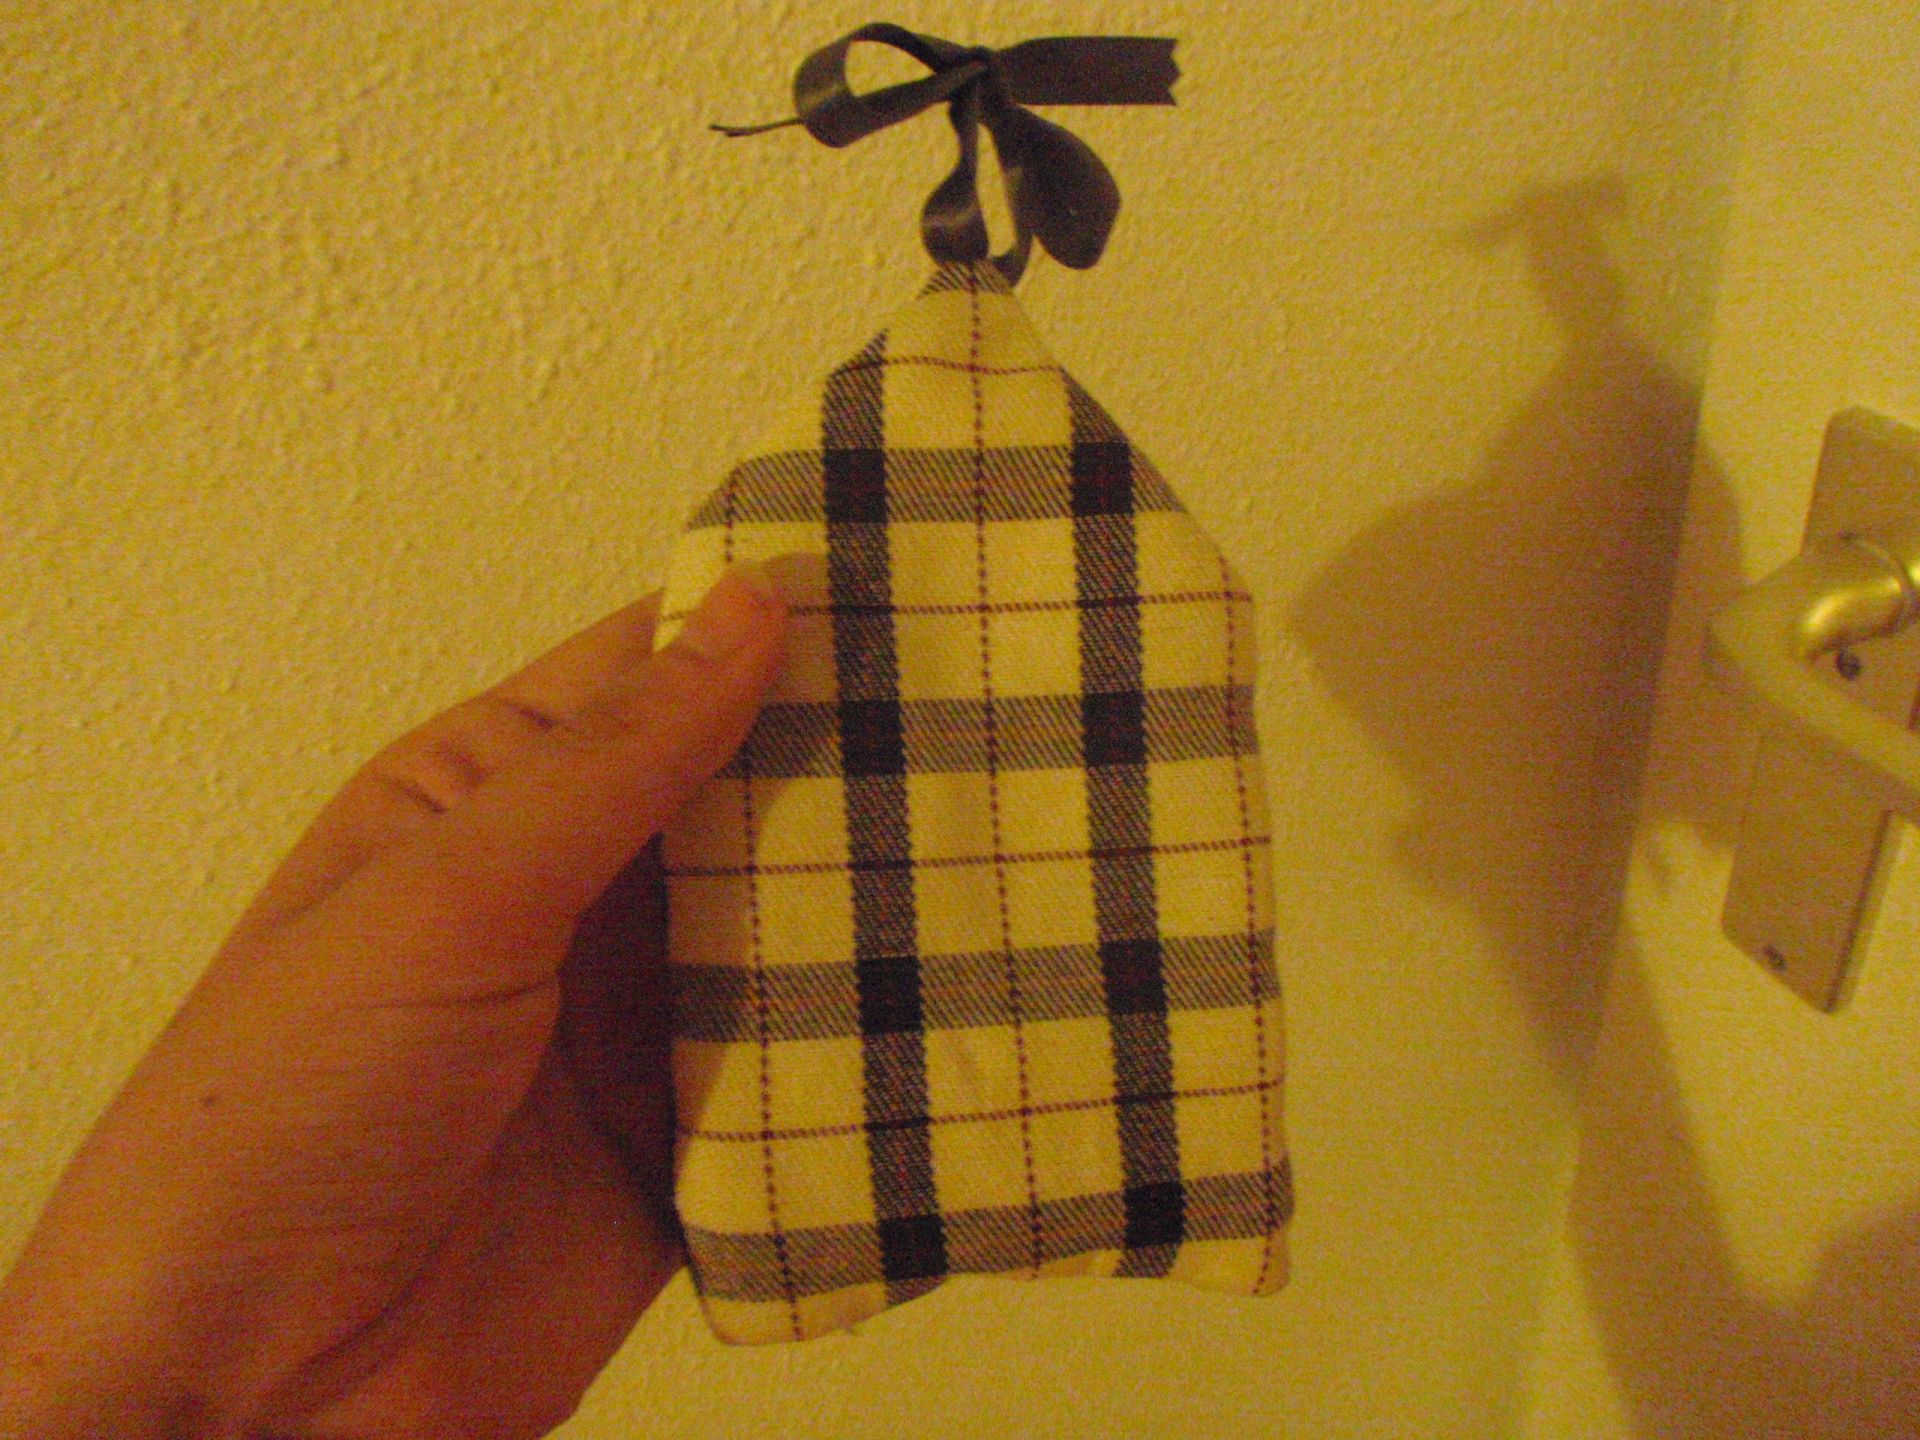
The idea was to make a bird house that could hold change that you could give to people who come by the house to collect money for charities and such. The idea is the same as of the zippered pouches that will be detailed in the next instalment of ‘gifts’. I made a zipper in the bottom and a big hole in the front. This was all hand sewn, and I was very pleasantly surprised by the results. It went better than I thought it would. I also finished in a decent time. I only needed 10 more minutes after I’d gotten of all the public transport I’d taken.

I attached a length of ribbon such that the house could be hung on a door handle or a nail or something. The idea then is that you drop change through the big hole and can take it out via the zipper. I hope it works.

Front Back

I don’t know if you recognise a bird house shape. I think it got lost a bit along the way, but I had fun. She at least liked the idea I’d made something, so I think it’s wins all around.

Gifts – 1

With school over, I’m now (still) enjoying holiday and searching for jobs every now and again. However, I also found that there are a lot of things you can do during holiday that involve getting out of my house. Since I’ve made so many (house-warming) gifts in the past weeks, I figured I’d dedicate multiple blog posts to that. Let’s start at the beginning.

The first gift was meant as a house-warming type gift. I made three cocktail stick hedgehogs/porcupines for three different friends. The first friend just moved with her boyfriend to a new house. As I’d visited her before but that had been unexpected I didn’t have a gift at the time, and I wanted to give one. The second friend also just moved with her boyfriend to a new house, as I’d be visiting the house and them I figured I wanted to bring a little gift. The third friend was celebrating his birthday, and he likes cooking, so I hoped he’d like it (yes, this was all in the same week, I was busy).

I hope you are curious to find out what cocktail stick hedgehogs are, since I’ve got pictures here.

Hedgehog! With sticks

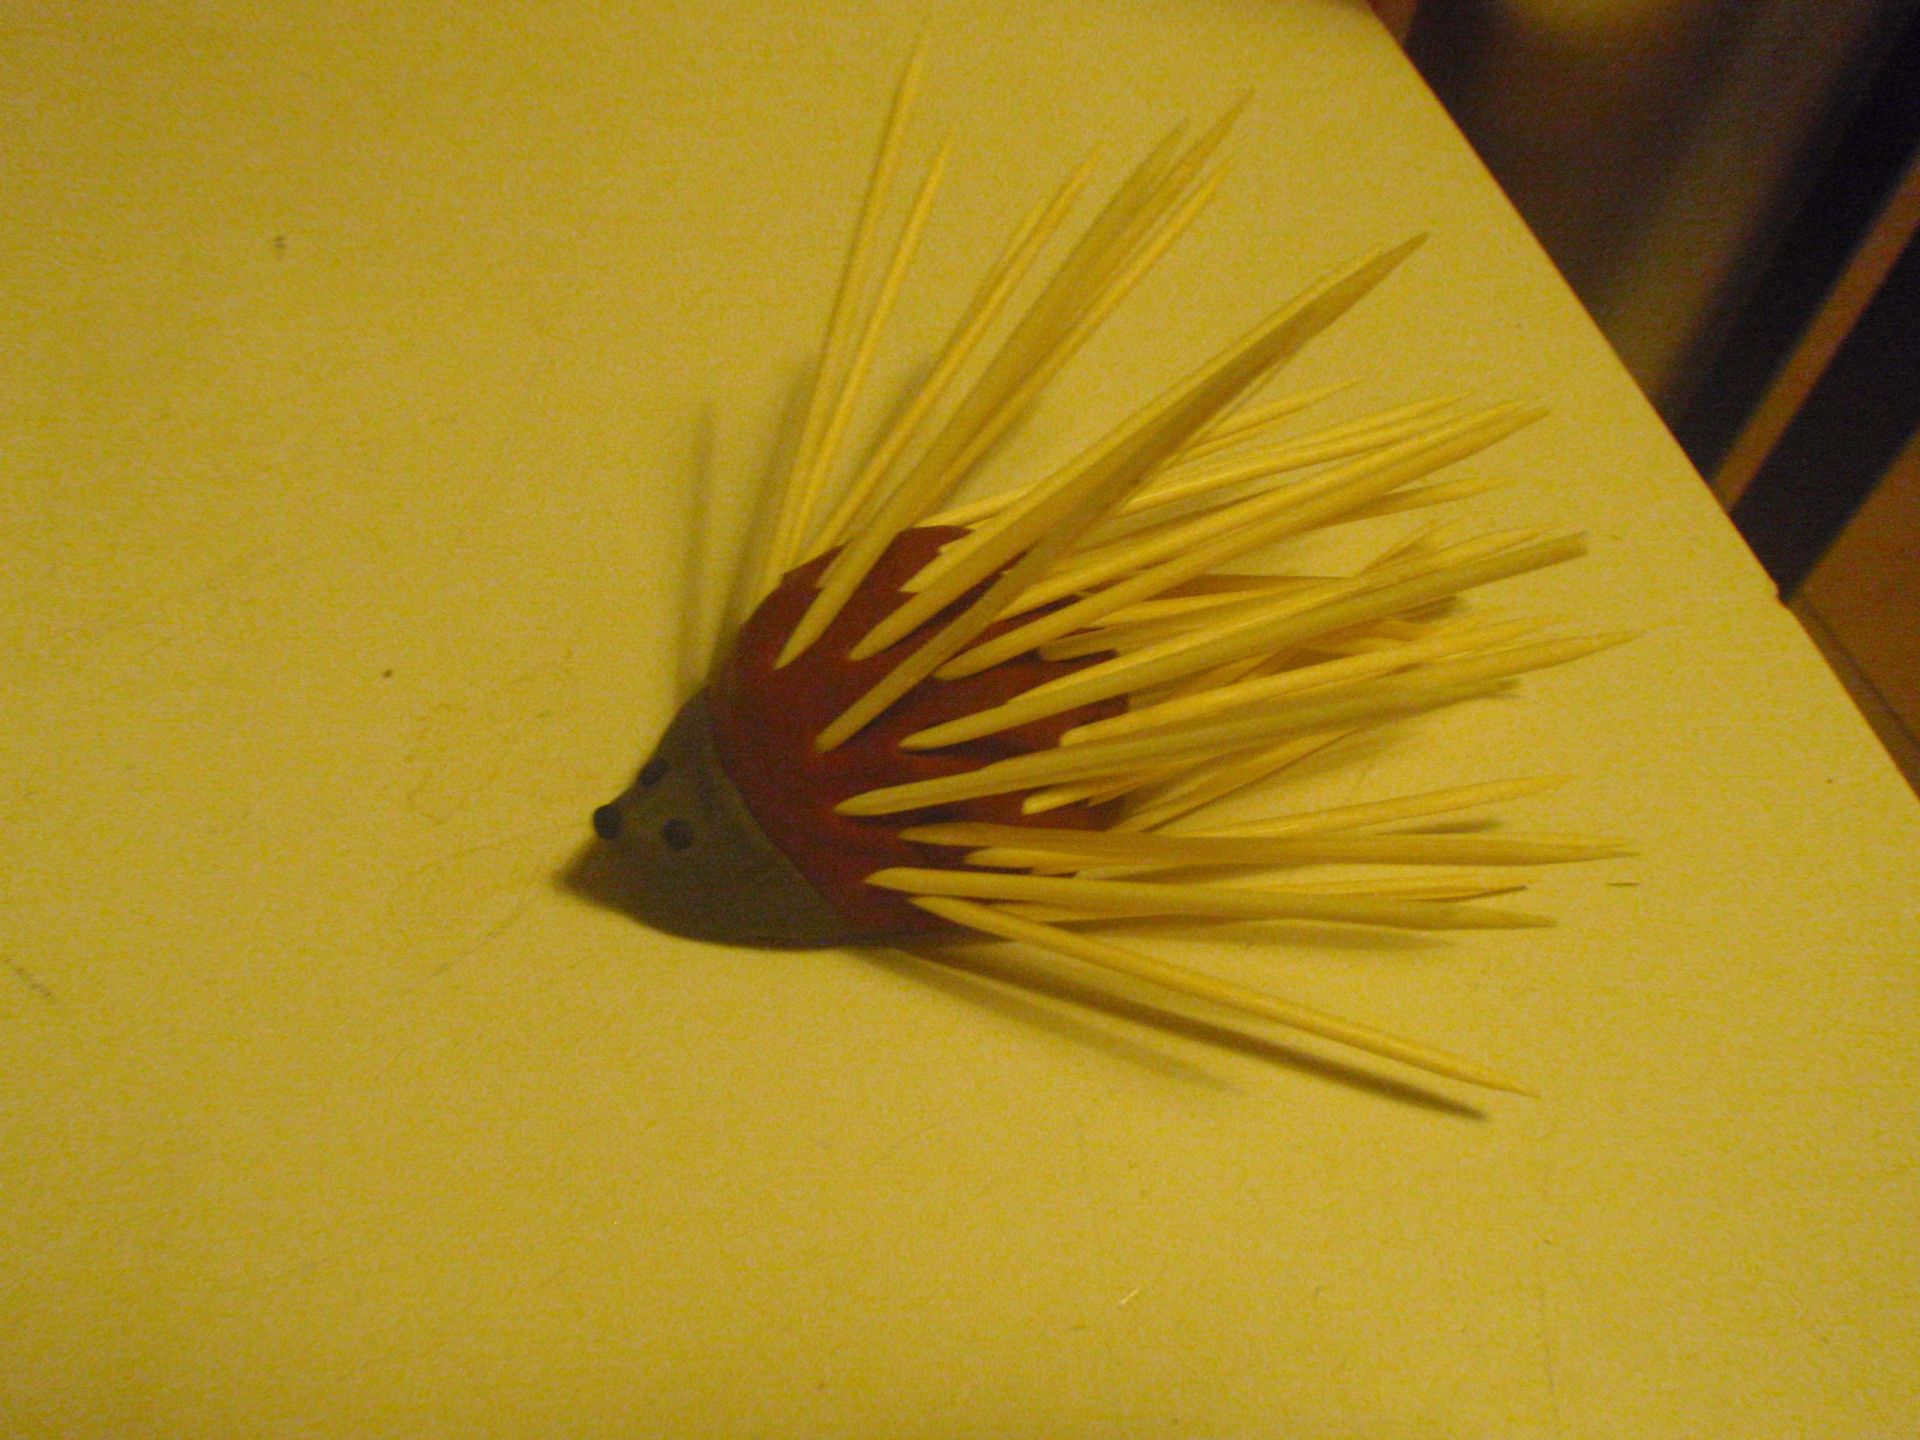
I made three different coloured ones, because I was using my left-over fimo clay. There is an aluminium base in, and it is covered by two different colours of fimo clay that were put through a pasta machine repeatedly. After I’d finished the covering, I googled hedgehog (to get them the distinctive hedgehog face shape) which involved making a little nose that pointed upwards. I added a black nose and eyes and pricked them with a stick. They were baked and were then ready to serve as cocktail stick holders.

Fully sticked 

This is one of them fully stocked with sticks. I personally think that they are super cute. If the recipients don’t fancy them, they can always throw them out.

So this was part 1. Stay tuned for the next instalment.

Kiddy-presents

Although my previous post was from a finished project. I soon discovered that I’d actually forgot to post about this project I finished way before that. Half June, the lady who supervised my thesis went on pregnancy leave. I wanted to make her and the kid a little present. I came up with a poppy, again.

This time I didn’t know the sex of the baby, and I had apparently used up all my yellow poppy suitable fabric. I only had blue left, and didn’t like that very much. So on the hunt  I went, to find myself a new bit of soft fabric that I could make a poppy from. I eventually found some red and green and white striped/blocked/whatevered fabric that was suitable enough. I’d apparently already used a bit at some other point and therefore it was missing a little bit. I trimmed of the other end also. I put the body together and added the head. When that was all finished, I needed a hat for it. I figured I could sew the offcuts together to make a bigger strip and that could be the hat. So I did just that.

It’s a bit Christmassy, but this is the final result. I think he’s cute.

Poppy

She seemed to like it too, so that was good.

In other news, I handed in my thesis on Wednesday and have received the results. I scored a 7.65 out of 10, which means I’ve passed my thesis and am now waiting for the secretariat to input the grade into the system and make me graduate! Yay! I’ll be a ‘, MSc’  soon!